Category: Guide

  • How to Create a Vintage Black & White Family Portrait Composite

    How to Create a Vintage Black & White Family Portrait Composite

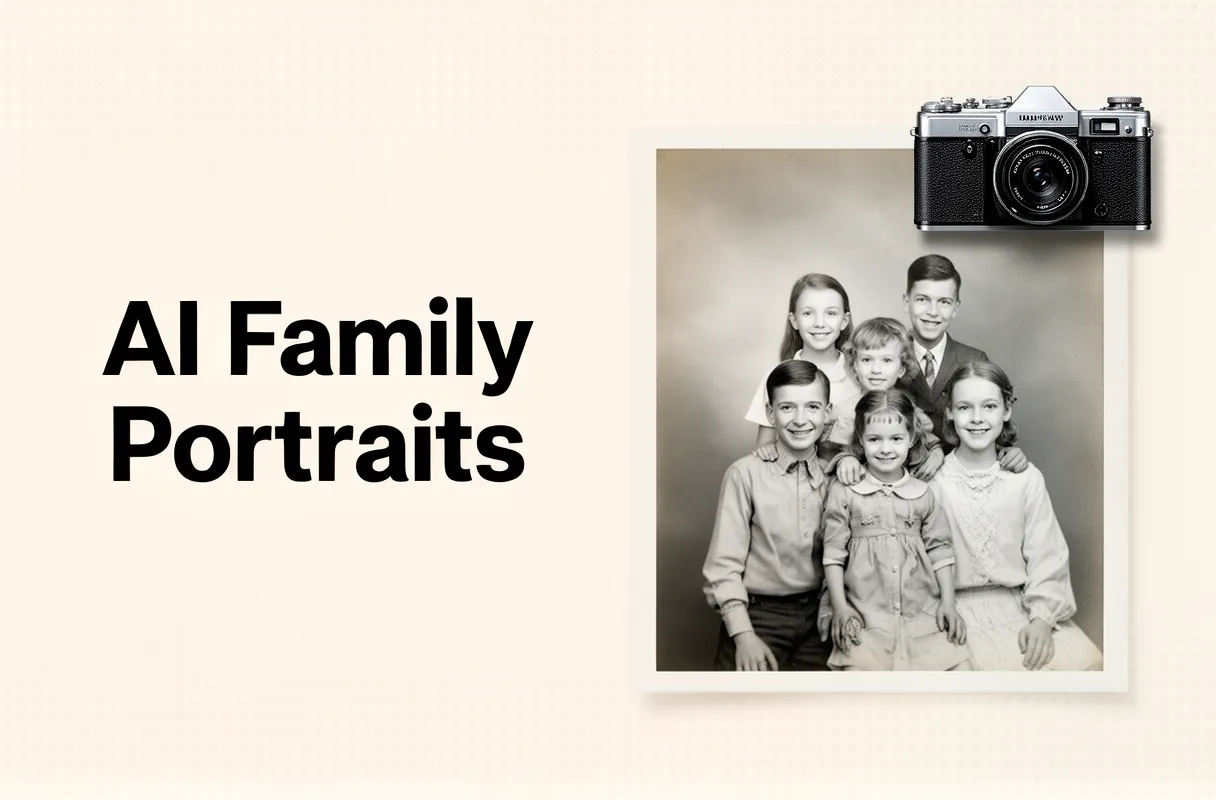
    To create a vintage monochrome composite AI from individual digital photos, you must upload your chosen images (up to four) and specifically select a black and white output style using a specialized platform like BringBack AI. This efficient process takes only minutes and requires no advanced photo editing skills.

    What You Need:

    • Individual digital photos (1-4 for BringBack AI)
    • An internet-connected device
    • Access to an AI composite tool (e.g., BringBack AI)
    • Credits for generating the composite (e.g., BringBack AI offers various credit packages).

    Many online tools claim to merge black and white photos online, but often they just desaturate images, creating a flat, unconvincing result. A true vintage monochrome composite AI requires complex analysis to harmonize lighting, texture, and tone across individual photos from different eras, ensuring a genuinely cohesive, natural-looking family portrait rather than a jarring, cut-and-paste collage. This guide cuts through the noise.

    By the end of this guide, you will confidently create a stunning, cohesive ai family photo black and white portrait, preserving cherished memories with authentic vintage aesthetics, ready for printing or digital sharing.

    Preparing Your Photos for a Vintage Composite
    Preparing Your Photos for a Vintage Composite

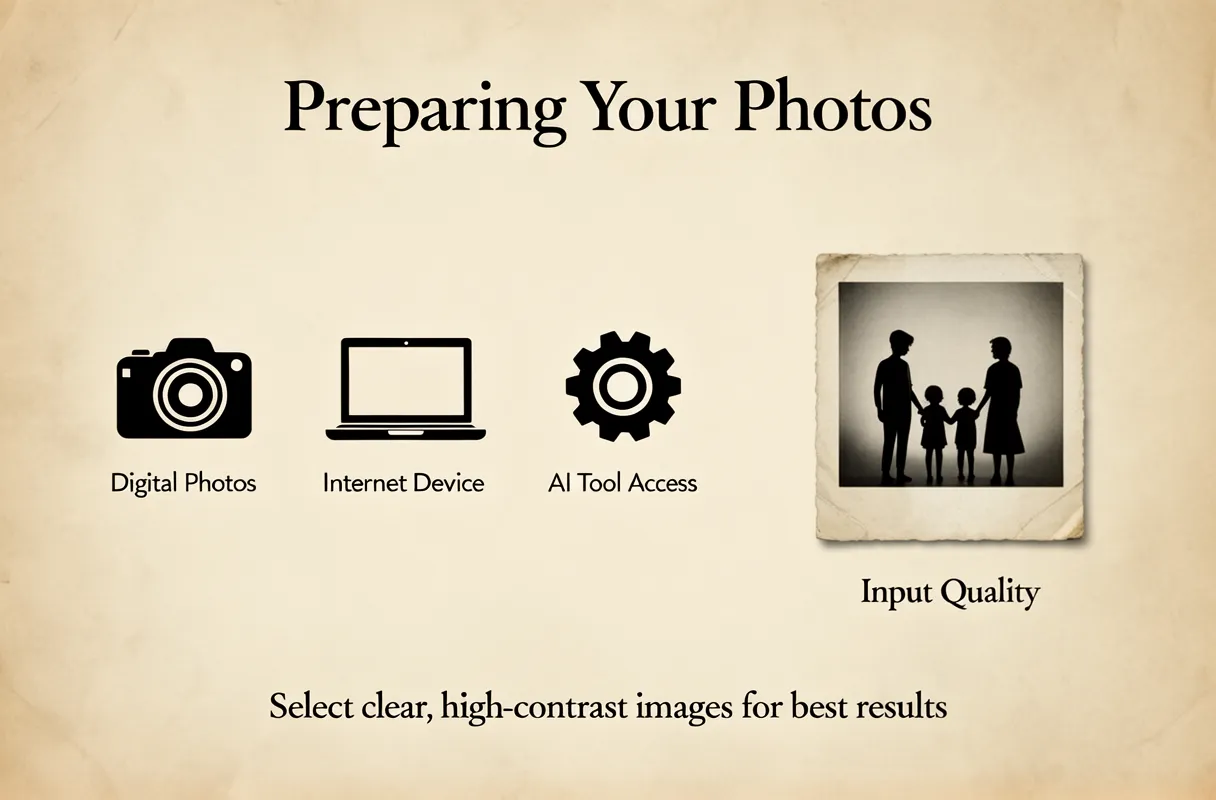
    Getting your photos ready is the first real step toward creating that cherished vintage composite. You'll need digital copies of your individual photos, a device with internet access, and an account with an AI tool, potentially with some credits loaded.

    The magic of AI family portrait generators lies in their ability to stitch together individual photos, even those taken years apart or in different settings, into one harmonious group picture. For the best results, focus on selecting 1 to 4 high-quality, distinct images. Some tools, like PixReunion, can handle up to 8-12, but for a sharp vintage look, fewer often means better.

    Here's what makes an input photo shine for optimizing source photos for black and white AI composites:

    • Clear Subjects: Faces should be easily visible and sharp. Blurry images make it hard for AI to identify features accurately.
    • Good Light Contrast: This is absolutely vital for B&W output. Look for photos where there's a clear difference between light and shadow on the subject's face. Even old black and white photos can work, but strong contrast is key.
    • Distinct Poses: While AI can sometimes blend similar poses, having varied stances or expressions adds depth to your final composite.

    Think of your input photos as individual actors. If they're all squinting into the sun or standing identically, the final scene will feel flat. AI tools can work with modern color photos (converting them to B&W) or existing vintage black and white shots. The goal is to provide it with the clearest possible "source material" for its transformation. TikTok tutorials often show simple side-by-side or stacked compositions, but the AI is what truly harmonizes them.

    Optimizing Source Images for Black & White AI

    Selecting the right source images is key to achieving a compelling vintage monochrome composite AI result. The AI can only work with what you give it.

    Think of your input photos as individual actors. If they're all squinting into the sun or standing identically, the final scene will feel flat. AI tools can work with modern color photos (converting them to B&W) or existing vintage black and white shots. The goal is to provide it with the clearest possible "source material" for its transformation. TikTok tutorials often show simple side-by-side or stacked compositions, but the AI is what truly harmonizes them.

    For the best vintage monochrome composite AI output, focus on these image qualities:

    • Clear Facial Features: Ensure faces are well-lit and sharp. Blurry or obscured faces are hard for the AI to reconstruct accurately.
    • Good Resolution: Higher resolution photos provide more detail for the AI to interpret. While older photos may have lower resolution, aim for the best available.
    • Distinct Poses and Expressions: Offer a variety of poses and genuine expressions. This gives the AI more material to create a dynamic and believable group scene.
    • Consistent Lighting (if possible): While the AI will harmonize lighting, starting with photos that have relatively similar light direction helps achieve a more natural blend.
    • Strong Light Contrast: For a punchy black and white look, select photos that have good contrast between light and shadow. This helps the AI define shapes and textures more effectively.

    Even if your original photos are in color, the AI can translate them beautifully into black and white. And yes, if you already have vintage black and white photos, those work as input too! The better the input image quality, the more stunning your final vintage monochrome composite AI creation will be.

    Step-by-Step: Crafting Your Black & White AI Family Portrait
    Step-by-Step: Crafting Your Black & White AI Family Portrait

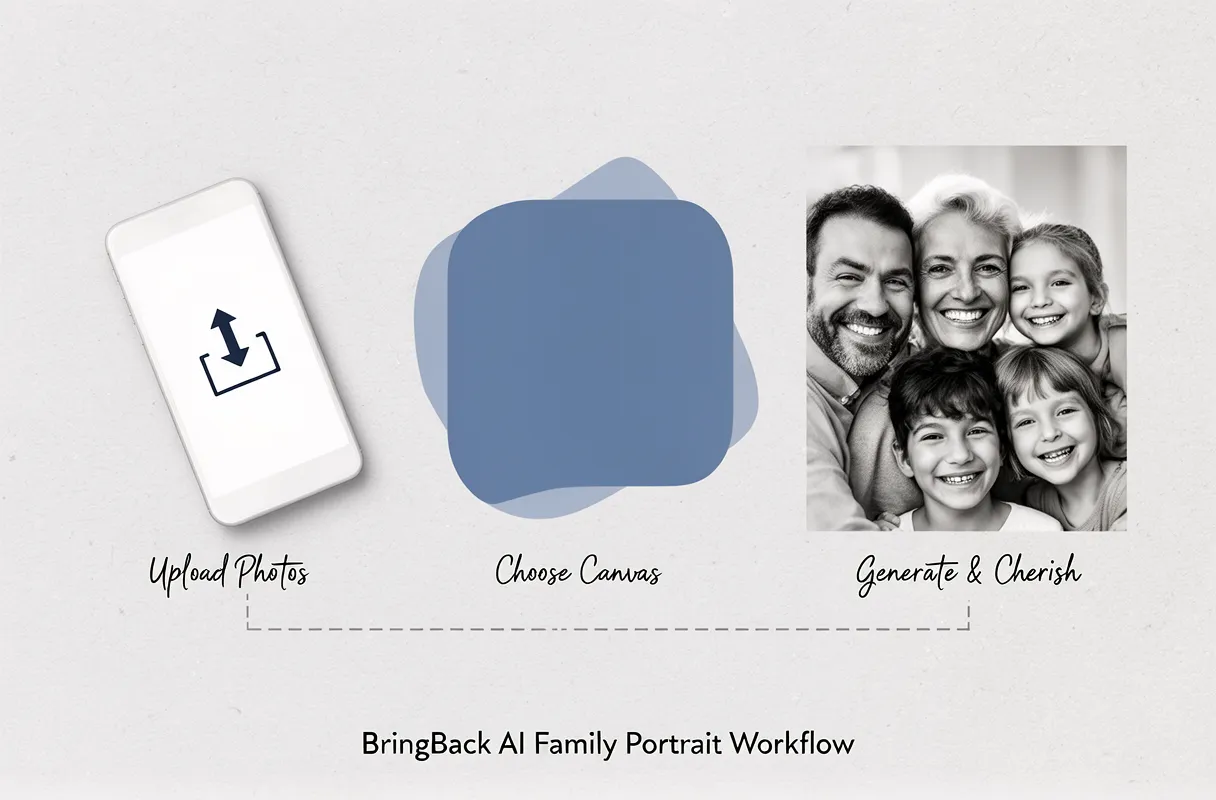
    Creating your ai family photo black and white composite is a straightforward, three-step journey. This process transforms individual memories into a unified piece of art, merging moments from different times and places into a single, cohesive image. You'll upload your chosen photos, let the AI work its magic, and then download your treasured black and white family portrait.

    1. Upload Your Photos

    Start by gathering 1 to 4 high-quality individual photos. Remember, good contrast in your source images makes for a punchier black and white output. Navigate to the "Upload Photos" section within the tool. You’ll see distinct areas to drag and drop your selected images. Think of this as laying out the individual puzzle pieces before they're assembled.

    2. Select Your Style & Generate

    After uploading, you’ll choose your desired output. Look for an option to select the 'Black and White' style. This tells the AI to render the final composite in monochrome. Then, confirm your composition. This might involve selecting an aspect ratio or arrangement. Once you’ve finalized your choices, click the "Generate" button. The AI will then begin processing, intelligently blending your chosen photos.

    3. Download and Cherish

    Within minutes, your ai family photo black and white composite will be ready. You'll see a preview of the generated image. Take a moment to appreciate how the AI has harmonized the lighting and composition, even across different source photos. Discover how BringBack AI simplifies the creation of a stunning family portrait from separate images. If you're happy with the result, you can download the high-resolution image, ready to be printed and shared for generations. This is how you can easily merge black and white photos online into a single masterpiece.

    Choosing the Right AI Tool for Your Monochrome Composite

    Selecting the correct AI tool hinges on your project's specific needs, especially when aiming for a black and white composite. Different platforms excel in different areas, from photo capacity to the nuance of their monochrome output style.

    Feature/Tool BringBack AI PixReunion Media.io
    Photo Capacity 1 to 4 individual photos Up to 8 (or 12) individual photos Not specified for individual photo capacity in composites; focuses on photorealism.
    B&W Output Harmonizes lighting and composition for vintage results. Offers specific 'Black and White' style options; intelligently analyzes lighting and skin tones. Creates photorealistic AI group photos; implies monochrome is achievable through general output.
    Quality Studio-quality, high-resolution Stunning 4K printable quality Photorealistic, natural faces.
    Pros Excellent for harmonizing lighting and composition across few images. High photo capacity, versatile styles, 4K quality. Focuses on accuracy and natural composition of faces in group settings.
    Cons Limited to 4 reference photos. Specific B&W interpretation might vary; user seeking to combine more than four individual photos will find BringBack AI unsuitable. How different AI tools interpret or convert photos to black and white needs further investigation for this tool.
    Pricing Model Starter: $4.99 (5 Credits), Pro: $9.99 (20 Credits), Family: $21.99 (60 Credits).
    2 credits = 1 family photo from individual photos.
    AI Family Portrait Generator offers various styles. Pricing details typically available on their site. Often offers trial options; search for 'B&W group photo creator free' to explore current offers or freemium models.

    When considering how different AI tools interpret or convert photos to black and white, it's crucial to differentiate between a simple filter application and AI-driven regeneration. Some tools apply a basic desaturation, while others analyze the original image's light and shadow to create a more nuanced monochrome aesthetic. For tools like PixReunion, understand their specific 'Black and White' style options and capacity to combine up to 8-12 individual photos. BringBack AI, while excellent for harmonizing up to four photos into a studio-quality composite, has a hard limit on input images. If you have a larger group or need more input flexibility, PixReunion might be a better fit, though BringBack AI excels at creating a cohesive look from fewer, potentially disparate, sources. Media.io, powered by advanced models, prioritizes photorealism and accuracy in faces.

    Generating Your Black & White Composite with BringBack AI

    Bringing your cherished family photos into a classic black and white composite is straightforward with BringBack AI. You'll achieve studio-quality results, harmonizing lighting and composition from your individual shots.

    1. Gather Individual Family Photos

    Start by selecting up to four of your best individual family photos. For a striking black and white composite, choose images with good contrast and clear subjects. These will serve as the building blocks for your final portrait.

    • Pro Tip: Ensure the lighting in your source photos is balanced. This helps the AI create a more cohesive monochrome look.

    2. Upload Your Photos to BringBack AI

    Head over to the BringBack AI platform and locate the 'Upload Photos' section. Drag and drop your selected images or click to browse your files.

    3. Select 'Black and White' Style/Output Option

    During the generation process, look for styling options. You'll find a setting specifically for 'Black and White.' Select this to guide the AI in creating the monochrome aesthetic. This ensures the final output isn't just a desaturated version but an AI-regenerated piece in classic grayscale.

    • Pro Tip: Some tools offer post-processing filters. BringBack AI's integrated option aims for a more authentic AI-driven black and white conversion, not just a simple filter.

    4. Adjust Canvas and Composition

    If our tool offers it, you might have options to select your desired canvas size or aspect ratio. Choose one that best suits how you envision your final vintage monochrome masterpiece. This step ensures a balanced arrangement of your family members.

    5. Generate Your AI Family Portrait

    Once you've uploaded your photos and selected the black and white style, initiate the generation process. The AI will then intelligently combine your images, harmonizing details to create a unified portrait.

    6. Review and Download the High-Resolution Image

    After a short processing time, your black and white composite will be ready. Review the generated image carefully, checking for natural likeness and consistent tones. You can then download the high-resolution image to cherish for years to come. If you're interested in the finer points of achieving this look, you can explore BringBack AI's specific features for creating high-quality stunning monochrome family portraits.

    Troubleshooting Common Issues & Enhancing Your Monochrome Portrait
    Troubleshooting Common Issues & Enhancing Your Monochrome Portrait

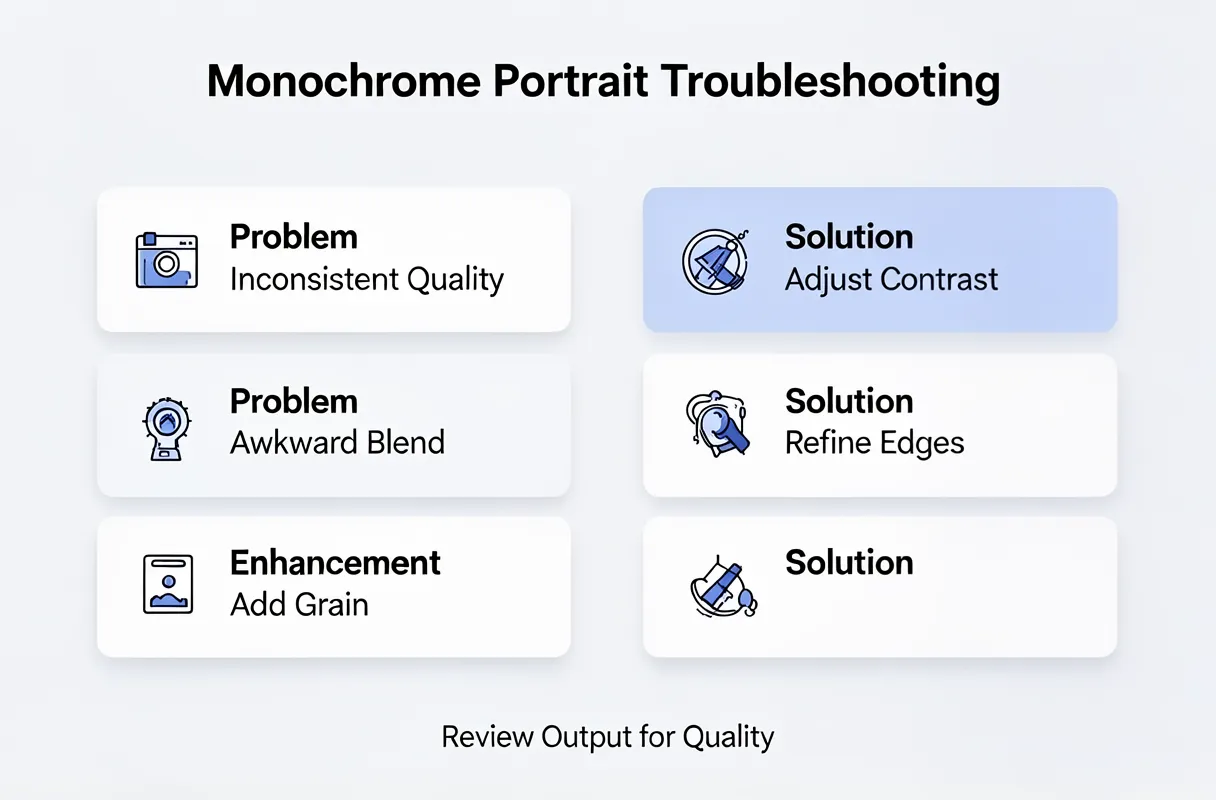
    When your monochrome composite doesn't quite hit the mark, don't worry; most issues are fixable. Source photo quality often trips up the AI. If one image is too dark or blurry, the AI struggles to harmonize it. Try using photos with good contrast and clear subjects. Awkward blending, where faces look distorted or unnaturally placed, usually means the AI couldn't reconcile different perspectives or lighting. Many tools have a "re-generate" option, which can sometimes yield a better result by re-analyzing the inputs.

    Common error messages are usually tied to file size or format issues, or sometimes a complete failure to interpret the inputs. If you see an error, double-check that your photos are in a supported format (like JPG or PNG) and within the tool's size limits. For more complex blending failures, consider simplifying the input by using fewer photos if the tool allows, or checking user reviews on platforms like Capterra for insights into image quality and common issues with specific AI family portrait generators.

    Enhancing your black and white portrait takes it from good to great. If the AI’s B&W conversion feels a bit flat, a little post-processing goes a long way. A quick trip to a simple editor like Canva allows you to adjust contrast and brightness. Adding a subtle film grain can instantly lend an authentic vintage feel. Some tools convert to black and white by simply applying a filter, while others regenerate the image with AI, leading to a more nuanced and "natural" monochrome look. Our own platform focuses on AI regeneration for a more cohesive result.

    Don't expect perfection on the first try. Review the generated image for any uncanny valley effects or obvious AI artifacts. If the black and white conversion isn't quite right, don't discard it immediately. Sometimes, a minor tweak in an external editor is all that's needed to achieve that perfect, timeless look.

  • How to Add a Missing Person to a Family Photo Naturally with AI

    How to Add a Missing Person to a Family Photo Naturally with AI

    To naturally add a missing person into an existing family photo, you must select optimal individual and group photos, then upload and initiate AI blending using BringBack AI. This process typically takes just a few minutes and requires a simple, guided workflow, ensuring authentic integration for your cherished memories.

    What You Need:

    • An active BringBack AI account with available credits (combining photos uses 2 credits).
    • High-resolution digital photos (PNG or JPG, under 10MB each).
    • Stable internet access.

    Many tools promise to add someone to a photo. However, achieving truly natural integration—where lighting, perspective, and skin tones match—is the real challenge. Generic AI models or free editors frequently produce unnatural edges or mismatched aesthetics, making the final image look obviously edited. That jarring artificiality defeats the purpose of memorializing a loved one.

    By the end of this guide, you will have a naturally blended family portrait. Your loved one will fit seamlessly into the scene, creating an authentic keepsake ready for sharing or printing without a second thought.

    Choosing the Best AI Tool for Adding People to Photos

    Choosing the Best AI Tool for Adding People to Photos

    Choosing the right AI tool is crucial for authentically adding a person to your photos. You need a solution that balances ease of use with realistic output, respecting your memories and privacy. Consider factors like output quality, the ability to handle multiple people, and the tool's specific focus on memorializing moments versus general image manipulation.

    AI Tools for Adding People: Features & Pricing

    Feature / Tool BringBack AI PixReunion Pokecut LovedOnePhoto Kinpict Google Gemini
    Output Quality High, natural blending Claims 4K print-ready Good Focus on emotional authenticity Claims 4K print-ready Variable, can be inconsistent
    Handles Multiple People Yes Yes Up to 8 people Yes Yes Limited
    Memorial Focus Yes, designed for preserving memories Family portrait creation General photo enhancement Specialized for adding loved ones General photo enhancement General AI model
    Privacy Strong (details forthcoming) Not explicitly stated Not explicitly stated Explicitly states "Your photos do not train any AI" Not explicitly stated Variable, depends on usage
    Pricing Credits: Starter $4.99/5, Pro $9.99/20, Family $21.99/60. 2 credits for combining individual photos. Not listed Free (limited features), Paid plans Not listed Free (limited features), Paid plans Free (with limitations)
    Pros Intuitive credit system, specialized for preserving memories. High-quality output claims. Supports many people, free tier available. Strong privacy guarantees, tailored for emotional needs. High-quality output claims. Widely accessible, general purpose.
    Cons Requires credits for specific actions. Pricing unclear. Output can be inconsistent; general purpose. May be less flexible for non-memorial use. Pricing unclear. Inconsistent results, requires very detailed prompts.

    The honest tradeoff is that free tools often require meticulous prompting and may produce less convincing results. Specialized, credit-based services typically offer more refined control and predictable, natural outcomes. For comprehensive features on seamlessly adding people to your photos, including detailed blending capabilities and examples, explore BringBack AI's dedicated solution page.

    Understanding AI Tool Features and Limitations

    Selecting an AI tool demands careful consideration of your specific needs, balancing features like output resolution and privacy against cost. Prioritizing a tool that offers both advanced capabilities and a clear value proposition is key for successful photo restoration.

    AI Tool Features Pricing Pros & Cons
    BringBack AI 4K output, handles multiple people, memorial focus, strong privacy, credit-based Starter $4.99/5 credits; Pro $9.99/20 credits; Family $21.99/60 credits. 2 credits for combining individual photos. Pros: Specialized for memorializing, transparent credit system for family photos. Cons: Credit system requires upfront purchase.
    PixReunion 4K print-ready, fast (10 min for family photos from singles), mobile experience Subscription-based (specifics require checking platform). Pros: Claims quick turnaround for complex tasks. Cons: Pricing less transparent upfront compared to credit systems. For an independent review and comparison of PixReunion's features and pricing against other photo editing tools, refer to Capterra's detailed analysis, including insights on its mobile experience and enterprise features.
    Pokecut Supports up to 8 people, animation options Varies (often credit or subscription). Pros: High capacity for group shots. Cons: Animation features may add complexity.
    LovedOnePhoto Memorial focus, user-friendly interface Often credit-based or tiered subscriptions. Pros: Tailored for emotional use cases. Cons: May lack some advanced editing features of general tools.
    Kinpict 4K print-ready output Varies (credit or subscription). Pros: High-resolution output. Cons: Less emphasis on specific memorial features.
    Google Gemini General AI model, "Nano Banana" update enhances capabilities Free (with potential paid tiers for advanced use). Pros: Accessible, versatile. Cons: Results can be highly inconsistent; often requires extremely detailed prompts and offers less granular control.

    General AI models like Google Gemini can process images, but their effectiveness for adding people to photos is hit-or-miss. Quality hinges heavily on prompt engineering; a highly detailed prompt is non-negotiable. Specialized tools, however, are built for this specific task, offering more predictable and natural-looking results. Think of it like using a scalpel versus a butcher's knife – both cut, but one is designed for precision.

    Some platforms, like AnimateOldPhotos, explicitly state that your photos do not train any AI, offering peace of mind regarding privacy. This contrasts with general models where data usage policies can be less clear. For adding multiple individuals, tools like Pokecut are built to handle up to eight people, a significant advantage for larger family gatherings. PixReunion, for instance, claims it can create a family portrait from individual photos in just 10 minutes. The honest tradeoff is that free tools often require meticulous prompting and may produce less convincing results. Specialized, credit-based services typically offer more refined control and predictable, natural outcomes. For comprehensive features on seamlessly adding people to your photos, including detailed blending capabilities and examples, explore BringBack AI's dedicated solution page.

    Adding a Missing Person Naturally with BringBack AI: A Step-by-Step Guide

    Adding a Missing Person Naturally with BringBack AI: A Step-by-Step Guide

    Adding a missing person to your family photo is surprisingly straightforward with our platform. We’ve designed the process to be intuitive, focusing on automated blending so the final result looks completely natural. You just need a few things ready to go.

    To add a missing person naturally with BringBack AI, you'll need:

    • A BringBack AI account with credits. Specifically, 2 credits are used for combining individual photos into a family portrait.
    • High-quality digital photos. We accept PNG or JPG files, generally up to 10MB.
    • A stable internet connection to upload and process your images.

    Our system handles the complex AI processing, making it simple for you to add missing person to family photo ai and recreate cherished memories.

    Step 1: Prepare Your Photos for Seamless Integration

    To achieve a natural look when adding someone to an existing photo, your source images are paramount. High resolution is key, as it provides the AI with enough detail to blend effectively. Think of it like having good ingredients for a recipe.

    When selecting your base group photo, look for one with clear subjects and a relatively uncluttered background. This makes it easier for the AI to isolate and place the new person without distracting elements. The lighting in this main photo also matters.

    For the individual you're adding, choose a photo taken with similar lighting conditions and camera angle if possible. While our system adjusts for lighting, starting with comparable sources means less work for the AI and a more believable final result. A simple, solid background behind the individual is ideal.

    Here's a quick checklist for your photos:

    • Base Group Photo:
    • High resolution and sharp focus.
    • Subjects clearly visible.
    • Lighting is reasonably even.
    • Background is not overly busy.
  • Individual Reference Photo:
    • High resolution.
    • Person is well-lit, ideally matching the group photo's light.
    • Perspective is similar to the group photo.
    • Background is plain or easily separable.
  • Accepted file types are PNG or JPG, typically up to 10MB. Choosing photos with these characteristics gives our AI the best chance to create a truly seamless blend that looks like the memory was always that way.

    Step 2: Upload and Initiate AI Blending in BringBack AI

    Ready to bring your loved ones back into precious moments? Here’s how to upload your photos and start the magic with BringBack AI.

    You’ll begin by navigating to the photo upload area on the BringBack AI platform. Look for the Upload Photos button. Clicking this will prompt you to select your files from your computer. Choose your main group photo first, the one that forms the foundation of your new memory. Then, select the individual reference photo you wish to add.

    After your photos are uploaded, you'll find the option to initiate the blending process. Select Combine Family Photos. This specific action uses 2 credits from your account, a small investment for a profound return. You'll see an indicator that the AI is now working its magic.

    BringBack AI takes over from here. It automatically aligns the lighting, shadows, and scale to ensure the added person looks like they were always there. A confirmation message or a processing indicator will let you know your photo is being prepared.

    This automated process means you don't need to be a tech wizard. The AI handles the complex blending, allowing you to simply wait for your enhanced memory to be ready. It’s a straightforward path to making that perfect family picture a reality, a powerful way to add family member to holiday picture AI seamlessly.

    Step 3: Review, Refine, and Download Your New Photo

    Now, your AI-generated photo is almost ready to become a treasured keepsake. Take a moment to closely inspect the composite image. Look for how naturally the new person blends with the original group. Pay attention to lighting consistency; do the shadows and highlights match across all figures? Check for accurate scale and perspective – does the added person fit in proportion with everyone else?

    Even the best AI can sometimes miss subtle details. You might notice minor issues like slightly mismatched skin tones, an attire that seems out of place, or edges that aren't perfectly blended. If BringBack AI automatically aligned everything, these should be minimal. For more advanced prompt-based tools, like Google Gemini, refining your prompts can make a big difference. For advanced strategies on crafting detailed and effective prompts to achieve precise AI image generation results, especially when using prompt-based tools like Google Gemini, consult this guide.

    • Poor Blending: The edges around the added person look fuzzy or cut-and-pasted.
    • Incorrect Scaling: The person appears too large or too small compared to others.
    • Mismatched Lighting: Shadows or highlights on the new person don't align with the scene's light source.
    • Unnatural Attire: Clothing styles or colors clash with the original photo's era or setting.

    Don't hesitate to iterate. Small changes to your prompt, like "make him slightly taller" or "soften the edges around his head," can often lead to significantly improved results. Many tools, like Kinpict, are built to automatically align lighting, shadows, and scale for you, minimizing the need for extensive tweaking. Once you’re happy with the result, simply click the Download button to save your restored memory in high resolution.

  • How to Restore a Ripped, Folded, or Torn Family Portrait with AI

    How to Restore a Ripped, Folded, or Torn Family Portrait with AI

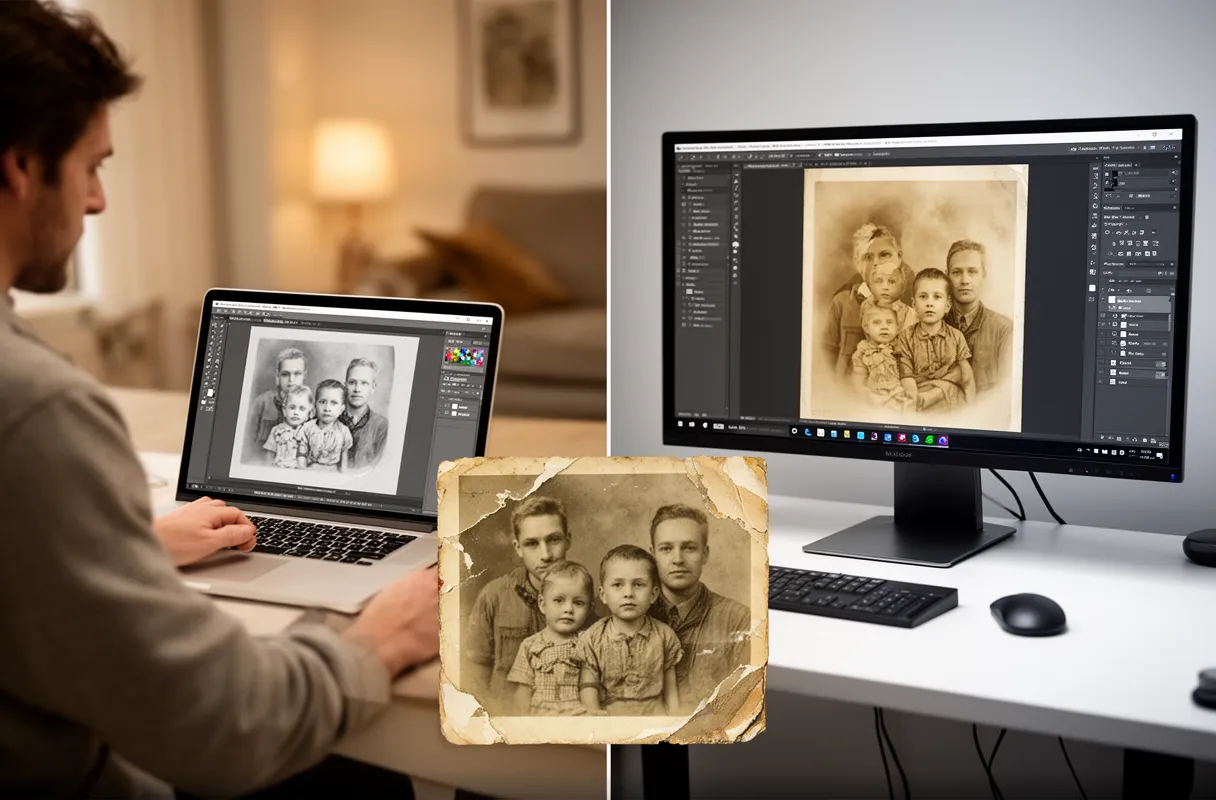
    To restore a damaged family photo, you must meticulously scan the physical original and then apply an AI restoration tool. This entire process takes minutes for most photos and requires basic computer skills, transforming deeply ripped images into pristine digital keepsakes.

    What You Need:

    • A flatbed scanner for physical prints (600-1200 DPI).
    • The damaged photo digitized as a TIFF or DNG file.
    • Reliable internet connection.
    • Credits or access to an AI photo restoration platform.

    Staring at a torn family portrait can feel like losing a piece of your history. A deep crease or jagged rip across a loved one's face might seem irreparable, leading many to believe expensive, manual restoration is the only option. This guide shows how modern AI tools offer a powerful shortcut to ripped family photo repair without complex software or expert training.

    By the end of this guide, you will have a pristine digital version of your cherished memory, completely free from folds, cracks, or tears. You will learn the exact steps to fix cracked family photo online and even how to repair folded paper photo with remarkable ease, ensuring your precious images are preserved for generations. This process even handles restoring torn face photo AI with surprising accuracy.

    Preparing Ripped Family Photos for AI Restoration: Physical & Digital Steps

    Preparing Ripped Family Photos for AI Restoration: Physical & Digital Steps

    Preparing your ripped family photos for AI restoration requires careful physical handling and precise digital capture. Before any software touches your image, meticulous digitization is foundational for successful AI restoration.

    Here’s how to get started:

    1. Gentle Cleaning: Use a very soft brush (like a makeup brush or a dedicated photo brush) to lightly sweep away dust and debris from the photo's surface. Avoid any liquids or harsh chemicals, as these can cause further damage. Compressed air can also work, but use short bursts from a distance.
    2. Flattening Creases: For deeply folded or creased photos, lay them flat on a clean, dry surface. Place a piece of acid-free paper over the photo. Then, carefully stack heavy, flat objects (like art books) on top. Allow the photo to press for several days, checking periodically.
    3. Temporary Alignment (Minimal): If pieces are completely separated, you can temporarily align them by placing them face-down on a clean surface and using tiny pieces of acid-free archival tape on the backside ONLY. Ensure the edges meet perfectly before taping. This is purely for scanning stability; remove it later.
    4. Scanner Choice: Always opt for a flatbed scanner over a sheetfed model. A flatbed provides even pressure and better control for delicate, torn, or uneven photos, preventing further damage.
    5. Optimal Scanner Settings:
      • Resolution: Set your scanner to 600-1200 DPI (dots per inch) or higher. This captures the fine details and textures essential for AI to work with.
      • File Format: Save your scan as an uncompressed TIFF or DNG file. These formats retain all original image data, unlike JPEGs which discard information to reduce file size. This is crucial for ripped family photo repair.
    6. Scanning Software: Use your scanner's default software, or consider professional options like Vuescan or Silverfast for more control over settings.

    For a broader understanding of how AI handles various types of damage, including tears, you can explore how AI can fix tears, scratches, and water damage. This careful preparation ensures the AI has the best possible source material to work with, leading to a superior restoration of your treasured memories.

    Pre-Scanning Best Practices for Damaged Photos

    Gentle cleaning preserves details before you scan. Avoid abrasive materials. A soft, clean brush or a can of compressed air can remove surface dust and debris without causing further damage. For stubborn grime on sturdy photos, a slightly damp (not wet) lint-free cloth can be used with extreme care. Always work from the center outwards to prevent spreading dirt.

    Deep creases or folded areas require patience for flattening folded photos. Place the photo between two pieces of acid-free archival paper and then under a stack of heavy books for several days. This gradual pressure helps the paper relax without cracking.

    When repairing tears for scanning, use minimal and careful use of acid-free archival tape. Apply it only on the backside of the photo, ensuring the ripped edges are perfectly aligned first. This temporary fix holds the pieces together for scanning without damaging the image surface or leaving residue. This is a temporary measure for scanning, not a permanent repair.

    Remember, the goal is to present the most complete image possible to the AI. Any additional damage introduced during the preparation phase will only make the restoration process harder and potentially less effective.

    How to Restore Your Ripped Family Portrait with BringBack AI

    How to Restore Your Ripped Family Portrait with BringBack AI

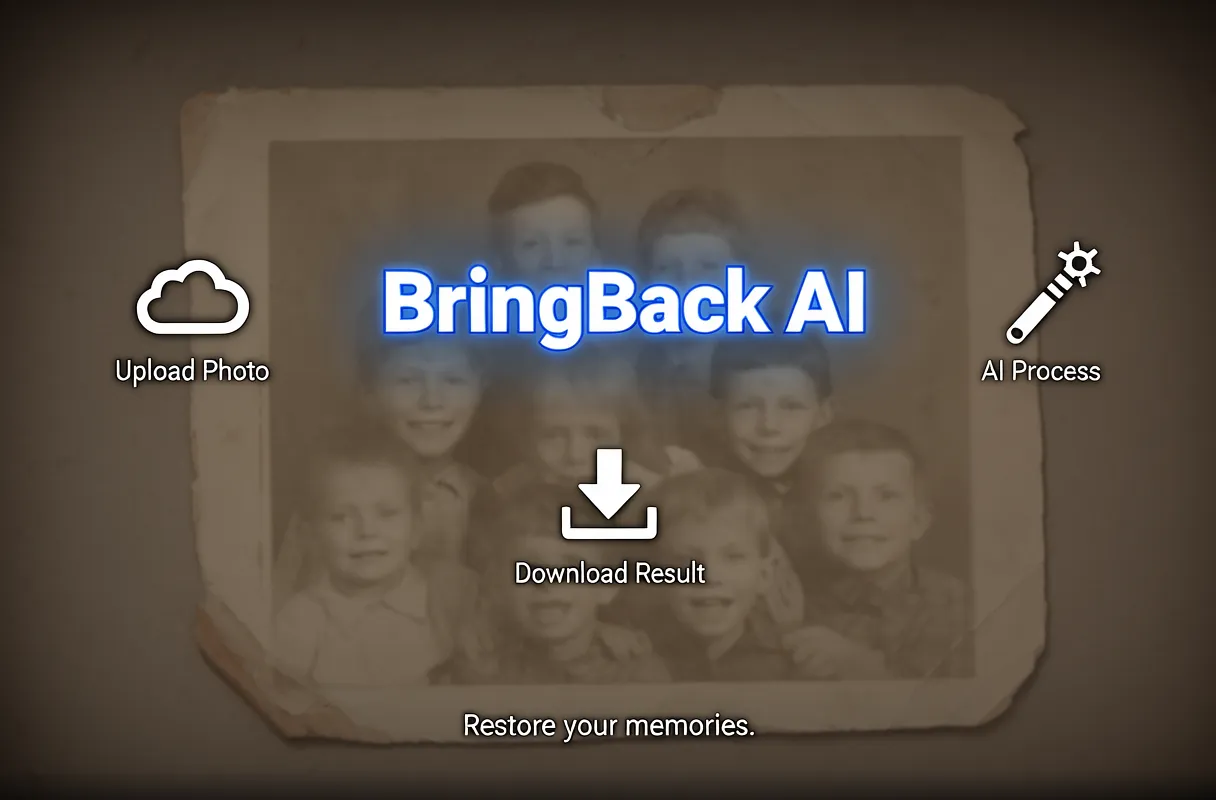
    To bring your ripped family portraits back to life with BringBack AI, the process is straightforward and designed to feel intuitive. You begin by uploading the digital version of your damaged photograph, whether it's a scan or an existing digital file. Our platform is built to handle a variety of image formats. Understanding typical platform constraints, for instance, Adobe Firefly supports file sizes up to 40MB and minimum dimensions of 512×512 pixels for processing.

    Once uploaded, BringBack AI automatically analyzes the image, detecting and repairing common issues such as tears, scratches, fading colors, dust, stains, creases, and even pixelation or blur. Our advanced algorithms work to reconstruct missing details and smooth out imperfections, aiming for a natural, high-resolution output.

    For a comprehensive guide on digital restoration techniques that can enhance your family reunion photos, consider exploring our detailed guide. BringBack AI prioritizes your privacy; images are not stored after the restoration process is complete, mirroring the secure approach found in tools like Photobooth.online.

    Finally, you simply download your restored, high-resolution photograph. The goal is to provide you with a revitalized piece of your history, simply and securely.

    BringBack AI Pricing and Value for Family Photo Restoration

    BringBack AI offers a straightforward pricing model focused on value, avoiding confusing subscriptions. You purchase credits for the services you need, ensuring you only pay for what you use.

    Here's how BringBack AI's credit packages break down:

    Package Name Credits Cost Value (Cost per Credit)
    Starter 5 $4.99 ~$1.00
    Pro 20 $9.99 ~$0.50
    Family 60 $21.99 ~$0.37

    These credits never expire. This means you can buy them when you need them and use them at your own pace, preserving your memories without added pressure.

    The number of credits required depends on the restoration task:

    • Old Photo Restoration: 1 credit per photo
    • Combining Photos: 2 credits to merge individual pictures into a single family portrait
    • Photo to Video Animation: 10 credits for a dynamic video from a single image
    • "Hug Video": 20 credits to create a heartwarming animated video featuring a family member's embrace.

    This model contrasts sharply with some platforms. For instance, Canva offers a free plan with extensive templates and storage but limits access to premium features. Their Pro plan provides more storage and advanced "Magic" tools, often at a recurring monthly fee. BringBack AI bypasses this, focusing purely on the restoration and animation of your cherished family photos with a clear, one-time cost. You get immediate access to powerful AI tools without ongoing commitments.

    Overcoming AI Limitations & Perfecting Your Family Portrait

    Overcoming AI Limitations & Perfecting Your Family Portrait

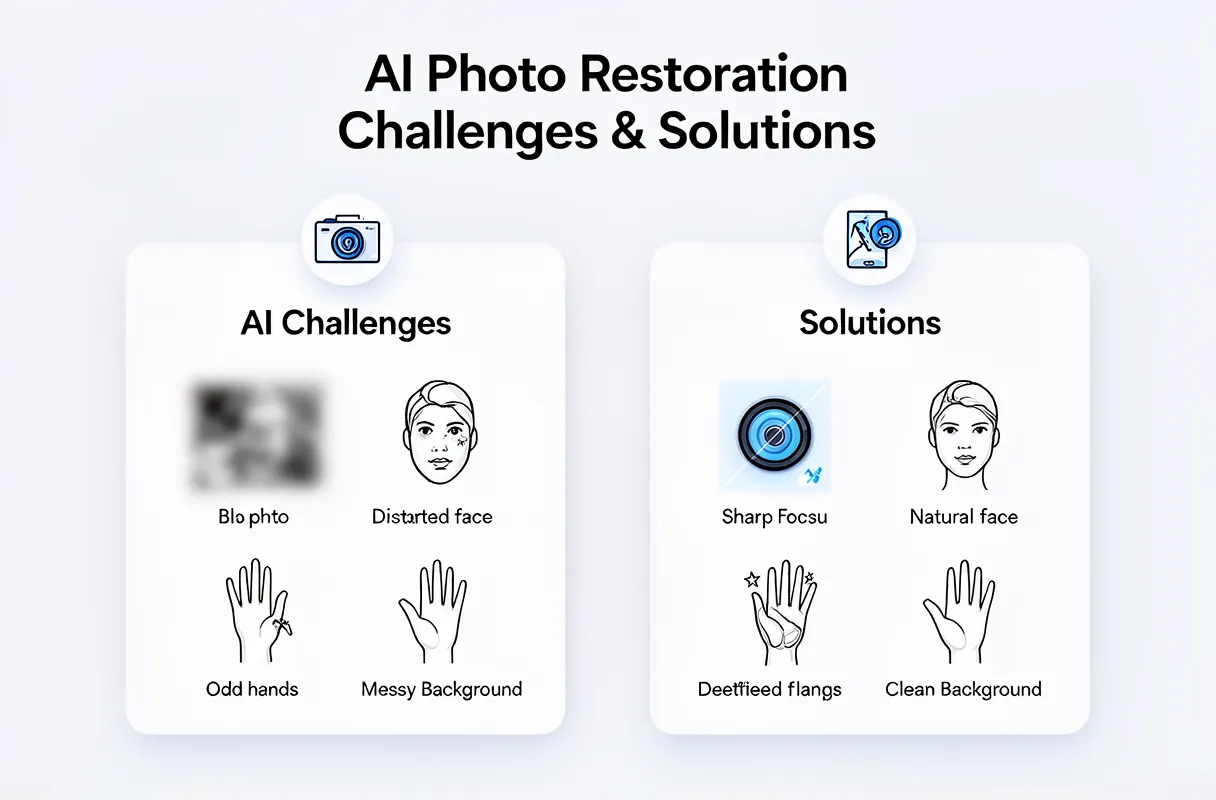
    AI image restoration is powerful, but not foolproof. You might encounter issues like blurry outputs, unnatural facial features, or odd background details.

    Common AI Image Challenges

    • Blurry or Low Detail: The AI may not capture fine textures, leading to a softened or over-smoothed appearance. This is common when restoring torn face photo AI.
    • Distorted Faces: Faces can appear asymmetrical, with misaligned eyes, odd proportions, or unnatural skin textures. This is a frequent hurdle when trying to fix distorted AI faces.
    • Background Artifacts: AI can sometimes hallucinate or distort background elements, creating strange patterns or disconnected shapes.
    • Unnatural Textures: Repaired areas might have a plastic-like sheen or an overly smooth, unrealistic look.

    Improving AI Restoration Quality

    You can significantly improve AI results by refining your input and settings.

    • Prompt Amplification: Use descriptive keywords to guide the AI. Add terms like "sharp focus, highly detailed, 8k resolution, crisp, high definition, studio quality."
    • Photography Context: Specifying camera details, like "shot on Canon 5D with 85mm f/1.4 lens," can help the AI mimic professional photographic styles.
    • Resolution and Sampling: Increasing the generation resolution (beyond the initial 512px) and the number of sampling steps often leads to a clearer, more refined final image.

    Tackling Distorted Faces

    Specific prompts can help correct facial distortions.

    • Explicit Face Prompts: Use phrases like "natural symmetric face, realistic skin texture, clear distinct eyes, professional portrait photography."
    • Subject Specificity: Indicate "single subject" or "close-up portrait" to focus the AI's attention.
    • Negative Prompts: Guide the AI away from errors with commands like "deformed face, asymmetric eyes, distorted features, unnatural skin, ugly." Specialized face restoration algorithms can also be integrated by some tools for superior results.

    For detailed guidance on prompt engineering and settings adjustments to fix common AI image problems, including quality and realism issues, refer to expert recommendations. This proactive approach, combined with using advanced prompts, helps improve AI photo quality significantly.

    To see examples and further tips on restoring intricate details, especially for ancestral photos where facial authenticity is paramount, consult our guide on restoring ancestral photos.

    By understanding these limitations and employing smart techniques, you can move beyond basic AI repairs to truly perfect your family portraits.

    Manual Refinements: When to Step Beyond AI

    AI photo restoration offers incredible speed, but some damage demands a human touch. You'll need to step beyond AI when dealing with complex photo tears, significant missing pieces, or when AI misinterprets existing damage.

    AI excels at general improvements, but it can struggle with specific challenges. For instance, AI might incorrectly "fill in" a rip with smooth, unnatural textures, or create 'ghosting' where the original tear was. Fixing these issues requires precision that AI alone can't provide.

    This is where manual editing tools come in. For fixing complex photo tears, consider these traditional post-AI refinements:

    • Levels and Curves: These tools help correct color casts or mismatched tones that AI might miss, especially along the repaired edges of a tear.
    • Contrast and Black/White Balance: Essential for bringing back punch and clarity to areas that have become dull or washed out.
    • Color Balance: Crucial for restoring faded colors or neutralizing unwanted tints (e.g., yellowing from age).
    • Clone Stamp and Healing Brush: Your best friends for localized damage. You can meticulously blend the repaired rip line, removing unnatural textures and ensuring a seamless transition with the surrounding photo detail.

    Don't be afraid to use these tools. They allow you to maintain the authentic character of your old photos while ensuring every detail, especially faces, remains clear and natural. This AI vs manual photo restoration decision hinges on the damage severity and your desire for absolute perfection.

    Long-Term Preservation for Your Restored Memories

    Once your cherished memories are brought back to life, the next critical step is long-term preservation. Simply saving the restored file isn't enough to guarantee its survival. You need a proactive strategy to protect these digital heirlooms.

    Always save your restored photo with a new file name and in the highest available resolution. Opt for uncompressed formats like TIFF (.tif) whenever possible. This ensures that any future re-editing or sharing retains the maximum possible image quality, preventing the degradation that often happens with formats like JPEG.

    Implementing a robust digital photo backup strategy is non-negotiable. This means employing the "3-2-1 rule": at least three copies of your data, stored on two different types of media, with one copy offsite.

    • Cloud Storage: Services like Google Drive, Dropbox, or dedicated photo archiving platforms offer accessible, offsite backups.
    • External Hard Drives: Keep at least one physical backup disconnected from your computer to protect against power surges or malware.
    • NAS (Network Attached Storage): For larger collections, a NAS can act as a central, local backup hub.

    Periodically check the integrity of your backup files. Digital data can become corrupted over time. Regularly verifying your archives ensures that when you need them, your restored photos are still perfectly intact and ready to be shared for generations to come.

  • How to Add a Deceased Father to a Wedding Photo Online

    How to Add a Deceased Father to a Wedding Photo Online

    To add your deceased father to a wedding photo online, you must select high-quality source images and use an AI photo integration tool. This process takes 30-60 minutes and requires moderate digital familiarity.

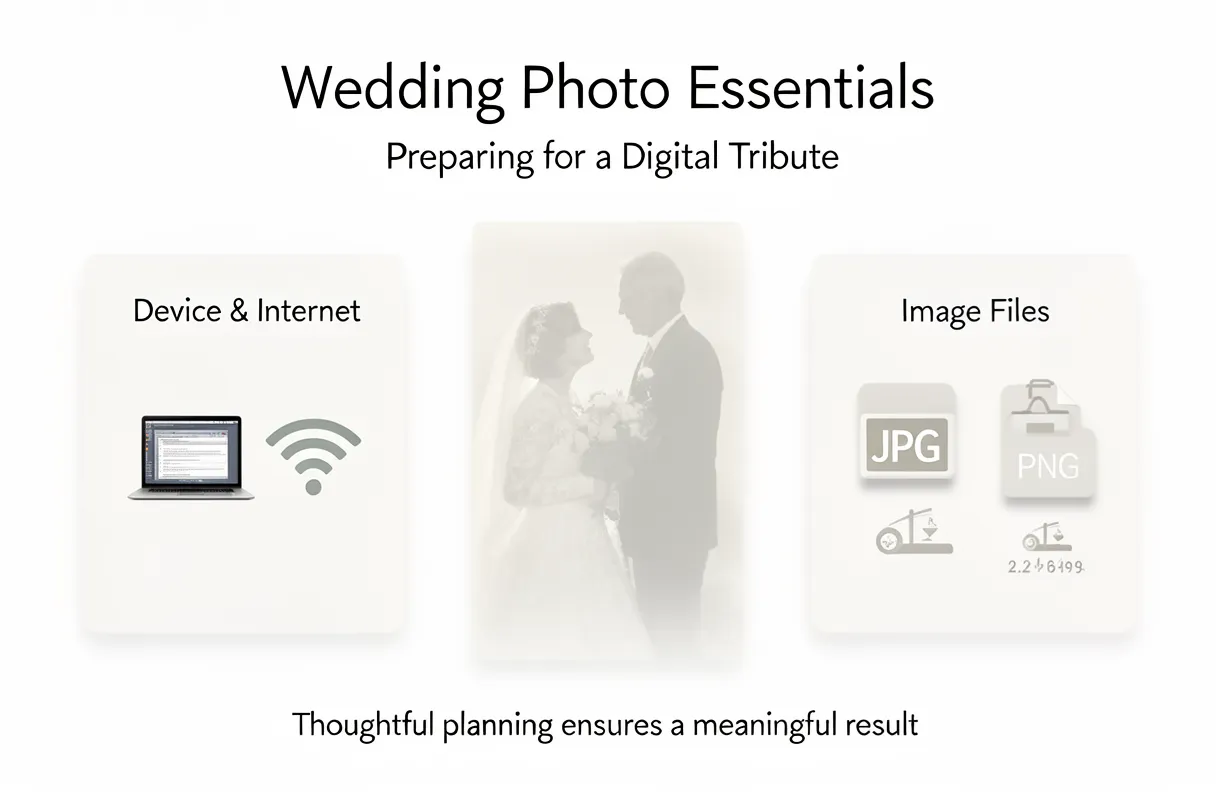
    What You Need:

    • A compatible device (computer, tablet, or smartphone).
    • Reliable internet access.
    • The original wedding photo (base image).
    • High-resolution photos of your deceased father.
    • Access to a chosen AI photo integration service.
    • Input images typically in PNG or JPG format, usually under 10MB each.

    The desire to include a lost loved one in life's biggest moments is profound. For a wedding, this is especially true. You want these additions to feel truly authentic, not just a digital paste-on. Wedding photos are the #1 use case for adding deceased loved ones to images, by far.

    Getting this right means blending more than just pixels; it blends cherished memories. It balances technical integration with deep emotional accuracy.

    By the end of this guide, you will have a cherished, natural-looking memorial photo, ready for a lasting tribute to your father's presence on your special day.

    Prerequisites for Adding Your Deceased Father to a Wedding Photo Online

    Prerequisites for Adding Your Deceased Father to a Wedding Photo Online

    Before you even think about adding your deceased father to a wedding photo online, you need a few things in place. Think of it like gathering your best ingredients before baking a cake. Getting these basics right ensures the final result feels natural and respectful.

    You'll need a stable internet connection and a device capable of uploading files. This could be a laptop, desktop, or even a modern tablet. More importantly, you'll need the right digital files. Most services for wedding photo editing deceased parent require images in common formats like JPG or PNG.

    These platforms often have file size limits, typically around 10MB per image. Make sure your photos aren't excessively large, or you might need to resize them first. Planning ahead here prevents frustrating technical glitches later.

    Here's what you should have ready:

    • Your Wedding Photo: The main image you want to edit.
    • A Photo of Your Father: A clear, well-lit picture of him.
    • Internet Access: A reliable connection for uploading.
    • Compatible Device: A computer, tablet, or smartphone.
    • Supported File Formats: Ensure your photos are JPG or PNG.
    • Reasonable File Sizes: Keep individual files under 10MB.

    Having these prerequisites sorted out makes the process of adding a deceased father to a wedding photo online much smoother. It respects the sensitivity of the task.

    Selecting Optimal Source Photos for Natural Integration

    Choosing the right photos is key to a natural-looking integration. Think of it like finding two puzzle pieces that fit perfectly.

    When selecting your wedding photo, look for one with good resolution and clear focus. The lighting should be as even as possible across the scene. Avoid images where subjects are heavily backlit or where shadows obscure important details. The clearer the original wedding photo, the easier it is for AI to blend seamlessly.

    For your father's photo, prioritize a well-lit, in-focus image where his face is clearly visible. A picture with a neutral or unbusy background helps prevent distractions in the final composite. Consider his attire: if he's wearing a suit or formal wear in his photo, it will blend more easily with wedding attire.

    Here’s what to look for in an optimal source photo:

    • High Resolution: Ensures detail isn't lost.
    • Sharp Focus: Especially on faces.
    • Even Lighting: Matches the wedding photo's light source.
    • Consistent Tone: Avoid extreme color casts.
    • Compatible Pose: A head-and-shoulders shot or a ¾ view works well.
    • Respectful Placement: Think about where he would naturally stand or sit, often near the couple.

    You want to aim for photos that minimize the differences AI needs to bridge. A well-chosen father photo makes the final composite feel genuine and respectful, not like a quick edit.

    And because a good starting point is so critical, remember that the quality of your source images directly impacts the realism of the final result. A slight blur or inconsistent lighting in either photo means more work for the AI, and potentially a less convincing outcome.

    How to Digitally Add Your Father to a Wedding Photo with BringBack AI

    How to Digitally Add Your Father to a Wedding Photo with BringBack AI

    Adding your father to a wedding photo digitally is a deeply personal process. BringBack AI simplifies this, ensuring your memorial photo feels natural and respectful. Our platform is built to handle the nuances of merging images, making the combine photos of dead parent wedding experience straightforward.

    Here’s how our tool helps you achieve a seamless integration:

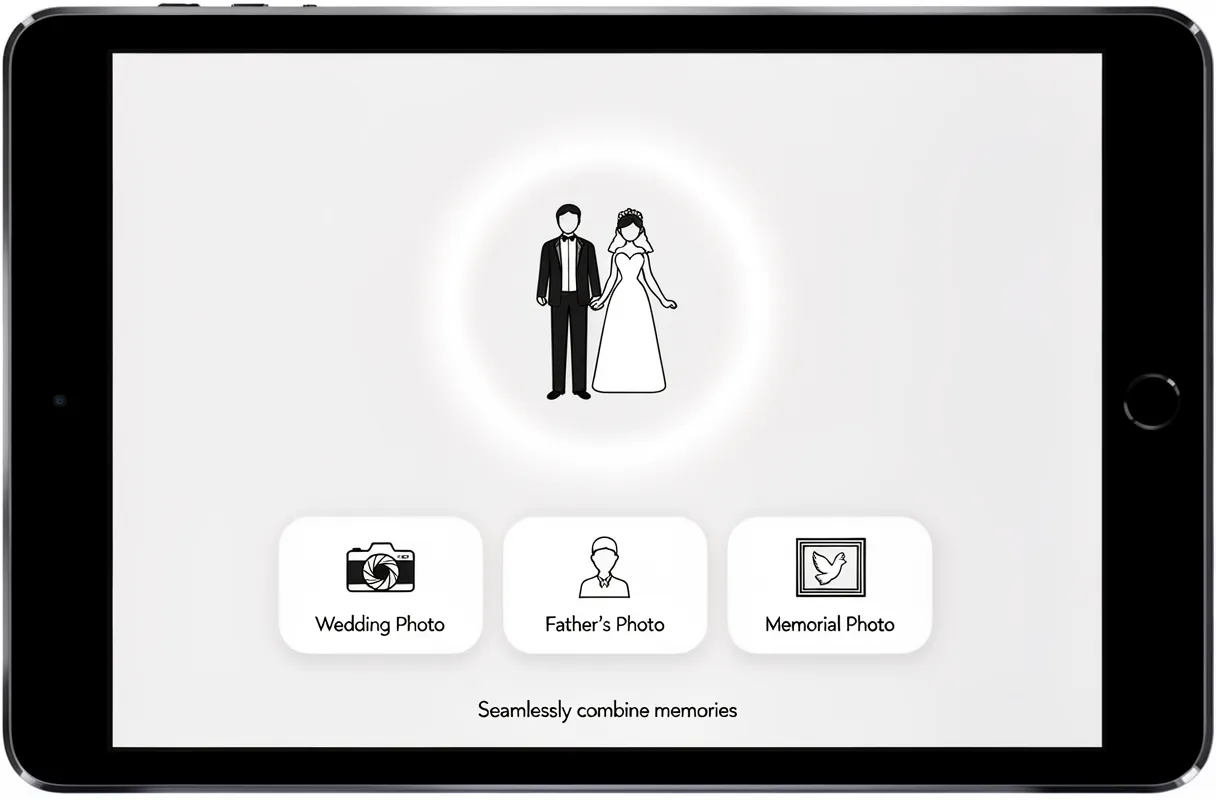
    1. Upload Your Images: Start by uploading your main wedding photo. Then, upload the chosen photo of your father from your prerequisites.
    2. AI Processing: Our AI automatically analyzes both images. It reconciles differences in lighting, shadows, and proportions, working to blend your father’s image into the wedding scene.
    3. Review and Download: You'll receive a high-resolution memorial photo ready for sharing or printing. This specific feature for memorial photos is a core part of our dedicated tool for adding deceased loved ones to photos.

    BringBack AI is designed to handle the complexities of merging photos of a deceased parent into wedding pictures, aiming for an outcome that honors your memory.

    Ensuring Realism, Resolving Issues, and Ethical Use

    Ensuring Realism, Resolving Issues, and Ethical Use

    When you're aiming to integrate a beloved father's image into wedding photos, the goal is emotional authenticity, not just technical perfection. You need to evaluate the AI's output carefully to ensure it feels real and respectful.

    Look for tell-tale signs that break the illusion. Distorted facial features, an unnatural blend between the original photo and the added image, or a noticeable mismatch in scale are all common AI photo errors. Lighting that clashes or shadows that fall incorrectly can also make the composite look jarring.

    If you encounter issues, don't despair. The best AI tools allow for refinement.

    Here's how to tackle common problems:

    • Distorted Features: Re-uploading the original photos, perhaps with slight adjustments to cropping or focus, can sometimes help the AI reinterpret them.
    • Unnatural Blending: Look for tools that offer manual adjustment sliders for opacity or edge feathering if available. Sometimes, a slight blur or blend can make the integration more subtle.
    • Mismatched Scale or Lighting: This often points to a mismatch in the source images. While AI tries to reconcile these, very significant differences can be challenging. You might need to find better source photos or consider professional touch-ups for perfect alignment.

    Ethical use is paramount. You're creating a cherished memorial, so always prioritize respect and dignity. Reputable AI services understand the sensitive nature of this work. They assure users that uploaded photos are not used to train their AI models. This commitment to user privacy safeguards your precious memories. Always choose tools that are transparent about their data handling practices.

    Evaluating AI-Generated Results and Troubleshooting Common Errors

    You’ve generated your AI memorial photo. Now, you need to make sure it looks right. The goal is naturalness and realism. Look closely at how the AI blended the images. Are the skin tones consistent? Does the lighting on the added person match the original scene? A good result feels like the person was actually there.

    Many AI photo tools, like those that assist with adding a deceased loved one to a photo, excel at reconciling differences in lighting, shadows, and proportions automatically. However, occasional hiccups can occur.

    Callout: Common AI Photo Errors & Fixes

    • Distorted Features: Faces might look slightly stretched or squashed. Try generating again with slightly different source photos or adjusting AI parameters if available.
    • Unnatural Blending: Edges where the new person meets the original photo might look "pasted on." Look for tools that offer masking or blending refinement.
    • Mismatched Scale: The added person might appear too large or too small for the scene. This often requires manual adjustment in more advanced editing software if the AI can't auto-correct.
    • Lighting Discrepancies: Shadows and highlights may not align. Ensure your source photos have similar lighting conditions.

    You might need to experiment with different prompts or source photos to get a truly seamless integration. Exploring the complexities of successful AI photo integration can be helpful; check out resources that explain these complexities.

    Evaluating the emotional accuracy of the final portrait is key. Does it capture the essence of your loved one? This is where human judgment is irreplaceable. If the AI output still feels off, don’t hesitate to refine it. Understanding how to refine AI photo results is part of the process.

    Respect for the memory is paramount. Ensure your chosen tool prioritizes user privacy and data security. This means the AI won't use your uploaded photos for training. Always opt for services that are upfront about their data handling.

    DIY AI Tools vs. Professional Editing Services: Weighing Your Options

    When you need to restore or enhance old photographs, the path forward often involves a choice: do it yourself with AI tools, or hire a professional. Each option presents a distinct set of trade-offs.

    DIY AI photo editing tools offer immediate access and lower upfront costs. Apps like YouCam Perfect or online services such as Lovedonephoto.com can be tempting for their accessibility. Many provide a free preview or a single free generation, letting you test the waters before committing to payment. These tools are great for straightforward fixes and allow you to explore capabilities like integrating individuals into existing photographs. However, the quality can vary, and free versions often come with limitations or watermarks. Getting a truly natural look might still require significant tinkering, and the results can sometimes feel artificial.

    Professional editing services, on the other hand, promise a higher caliber of work. Companies like Pixels Photo Art employ skilled digital artists who can meticulously restore and enhance images. This route ensures a bespoke, emotionally accurate final portrait, where every detail is considered. The downside is the professional photo restoration cost, which can be substantial, ranging from hundreds to thousands of dollars depending on the complexity and desired outcome. It’s an investment in preserving a cherished memory with the utmost authenticity.

    Many services now bridge this gap. Some AI photo integration services combine advanced neural networks with a final hand-review by digital artists. This blend aims for optimal realism and emotional accuracy, offering a middle ground between pure DIY and full professional service.

    Here's a quick look at how different options stack up:

    Feature/Service DIY AI Tools (e.g., YouCam Perfect) Professional Services (e.g., Pixels Photo Art) Hybrid AI + Artist (e.g., BringBack AI)
    Cost Low (free to ~$10/month) High ($100 – $1000+) Moderate ($4.99 – $21.99)
    Effort Required High (learning curve, trial-and-error) Low (briefing process) Low to Moderate (user input, preview)
    Skill Level Beginner to Intermediate Professional Artist Skillset required User-friendly interface
    Output Quality Variable, can be limited Excellent, bespoke Very Good to Excellent
    Free Trial/Preview Common Rare Common
    BringBack AI Pricing N/A N/A Starter: $4.99 (5 Credits)
    Pro: $9.99 (20 Credits)
    Family: $21.99 (60 Credits)

    For those seeking detailed guidance on utilizing free photo editing apps for deceased loved ones, a thorough resource can be found on applying free editing tools. Ultimately, your choice hinges on your budget, the importance of intricate detail, and how much hands-on control you wish to retain over the process.

    Final Steps and Preserving Your Cherished Memory

    Before you save your completed memorial photo, download it in a high-resolution format suitable for printing. Common options include JPEG for general use or TIFF for maximum quality if professional printing is planned. This ensures the final print retains the detail and emotional nuance you worked to achieve.

    Consider where you'll print merged wedding photo or family portraits. Photo labs offer varying paper types and finishes. A matte finish can reduce glare, while a glossy finish might make colors pop. Think about the lighting in the space where the photo will hang.

    Proper storage is key to preserve family memories. Keep prints away from direct sunlight and high humidity. Archival sleeves or albums provide excellent protection against fading and physical damage. Digital backups on multiple secure cloud services are also wise.

    You can then share the download memorial photo respectfully with family and friends. If you're looking to do more, explore options for animating old photographs or further restoration. Our platform, BringBack AI, can bring these cherished images to life in new ways, honoring your loved ones with deeper immersion.

  • How to Restore and Colorize Old Military Photos Online with AI

    How to Restore and Colorize Old Military Photos Online with AI

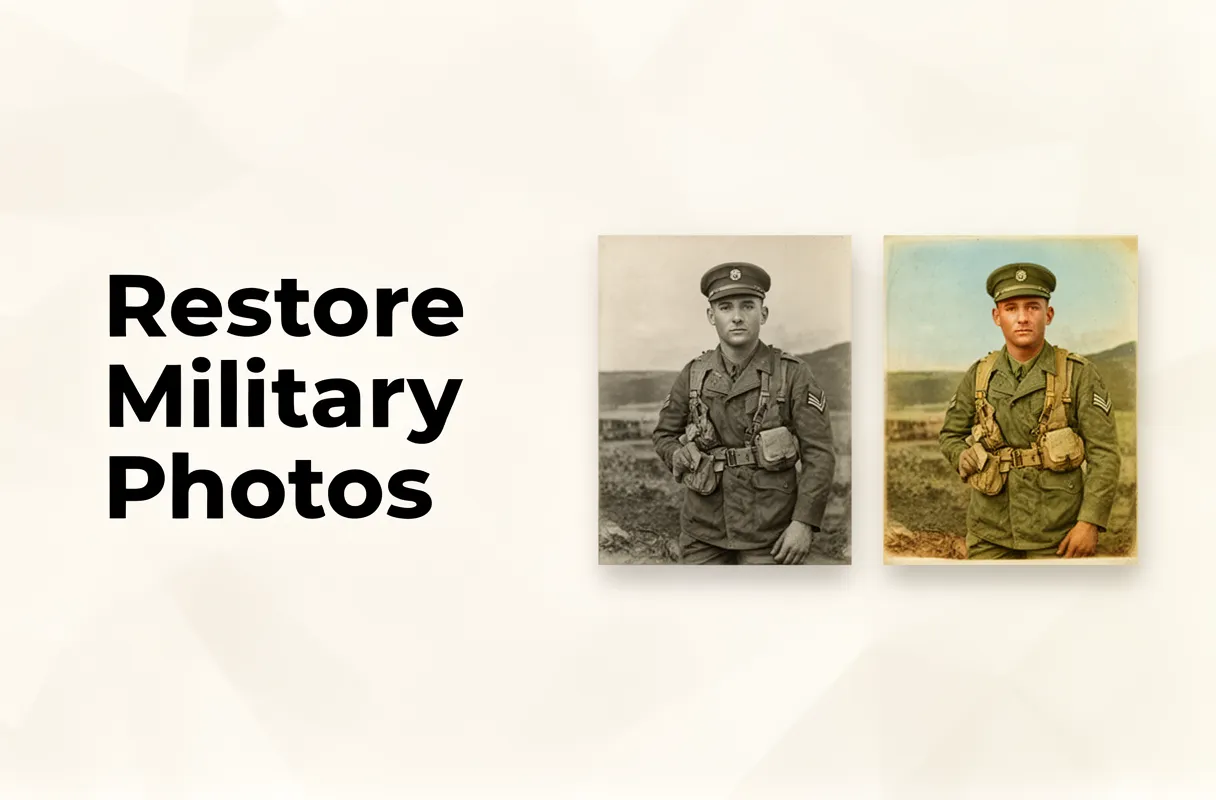
    To genuinely restore and colorize old military photographs online, you must combine meticulous online historical research with AI-powered restoration tools. This hybrid process typically takes several hours to multiple days per image and demands an intermediate skill level in image editing.

    What You Need:

    • A high-resolution scan of your military photo (minimum 300-600 DPI).
    • Intermediate proficiency in image editing software (understanding layers, masks).
    • Access to online military archives and research databases.
    • Significant investment of time and patience.

    Many tools promise instant transformations, but generic AI often fails to capture the historical accuracy essential for military photographs. You might find uniform colors are wrong, or medal details are simply guessed. Preserving this heritage demands more than a quick filter; it calls for a deep commitment to authenticity. This is where the real challenge lies, and why a human touch remains indispensable for military photo restoration online.

    By the end of this guide, you will master a robust workflow for authentic military photo restoration online, combining powerful historical research with efficient digital tools to achieve unparalleled detail and emotional resonance for every old army uniform photo or military portrait.

    Why Generic AI Fails Authentic Military Photo Restoration

    Why Generic AI Fails Authentic Military Photo Restoration

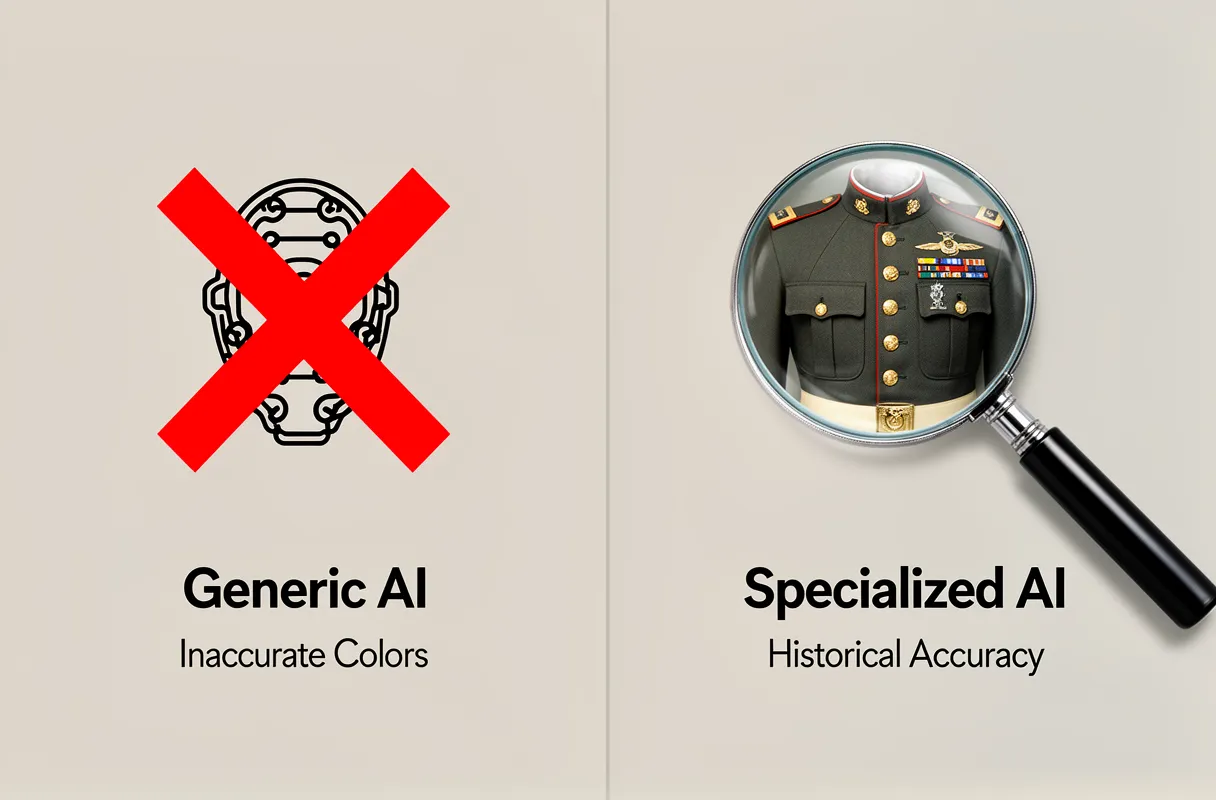
    Generic AI struggles with authentic military photo restoration because it prioritizes speed over historical precision. These tools often 'guess' colors and details based on vast, averaged datasets. This leads to common errors, like misrepresenting the specific shade of khaki in a 1914 British infantryman's uniform or wrongly coloring silver campaign medals as bronze.

    The critical issue is that military photo restoration demands absolute accuracy. Uniform colors, the specifics of medal materials, and the subtle nuances of rank insignias are not just aesthetic choices; they are vital historical markers. General AI colorization tools lack the specialized knowledge to distinguish these critical details, essentially applying a broad brush where a surgeon's scalpel is needed.

    While AI offers quick fixes for everyday photos, it fails military subjects because it cannot replicate the meticulous manual research required. This research is necessary to correctly reconstruct these historically significant elements, making human intervention indispensable for military portrait colorization AI applications.

    Comparing Online AI Restoration Tools: Features, Costs, and Accuracy

    While AI photo restoration tools offer speed, they often compromise the historical accuracy vital for military photographs. These tools frequently guess colors and details, missing the precise nuances required for authentic representation. For a broader understanding of various online photo restoration tools and techniques beyond military-specific needs, explore our comprehensive guide on how to restore old photos online.

    Here's a look at some popular options and their offerings:

    | Tool | Pricing Model | Pros | Cons | Accuracy Notes (Military Context)

    Master Authentic Military Photo Restoration Online: A Hybrid Approach

    Master Authentic Military Photo Restoration Online: A Hybrid Approach

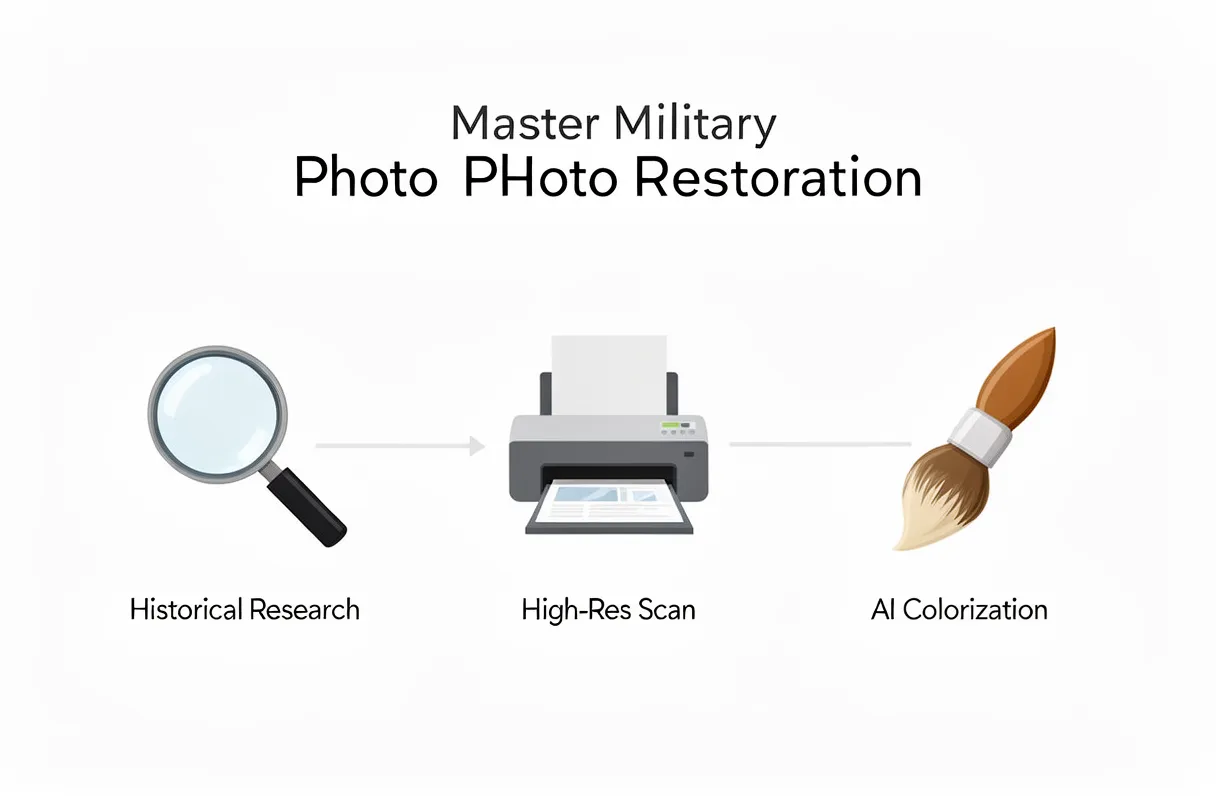
    Restoring old military photographs demands a blend of digital skill and historical detective work. Simply uploading a photo to a generic AI tool risks misrepresenting history. True authenticity requires a deliberate, hybrid approach.

    First, ensure you have a high-resolution scan. Aim for at least 300 DPI, ideally 600 DPI, to capture the subtle details of uniforms, medals, and insignia. This digital foundation is non-negotiable for accurate restoration. You'll also need intermediate photo editing software skills. Understanding layers, masks, and blending modes is essential for precise manual adjustments that AI often misses.

    The process begins with meticulous manual research into military archives. This step dictates the AI's subsequent role. You must pinpoint the exact era, regiment, and rank depicted. For instance, determining the precise shade of khaki serge for a 1914 British infantryman requires more than AI guesswork; it needs consultation of historical uniform guides and photographic records.

    After gathering this historical data, you can approach online tools. While generic AI might offer quick fixes, specialized tools or a combination of manual work and AI processing are needed. Our approach involves using AI for initial cleanup and color enhancement, then layering meticulously researched historical details back into the image. This hybrid method ensures that the final restored image is not just visually appealing, but historically accurate, preserving the true story of the soldier.

    Deepening Accuracy with Online Military Archives and Research

    For true historical accuracy in restoring military photographs, dive into specialized online archives. You must meticulously research specific details like uniform colors, insignia placement, and medal types pertinent to the exact regiment, unit, and service era. Simply letting an AI guess these elements leads to inaccuracies.

    The National Archives provides official governmental resources for accessing federal military service records, which are indispensable for detailed historical research into uniform specifications, medals, and rank insignias. Explore repositories in Washington D.C., St. Louis, and College Park, MD. State archives, like the NC Archives, also hold vast military collections, offering wartime correspondence, unit rosters, and personal accounts.

    Using these resources allows for precise manual restoration, ensuring that details like the correct shade of olive drab or the accurate configuration of a soldier's campaign ribbons are faithfully reproduced. This manual due diligence is non-negotiable for professional results.

    This approach means each restored image isn't just a clearer picture, but a more honest representation of the individual and their service. You are not just repairing a photo; you are honoring a piece of history with its true visual context.

    Streamlined Restoration and Colorization with BringBack AI

    You've spent hours meticulously researching uniforms, medals, and backgrounds. Now, you need to bring that history to life without losing the authenticity you’ve painstakingly built. This is where our platform, BringBack AI, steps in to streamline the final stages.

    You can upload your photo directly after your manual research and any essential minor touch-ups. BringBack AI then processes and restores, colorizes, or animates the image automatically. It uses advanced algorithms designed to respect the historical context you've provided. This means the software understands how to apply colors and reconstruct details based on the visual cues and the era, rather than generic guessing.

    Think of it like this: you've done the heavy lifting of becoming the historian. Now, you hand the brush to a skilled artist who knows precisely what to paint and how to apply it, based on your detailed instructions. The AI doesn't replace your research; it executes it with speed and precision. This automated processing significantly cuts down restoration time, allowing you to achieve a high-fidelity result quickly. Your verified historical data guides the AI’s output, ensuring the restored image remains a faithful representation of the past, not a digital fabrication.

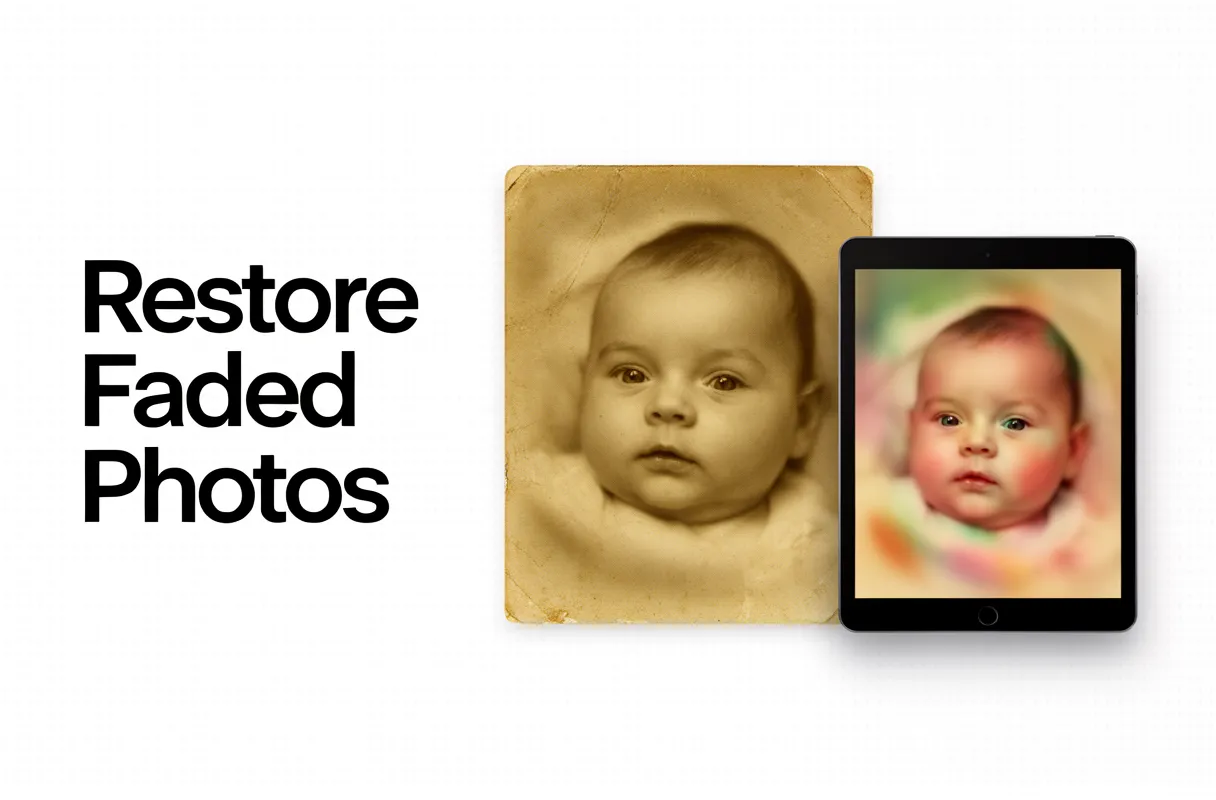
  • How to Restore and Colorize Faded Baby Photos from the Past

    How to Restore and Colorize Faded Baby Photos from the Past

    To repair old childhood pictures and colorize vintage baby photos with AI, you must first carefully digitize them using a modern smartphone scanning app, then upload them to a dedicated AI restoration platform. This entire process typically takes under 15 minutes and requires minimal technical skill.

    What You Need:

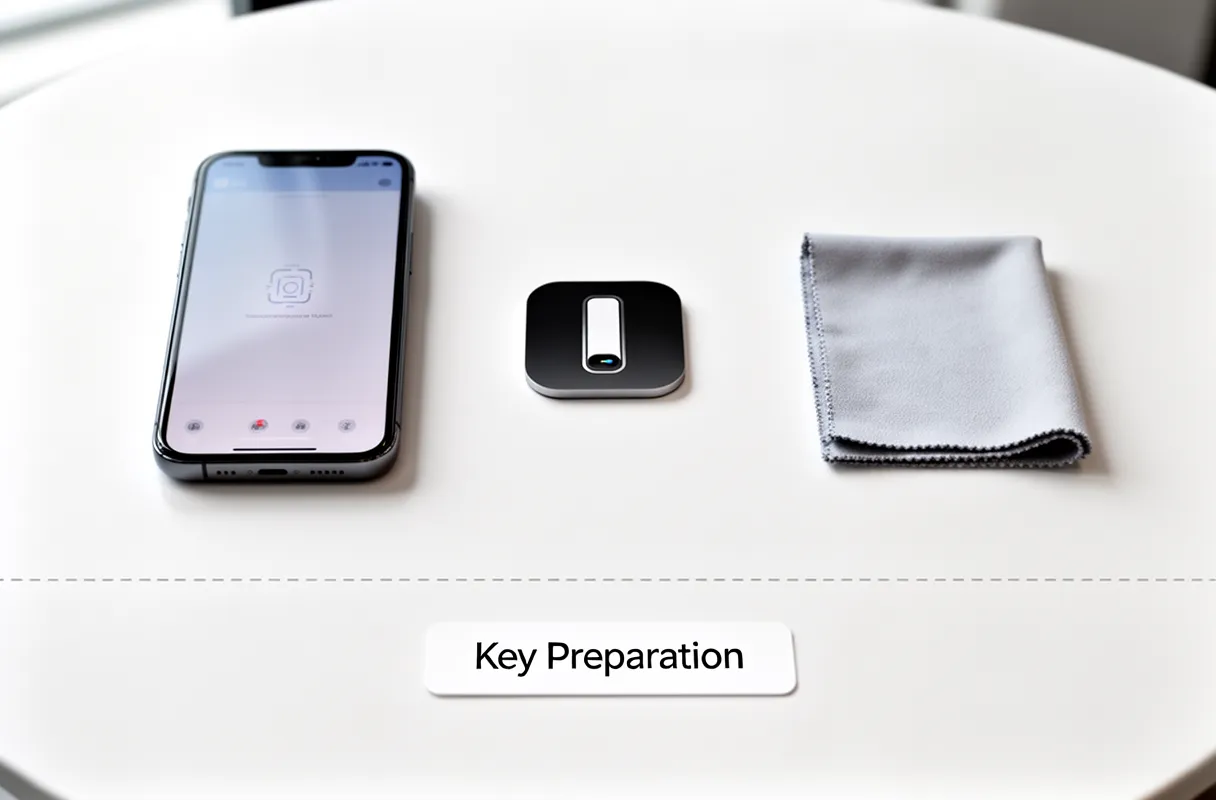
    • A modern smartphone (ideally under two years old for optimal camera quality).
    • A dedicated scanning app (e.g., Google PhotoScan).
    • A clean, well-lit surface for accurate photo digitization.
    • An active internet connection.
    • Credits for an AI photo restoration service.

    You likely have a box of precious, faded baby photos tucked away, slowly deteriorating. These physical prints curl, scratch, and lose their vibrance over time. Most people feel these memories are lost forever, or dread the considerable expense of traditional, manual restoration. Manually trying to repair old childhood pictures can easily cost hundreds of dollars and take weeks to complete. AI photo restoration offers a powerful, instant solution.

    By the end of this guide, you will have stunningly restored, vibrant versions of your cherished baby photos, ready to be shared digitally and treasured for generations. You will effectively restore faded baby polaroid online, bringing them back to life.

    Preparing Your Physical Baby Photos for AI Restoration

    Preparing Your Physical Baby Photos for AI Restoration
    Before AI can work its magic, your old photos need a little human touch. This preparation ensures the best possible outcome for your precious memories.

    Here are the three essentials you'll need:

    1. A modern smartphone: Your phone is your scanner. Make sure it has a decent camera – models less than two years old generally perform best.
    2. A reliable scanning app: Tools like Google PhotoScan use computational photography to combat glare and distortion, which is critical for shiny prints and Polaroids.
    3. A clean, flat surface: A dust-free table provides a stable, controlled environment for scanning.

    Think of AI as a master restorer, but even they need good raw material. AI excels at fixing faded colors, scratches, and subtle damage that obscure details. However, it cannot invent content that is completely missing or physically destroyed. Proper physical preparation prevents irreversible damage that even the most advanced AI cannot overcome. This initial step is your bedrock for high-quality restoration.

    Safe Handling and Pre-Digitization Cleaning

    Handling your old baby photos requires a gentle touch. Think of them as delicate butterflies; a rough grab can tear fragile wings. Your goal is to prepare them for digitization without causing new damage. This means taking the time to carefully assess each picture before you even think about scanning.

    This pre-digitization cleaning is not about making them look perfect now, but about ensuring you have the best possible source material for AI. AI can do wonders to repair old childhood pictures, but it can't magically fix damage you inflict during handling.

    Here’s how to handle them safely:

    • Clean Hands are Paramount: Always wash and thoroughly dry your hands before touching photographs. Oils from your skin can transfer and cause long-term damage. Consider wearing lint-free cotton gloves for an extra layer of protection, especially for very old or brittle prints.
    • Work on a Flat, Stable Surface: A clean, dry table or desk provides a stable platform. Avoid scanning from your lap or a soft surface that can cause distortion.
    • Gentle Separation of Stuck Photos: If photos are stuck together, do not force them apart. Instead, try gently sliding a thin, flat, non-metallic object (like a plastic photo spreader or a very thin, flexible plastic ruler) between them. Sometimes, a controlled environment with slightly higher humidity can help loosen adhesives over time, but proceed with extreme caution. Never use tape or sticky substances.
    • Delicate Dusting: For surface dust or debris, use a soft, clean camel hair brush or a can of compressed air (held upright and at a distance). Never use a dry cloth, as it can scratch the emulsion.
    • Flattening Warped Prints: If prints are significantly curled, place them under light, clean weights (like books covered in acid-free paper) on a flat surface for a few days. Avoid extreme heat or direct sunlight, which can worsen damage.

    AI restoration tools are powerful for bringing faded colors and obscured details back to life. However, preventing further physical damage is your most critical first step. This careful handling ensures the AI has clear, unmarred data to work with, leading to the most authentic and beautiful results for your cherished memories.

    Digitizing Faded Baby Polaroids and Prints

    Capturing those precious baby Polaroids and faded prints digitally requires a careful approach. Use a modern smartphone with a good camera and a dedicated scanning app. Apps like Google PhotoScan employ computational photography, cleverly combining multiple shots to eliminate distracting glare and perspective distortions from shiny surfaces. This means your digitized memories appear as flat and clear as possible.

    Here's how to get the best digital copy:

    1. Prepare Your Space: Find a well-lit area, preferably with diffused natural light.
    2. Position the Photo: Lay the print flat on a contrasting, non-reflective surface.
    3. Open Your App: Launch Google PhotoScan or a similar app.
    4. Scan: Follow the app's on-screen guides. It will likely prompt you to take photos from different angles.
    5. Review and Save: The app will process the images into a single, enhanced file. Save it in the highest resolution available.

    For comprehensive guidance on digitizing old photos using a smartphone, refer to this detailed guide.

    Pro Tip: A smartphone camera released within the last two years will offer superior quality for this task. Aim for the highest quality digital file possible, as this provides the best foundation for subsequent AI restoration. This ensures you can restore faded baby polaroid online with the most detail.

    AI-Powered Restoration: Reviving and Colorizing Memories with BringBack AI

    AI-Powered Restoration: Reviving and Colorizing Memories with BringBack AI
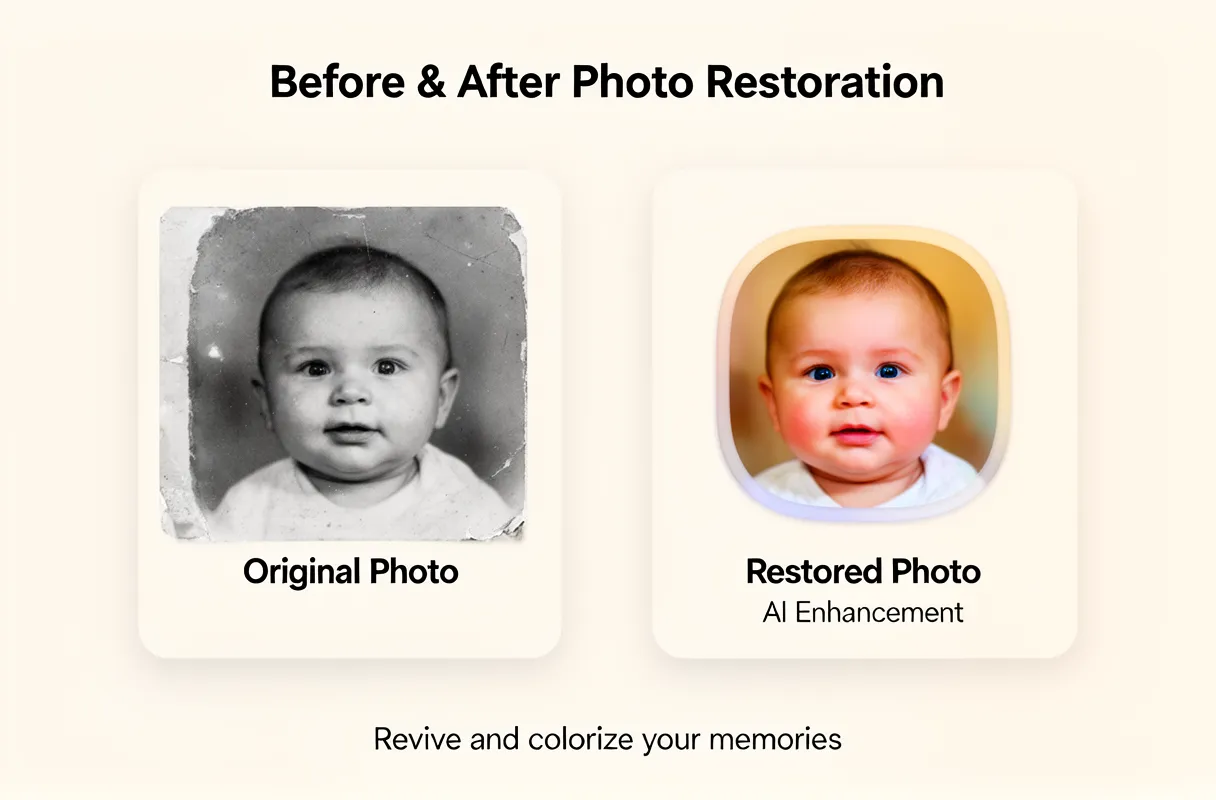
    AI photo restoration uses models trained on millions of images to automatically repair, enhance, reconstruct textures, sharpen details, remove scratches, fix fading, sharpen blurred areas, upscale, and colorize vintage baby photos AI.

    Our platform, BringBack AI, makes this process incredibly simple and accessible. You can instantly revive your most cherished memories with just a few clicks.

    Here’s how to bring your old photos back to life:

    1. Upload your damaged or still photo.
    2. BringBack AI processes and restores/animates the image automatically.
    3. Download your high-resolution photo or animated video.

    It's that easy to colorize vintage baby photos AI and see them as they once were.

    You'll find our pricing is designed for flexibility. Our starter pack is $5.99 for 10 Credits, the pro plan offers 30 credits for $12.99, and our family plan gives you 60 credits for $21.99. Each credit is used for one old photo restoration, ensuring clear value. Discover more about restoring your precious old photographs with AI technology. Discover more about restoring your precious old photographs with AI technology.

    Our goal is to help you preserve those irreplaceable moments, offering a simple yet powerful way to ensure your family's history remains vibrant.

    Choosing the Right AI Tool and Understanding Feature Differences

    Selecting an AI photo restoration tool depends on your specific needs, much like choosing the right tool for a delicate repair. Some tools excel at bringing back faded colors, while others focus on mending severe physical damage. It's essential to understand these differences before committing your precious memories.

    Many free online tools offer basic enhancements, but they often come with limitations. These typically include lower download resolutions, prominent watermarks, and restricted daily usage. Paid subscriptions or credit systems, like those offered by BringBack AI, provide greater flexibility and higher quality output.

    Here's a look at how different tools stack up:

    Feature/Tool BringBack AI (Credits) Evoto AI LetsEnhance.io Canva Magic Studio (Pro)
    Primary Focus Restoration, Colorization, Animation General Enhancement, Ease of Use Upscaling, Sharpening, Old Photos Design, Editing, AI Tools
    Pricing Model Credit Packages (1 Credit/Photo) Subscription tiers, Pay-as-you-go Subscription tiers, Credits Subscription (Canva Pro)
    Download Quality High-Resolution High-Resolution High-Resolution High-Resolution
    Watermarks None None None None (with Pro subscription)
    Ease of Use Simple Upload & Process Recognized for Ease of Use Moderate, dedicated models User-friendly, integrated
    Special Features Animation, Colorize vintage baby photos AI AI Portraits, Background Removal 'Authentic mode' toggle Magic Edit, Magic Expand

    Evoto AI, for instance, is frequently praised for its user-friendliness, making it a strong contender if simplicity is your priority. Over 1 million photographers use the platform, recognizing its straightforward approach. LetsEnhance.io, on the other hand, offers specialized models, including a dedicated one for old photos, complete with an 'Authentic mode' toggle. This feature helps maintain the original feel of the photograph, preventing an overly processed look. Exploring advanced tips for colorizing black and white photos can also lead you to discover how tools like this can aid in genealogical research.

    Canva's Magic Studio, accessible via its Pro subscription, bundles several AI tools like Magic Edit and Magic Eraser. While powerful for general design and image manipulation, its photo restoration capabilities might be less specialized than dedicated platforms. For truly impactful restorations, especially when dealing with severe fading or complex colorization needs, consider the specific functionalities.

    Addressing Common Challenges and Privacy Concerns

    When AI restoration doesn't quite hit the mark, unexpected results can be frustrating. Common issues include an over-processed, 'plastic' look on faces or unnatural color casts. Artifacts or strange textures can also appear.

    Here's how to tackle these common restoration hurdles:

    • Over-processing: Dial back intensity settings if your tool allows. Some platforms offer different "strength" levels.
    • Unnatural Colors: Look for manual color balance or hue adjustments. Sometimes, a subtle touch-up is needed.
    • Artifacts/Grain: Try a different AI model or tool. For instance, LetsEnhance's 'Authentic mode' toggle can sometimes smooth out rough AI output.
    • Facial Distortion: This is tricky. Use tools that focus on facial enhancement specifically, or be prepared for manual correction.

    Dealing with privacy across various AI platforms requires vigilance. While many promise security, the reality can differ. It’s important to understand how your images are used.

    Evoto AI, for example, explicitly states its commitment to user privacy. They affirm that user images and data are not used to train generative AI models without explicit permission. This is a key distinction from platforms where your uploads might contribute to a broader AI learning pool.

    However, some AI platforms, like Nano Banana via Higgsfield, may encounter 'sensitive materials' checks. This can lead to restoration failures for historical images that might be misconstrued by automated filters.

    For a detailed understanding of what AI photo restoration can and cannot fix, especially concerning severe damage, consult this resource: what AI photo restoration can and cant fix.

    The Honest Tradeoff: While AI offers speed and convenience, it struggles with severe damage where original content is truly lost (e.g., significant foxing, mold, or fire damage). Be aware that some platforms may also trigger 'sensitive materials' checks for historical images, causing restoration failures.

    Beyond Restoration: Secure Storage and Ethical Preservation

    Beyond Restoration: Secure Storage and Ethical Preservation
    Storing your restored memories securely is as important as the restoration itself. Proper organization prevents future loss and ensures your family’s history remains accessible.

    1. Best Practices for Digital Photo Storage

    You need a multi-layered approach for robust photo security. This means avoiding a single point of failure.

    • Cloud Storage: Services like Google Photos, Dropbox, or iCloud offer convenience and automatic syncing across devices. They are good for accessibility but can be vulnerable to account breaches or company policy changes.
    • Local Storage: External hard drives or Network Attached Storage (NAS) devices provide direct control over your files. They are immune to online breaches but can fail physically or be lost/stolen.
    • The 3-2-1 Backup Rule: For true peace of mind, follow this proven strategy: maintain at least three copies of your data, on two different types of media, with one copy stored offsite. This could mean your main computer, an external drive, and a cloud backup.

    2. Ethical Considerations in AI Restoration

    When AI reconstructs elements, especially faces, you balance historical fidelity with artistic enhancement. It's crucial to understand that AI is inferring missing details based on patterns.

    It can sometimes create an unintentionally altered or even fabricated likeness, especially if the original damage is severe. For situations demanding absolute historical accuracy, or when dealing with extensive damage like water stains or mold, consider professional manual restoration. This gives you finer control for complex fixes. You can learn more about advanced restoration techniques, including how to fix water-damaged photos with AI, in our guide on fixing water-damaged memories.

    3. Maintaining Authenticity

    While AI offers speed and impressive results, always review the final output critically. Compare the restored image to any existing references you might have.

    For highly specialized needs or when the original data is critically degraded, traditional software like Adobe Photoshop or GIMP offers granular control for skilled retouchers. These tools allow for precise manual adjustments where AI might falter, ensuring the highest level of historical accuracy.

    With your memories safely stored and ethically preserved, you have created a lasting legacy. You’ve successfully moved beyond mere restoration to true preservation.

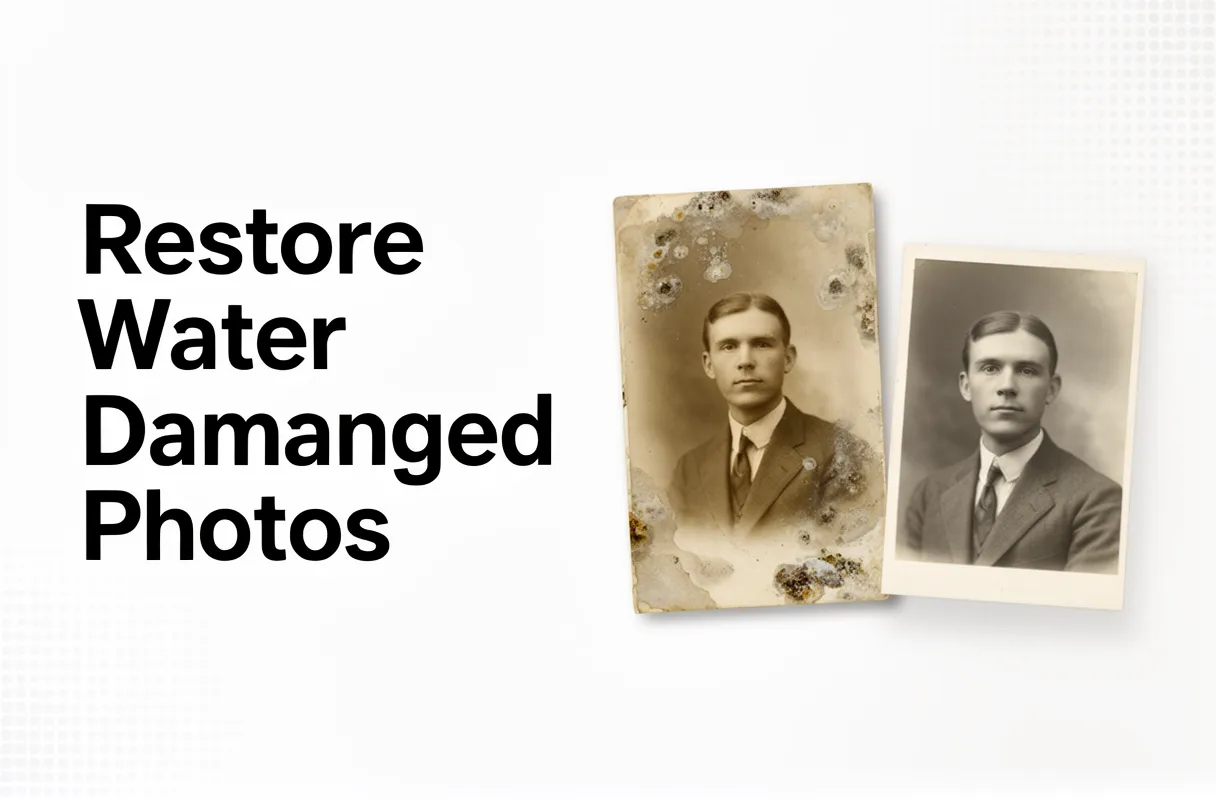
  • Water Damaged Photo Restoration: How to Fix Stains & Mold with AI

    Water Damaged Photo Restoration: How to Fix Stains & Mold with AI

    To restore water-damaged photos, you must first stabilize them immediately, then apply careful drying techniques, followed by gentle physical cleaning, and finally, leverage digital or AI-powered restoration tools. This comprehensive process can take several hours to days for initial steps and requires a moderate level of care and patience.

    What You Need:

    • Distilled water for rinsing.
    • Clean, absorbent materials like blotter paper or lint-free towels.
    • A flat, dry space with good air circulation.
    • A high-resolution scanner and access to photo editing or AI restoration software.

    Discovering your cherished photographs soaked can feel devastating. But don't despair; many water-damaged photos, especially those on more resilient modern papers, can absolutely be saved. Most believe the damage is permanent, but quick action combined with smart techniques makes a huge difference. This guide walks you through both hands-on physical fixes and the marvel of AI-powered digital restoration.

    By the end of this guide, you will have the knowledge and steps to tackle water damaged photo restoration, transforming seemingly lost memories into cherished keepsakes ready for sharing and long-term preservation.

    Emergency Measures: Saving Your Water-Damaged Photos Immediately

    Your precious photos have just endured a water disaster. Don't panic; immediate action is your most powerful tool. Swift, decisive steps can salvage memories that would otherwise be lost forever. The goal now is stabilization and preventing irreversible damage.

    Here’s how to begin:

    • Assess the Damage: Quickly survey the extent of the water exposure. Is it just dampness, or complete submersion? Note any contaminants like mud or chemicals.
    • Separate with Care: If photos are stuck together, DO NOT FORCE THEM APART. The gelatin layer on older photos becomes incredibly fragile when wet, like wet tissue paper. Forcing them will tear them. For modern resin-coated papers, separation might be easier but still requires caution.
    • Quick Rinse (If Needed): For photos covered in mud or contaminants, a gentle rinse under cool, running water can prevent staining. Use distilled water if possible to avoid mineral deposits. Hold photos by their edges and let water flow over the emulsion side. This is a temporary measure; proper drying follows.
    • Freeze Large Collections: If you have an overwhelming number of photos or albums, your best bet is to freeze them. Place batches in freezer bags (interleaving with wax paper if individual photos are stuck, but again, don't force). Freezing halts deterioration and buys you time for more methodical drying later.

    Remember, old photographs' gelatin layers soften dramatically when wet, making them highly susceptible to sticking. Likewise, photos dried while still in contact are nearly impossible to separate without damage. Acting within the first hours dramatically increases your chances of successful restoration. Stabilizing the photos now, even if they remain wet, is paramount according to conservation guidelines.

    Safe Drying Techniques: Preventing Further Damage & Mold

    Once photos are stabilized, safe drying is your next urgent priority. This prevents permanent sticking and the dreaded spread of mold.

    Photos should air dry, placed face up on absorbent material like clean paper towels or blotting paper. Change this material frequently as it absorbs moisture. Good air circulation is key; use a fan on a low setting, pointing away from the photos, to encourage gentle airflow. A dehumidifier can also create a drier environment, speeding up the process without applying heat.

    Never use direct heat. Forget hairdryers, ovens, or placing photos in direct sunlight. These methods warp, melt, and further damage the delicate emulsion. Think of it like trying to dry delicate silk with a blast furnace – it just doesn't work and causes more harm.

    Mold growth is a serious threat, thriving in damp conditions. Watch for fuzzy, discolored patches, often starting at the edges. If you spot minor surface mold on fully dry photos, a soft brush or a dry cotton swab can often remove it. For anything more significant, or if the mold is on still-damp photos, consult a professional conservator. Albums and mounted photos present unique challenges; their multiple layers trap moisture, requiring careful separation and support to prevent warping during drying.

    The goal here is slow, gentle evaporation. This painstaking process maximizes your chances of salvaging your cherished images.

    Physical Restoration: Tackling Stains, Wrinkles, and Mildew

    Once your water-damaged photos are completely dry, physical restoration can begin. This stage addresses the visible damage like wrinkles, stains, and any minor mildew.

    To flatten curled or wrinkled photos, try pressing them gently. Place the photo between two sheets of acid-free blotter paper and then inside a heavy book. Apply even pressure for several days, checking periodically. Avoid direct heat, which can cause further damage.

    For surface stains or dirt, a dry, soft brush or a cotton swab lightly dampened with distilled water can work. Always test on an inconspicuous corner first. For minor surface mold on fully dry photos, a soft brush or a dry cotton swab can often remove it. For anything more significant, or if the mold is on still-damp photos, consult a professional conservator. Albums and mounted photos present unique challenges; their multiple layers trap moisture, requiring careful separation and support to prevent warping during drying.

    The goal here is slow, gentle evaporation. This painstaking process maximizes your chances of salvaging your cherished images.

    Severe damage, such as extensive mold, deep tears, or chemical stains that have penetrated the emulsion, may require professional attention. Conservators have specialized tools and knowledge to handle these delicate situations without causing further harm. You'll know it's time to call in an expert if home methods aren't effective or if you fear making the damage worse.

    Digital Restoration & AI Tools: Breathing New Life into Damaged Images

    Digital restoration takes over where physical methods end, using software to mend what the naked eye can still see are cracks and fades. You begin by scanning your damaged photos at the highest possible resolution, even if they appear nearly blank. This captures every pixel of detail, providing the raw material for digital repair.

    Software like Adobe Photoshop or the free alternative GIMP lets you meticulously rebuild torn sections and erase water spots. You can adjust contrast to bring back faded colors and sharpen blurry details. Think of it like a digital surgeon, carefully stitching and smoothing.

    But where AI truly shines is in automating these painstaking tasks. AI-powered tools can automatically detect and remove scratches, reduce image noise, and even enhance fine textures you thought were lost forever. They can intelligently colorize black-and-white images, breathing vibrant life into forgotten faces. Tools such as Bringback AI, MyHeritage Photo Enhancer or VanceAI excel at this, often delivering impressive results with minimal user input.

    The hard truth is that while AI is powerful, it's not magic. For severely degraded images, especially those with significant emulsion loss or complex chemical damage, AI might struggle. It's best used as a potent assistant, augmenting your own careful edits rather than replacing them entirely for perfect results. You still need a discerning eye to guide the process.

    Preventative Measures: Protecting Your Photos from Future Water Damage

    Protecting your precious photos means safeguarding them from future threats, especially water. By implementing smart storage and backup strategies, you can keep your memories safe for generations to come.

    Store Photos in a Secure, Climate-Controlled Environment

    Proper storage is your first line of defense. Photos should live in acid-free boxes designed for archival purposes. These boxes prevent chemical reactions that can damage your prints over time. If possible, choose a climate-controlled storage unit or a dedicated space in your home that maintains a consistent temperature and humidity. Avoid basements, attics, or garages where temperature swings and moisture are common.

    • Use archival sleeves or interleaving paper to prevent photos from sticking together.
    • Keep storage boxes off the floor, ideally on shelves, to avoid direct contact with potential water sources.
    • Position your storage away from pipes, windows, and exterior walls that might be prone to leaks or condensation.

    Create Robust Digital Backups

    A physical backup isn't enough. You need digital copies, too. Scan your photos at a high resolution, even if they appear fine. Store these digital files in at least two separate locations.

    1. Cloud Storage: Services like Google Drive, Dropbox, or specialized photo backup platforms offer off-site protection.
    2. External Hard Drives: Keep a physical backup in a different location from your primary computer.

    Regularly check your digital backups to ensure they remain accessible and uncorrupted. This layered approach acts like having a spare tire and a roadside assistance plan for your memories.

    Regularly Inspect Your Storage Areas

    Don't just set and forget. Make it a habit to inspect your photo storage areas at least twice a year. Look for any signs of moisture, mold, mildew, or pest activity. Early detection allows you to address small issues before they become catastrophic floods for your photos. If you notice any dampness or unusual smells, act immediately to find and fix the source. This vigilance is a small price to pay for the long-term safety of your most cherished images.

  • How to Combine Photos of Grandparents and Grandchildren with AI

    How to Combine Photos of Grandparents and Grandchildren with AI

    To combine photos of grandparents and grandchildren with AI into a single, cohesive portrait, you select high-quality individual images and upload them to a dedicated photo joiner AI tool like BringBack AI. This process typically takes under 5 minutes of active user time and requires basic tech skills.

    Prerequisites:

    • High-resolution photos of grandparents and grandchildren (JPG, PNG, HEIC formats).
    • A stable internet connection.
    • A desktop computer, tablet, or smartphone.
    • BringBack AI credits for processing (e.g., 2 credits per family photo merging).

    Manually editing family photos to merge grandparents and grandchildren photos online often results in stiff, unnatural composites that fail to capture genuine connection. Traditional photo editing struggles to match lighting, textures, and depth across different images and eras. This ‘cut-and-paste’ look can feel disrespectful or simply disappointing, especially when you’re trying to create a meaningful memorial or bridge generations that never met. It misses the authentic feeling you want.

    By the end of this guide, you will hold a naturally blended, emotionally resonant AI-generated family portrait. It will seamlessly unite your loved ones across generations, creating a cherished memory ready for printing, sharing, or becoming a digital heirloom.

    Preparing Optimal Photos for AI Family Portrait Merging

    Getting your photos ready is the first real step toward creating that perfect AI family portrait. High-resolution photos for AI are non-negotiable for the best results. This means picking images that are clear, well-lit, and free from excessive noise or blur. Most AI photo merging tools, like ours, work directly in your web browser. You just need a stable internet connection and a device – be it your smartphone, tablet, or computer.

    You’ll typically upload photos in common formats like JPG, JPEG, PNG, WEBP, or HEIC. Keep an eye on file size limits, usually between 10MB and 25MB per image, to avoid upload issues.

    Input Photo Selection Best Practices

    Selecting the right input photos is more art than science, but following a few guidelines dramatically improves the outcome.

    • Consistent Lighting: Aim for photos where the light falls similarly on each person. This helps the AI blend skin tones and shadows naturally. Avoid images with harsh shadows or blown-out highlights if possible.
    • Similar Poses: Subjects looking towards the camera, or in similar directions, make the blending process smoother. If someone is looking far off to the side in one photo and directly at the lens in another, the AI will have a harder time creating a cohesive group.
    • Neutral Backgrounds: While the AI can often handle busy backgrounds, simpler, more uniform backgrounds across your chosen photos will lead to a cleaner merge. Think plain walls, simple outdoor scenes, or studio backdrops.
    • Original Resolution is Key: Always use the highest resolution original files you have. Don’t use screenshots or heavily compressed social media versions. The more detail the AI has to work with, the sharper and more realistic your final portrait will be.

    Because these tools are browser-based, you don’t need to download any software. This makes the process accessible across iPhones, Android devices, iPads, Macs, and Windows PCs.

    Understanding BringBack AI Credits and Costs

    BringBack AI uses a clear credit system to manage photo restoration, animation, and merging costs. You purchase credits in one-time payment packages, ensuring your investment never expires. This approach contrasts with subscription models, offering you flexibility and direct value for your specific needs.

    Here’s how BringBack AI credits break down:

    • 1 credit restores one old or damaged photo.
    • 2 credits are needed to merge individual family photos into a single portrait.
    • 10 credits animate a single still photo into a short video.
    • 20 credits create a “hug” video featuring family members interacting.

    We offer several BringBack AI credit packages designed for different user needs:

    PlanPriceCreditsCost Per CreditBest For
    Starter$5.9910$0.59Trying out restoration or small merges
    Pro$12.9930$0.43Frequent users, multiple family photos
    Family$21.9960$0.366Extensive restoration and animation projects

    Many AI platforms offer free trials or small initial credit allowances. However, BringBack AI focuses on transparent, one-time payment AI photo tools that put you in control of your budget and project scope, without ongoing commitments. You know exactly what you’re paying for.

    Seamlessly Combine Grandparents and Grandchildren Photos with BringBack AI

    Bringing old photos of grandparents and new ones of grandchildren together creates a richer family story. Our tool simplifies merging these cherished moments into a single, cohesive image. You upload your still or damaged photos, our AI restores and blends them, and then you download your new high-resolution portrait.

    Here’s how BringBack AI makes combining generations simple:

    1. Upload Your Images: Go to dashboard and choose family portrait tool. Start by uploading the distinct photos you want to combine.
    2. AI Processing: Our advanced algorithms then work their magic. They handle the ‘Old Photo Restoration’ for older images, ensuring a consistent look. The AI then performs ‘Generational Blending,’ matching lighting, skin tones, and color grading for a natural integration. It even uses ‘AI Position Tracking’ to arrange subjects realistically, as if they were in the same original shot.
    3. Review and Download: In about 30-60 seconds, you’ll see an instant preview of your combined image. The AI aims for ‘Group Harmonization,’ making sure everyone looks like they belong together.

    Our system is designed to make adding a baby to grandparents’ photos experience effortless.

    Refining and Finalizing Your AI-Generated Family Portrait

    After merging photos, take time to carefully evaluate the result. Look for signs of unnatural blending, like mismatched lighting or sharp edges where people should connect. Issues such as distorted faces, plastic-like skin textures, or blurry hands are common artifacts in AI image generation. It’s essential to compare the AI’s output against your original photos to ensure the quality of the AI portrait feels respectful and believable.

    Manage your expectations, too. While AI is advancing rapidly, achieving perfect photorealism in sensitive family portraits, especially those involving deceased loved ones, can still be a challenge. Some services offer a hand-retouched finish by professional artists for premium portraits, which can bridge the gap if AI alone falls short of your desired realism.

    For optimal results, focus on selecting clear, high-resolution source images. The output from BringBack AI is generally high-resolution, making it suitable for printing. However, for large canvas prints, confirm the exact resolution and format. Preparing your AI images for print involves ensuring the file is crisp and free from the common issues mentioned earlier.

    Ethical Considerations for AI Memorial and Family Photos

    When creating memorial or generational photos with AI, privacy and consent are paramount. It’s important to understand how your images are handled and to approach the process with deep respect for the individuals depicted. Many platforms, like ours, encrypt your photos and keep them private, ensuring they aren’t used for other purposes.

    Approaching these creations with sensitivity ensures they serve as genuine tributes. Consider the emotional impact on family members who will view the final image. Managing expectations is key; AI tools provide a way to visualize memories, but they are representations, not direct reproductions.

    Here are key ethical points to consider:

    • Respectful Representation: Ensure the AI-generated image honors the person’s likeness and spirit. Avoid creating images that could be misconstrued or disrespectful.
    • Privacy Safeguards: Choose tools that clearly outline their data privacy policies. Look for encryption and a commitment to keeping your uploaded photos secure.
    • Consent (Where Applicable): While consent from deceased individuals is impossible, consider the wishes of living family members. Discuss the creation process with those closest to the memory.
    • Authenticity and Transparency: Be open about the use of AI. These are created memories, a modern way to connect with the past.
    • Emotional Well-being: Recognize that AI-generated memorial photos can evoke strong emotions. Approach their creation and sharing with care and empathy.

    By prioritizing these ethical considerations, you can use AI to create meaningful and respectful digital mementos.

    Beyond Merging: Preserving and Animating Family History with AI

    AI tools go beyond simply merging faces. They can reconstruct faded memories for family reunions or add deceased loved ones into new photos, creating a profound connection to the past. For an even more immersive way to bring your family photos to life, discover how making old photos move and smile can add a new dimension to cherished moments.

    AI photo restoration is essential for bringing damaged or static images back to life. This technology can mend tears, correct fading, and even fill in missing details. Our platform, BringBack AI, focuses on a simple, secure, and authentic way to achieve this.

    Beyond static restoration, AI can animate old family photos. Imagine seeing a smile on a grandparent’s face from a photo taken decades ago, or watching a childhood picture subtly come alive. This is a powerful way to preserve family memories with AI, offering a glimpse into the past that static images can’t provide.

    BringBack AI’s core mission is to make this process accessible and trustworthy. We aim to give you back your history, not just a digital copy.

  • The 3-Minute Triage for a Newly Discovered Box of Corrupted Photos

    The 3-Minute Triage for a Newly Discovered Box of Corrupted Photos

    To restore your precious memories from digital corruption, you must first confirm the damage type and then use specialized online tools for corrupted image repair online. This precise approach ensures effective recovery. This process often takes mere minutes and requires basic computer literacy.

    What You Need:

    • The corrupted image file(s).
    • A stable internet connection.
    • (Optional but useful) Another healthy photo from the same device to use as a reference.

    You might have just found a dusty hard drive, full of old memories. But instead of vibrant pictures, you see garbled files, error messages, or blank thumbnails. This isn't physical damage like a torn print; it's digital corruption, a common gut punch for anyone hoping to restore old photos. Many feel a deep sense of loss when facing these broken files.

    By the end of this guide, you will have a clear path to fix damaged photos through a streamlined digital image repair triage, ready for you to relive and share those unforgettable moments.

    Diagnosing Your Damaged Photos: Digital Corruption or Physical Wear?

    Diagnosing Your Damaged Photos: Digital Corruption or Physical Wear?

    Old memories can feel broken when the pictures we cherish turn into garbled files or display error messages. This often isn't physical damage like a torn print, but digital corruption, a common gut punch when trying to restore old photos. Many feel a deep sense of loss facing these broken files.

    By the end of this guide, you will have a clear path to fix damaged photos through a streamlined digital image repair triage, ready for you to relive and share those unforgettable moments.

    The first step to saving your precious images is identifying whether the problem lies with the digital file itself or the physical print. Digital corruption means the file's data is scrambled, while physical wear refers to damage on the actual photo paper.

    Digital Corruption vs. Physical Damage: What's the Difference?

    • Digital Corruption:

    • Causes: Often stems from file transfer failures, power interruptions during saving, virus attacks, or incomplete downloads.
    • Errors: You might see unsupported file types, problematic filenames (using special characters or exceeding length limits), or files too large for a specific platform. The image file itself is unreadable by software.
    • Symptoms: Garbled pixels, incorrect colors, blank images, or complete inability to open the file.
  • Physical Damage:

  • Understanding whether you're dealing with digital photo corruption or physical photo damage is key. Identifying the type of issue will guide you toward the right steps to restore old photos and ensure you choose the most effective methods for recovery.

    Essential Steps for Repairing Corrupted Digital Images Online

    Essential Steps for Repairing Corrupted Digital Images Online

    Here are the essential steps for fixing your corrupted digital images online:

    1. Prepare Your Image File: Before uploading, create a local copy of your damaged photo. Rename the file to use only alphanumeric characters to prevent upload errors. This simple step ensures smoother processing by online tools.
    2. Select a Reputable Online Repair Service: Choose a service known for its effectiveness in handling digital corruption. Look for platforms that can process a variety of file types and camera brands, such as those specializing in corrupted image repair online for JPEGs, RAW files, and more.
    3. Upload and Initiate Repair: Upload your prepared image to the chosen online tool. The AI will then analyze the file's structure to identify and repair damage.
    4. Review and Preview the Results: Once the repair is complete, a preview will usually be provided. Check for restored clarity, accurate colors, and the absence of artifacts or distortion.
    5. Download Your Restored Photo: If you're satisfied with the preview, proceed to download the repaired image. Save it to a secure location immediately.

    How to Fix Corrupted Images Using Online Tools

    When your precious memories are locked away in a damaged file, the thought of losing them can be disheartening. Fortunately, a straightforward path exists to recover these digital treasures. Online photo repair steps are designed to be accessible, even if you’re not a tech expert.

    The primary function of services like JPG.Repair is to address digitally broken files. This includes everything from unreadable JPEGs to corrupted RAW files from your professional camera or even your phone. They specifically target issues that render your image unopenable, a problem often stemming from incomplete transfers or storage media errors.

    Uploading Your Damaged File

    Your journey begins with preparing the file. Make a copy of the corrupted image and rename it to avoid any special characters that might cause issues. Then, you'll simply Click Upload on your chosen platform. Most tools can handle a wide array of file types and brands, including Canon, Nikon, Sony, Panasonic, GoPro, iPhone, Dashcam, Android, and Drones. This broad compatibility means your specific photo is likely supported.

    The AI-Powered Repair Process

    Once uploaded, the AI gets to work. It scans the digital footprint of your image, identifying what's broken – often a corrupted header or damaged data blocks. The system then works to reconstruct these elements, attempting to rebuild the image from the available data. This is the core of corrupted image repair online; it's a sophisticated process made simple for the end-user.

    Previewing and Securing Your Memory

    After the AI has done its work, you'll be presented with a preview. This is your chance to see the magic happen. You can examine the restored clarity, check if the colors have been accurately brought back, and ensure that strange artifacts are no longer present. This step is vital to how to fix corrupted images successfully before you commit to downloading.

    Preparing Your Files and Choosing the Right Service

    Before you can begin restoring your precious memories, image file preparation is crucial. Start by copying your damaged photo to a local drive. Then, rename the file to include only alphanumeric characters (letters and numbers). Avoid spaces, special symbols, or excessive length, as these can cause upload errors. This simple step significantly improves your chances of a successful repair.

    Many online tools restore a corrupted image by replacing its damaged JPEG header with a healthy one. If your chosen service requires you to provide a healthy JPEG header, try to find another photo taken with the same camera and identical settings. This duplicate can often provide a suitable, clean header. For a deeper understanding of JPEG header corruption and various repair approaches, refer to this comprehensive guide. If the original device isn't available, some platforms offer generic headers.

    We understand that online repair privacy is a top concern. Reputable services ensure your uploaded images are typically not saved after the repair process and are permanently deleted. This safeguards your personal data and cherished memories. Before selecting a tool, it's wise to research tool reviews to check their success rates and data handling policies. Choosing the right repair tool is key, and for a broader look at how AI is revolutionizing image restoration, explore ai photo restoration online.

    A Pro Tip: Always ensure you have a stable and strong internet connection before initiating an upload. This prevents interruptions that could corrupt the file further. If your chosen repair service requires it, here's how users can obtain or identify a 'healthy JPEG header'.

    Uploading, Repairing, and Downloading Your Restored Image

    You've prepped your precious memories and selected the right tool. Now, let's bring them back to life.

    Uploading Your Corrupted Image

    Start by uploading your corrupted image file to the chosen online repair tool. Many services, like JPG.Repair, are designed to handle files from Canon, Nikon, Sony, GoPro, iPhones, and more. Simply drag and drop your file or use the Click Upload button. The AI will then scan and analyze the image's internal structure, identifying the specific areas of corruption.

    Reviewing the Repair Preview

    Once the initial scan is complete, you'll typically see a repair preview. This is where you review the repair preview. Look closely for restored clarity, accurate colors, and the absence of visual artifacts. This step is critical for ensuring the service has accurately fixed the damage.

    Understanding Online Photo Repair Cost and Time

    The online photo repair cost is usually based on repair units. For example, JPG.Repair charges $5 per unit plus VAT, with a minimum purchase of 4 units ($20). The image repair time varies. Simple corruption might take seconds to minutes, while complex cases, especially those requiring manual review via a 'custom recovery service' (often included at no extra cost by professional platforms), could extend to an hour or more.

    Downloading Your Repaired Image

    After you're satisfied with the preview, proceed to download the fully repaired image. Ensure you save it to a safe location immediately. This is the magical moment your cherished memories are restored and ready to be shared or preserved for generations.

    Pro Tip: Always save multiple copies of your restored image to different devices or cloud storage to prevent future loss.

    Troubleshooting Online Repair Failures and Advanced Solutions

    Troubleshooting Online Repair Failures and Advanced Solutions

    Encountering issues with online photo repair can be frustrating, but most problems have straightforward fixes.

    Troubleshooting Common Online Repair Errors

    Even with the best intentions, online repair processes can sometimes hit snags. Understanding these common roadblocks and their quick fixes can save you time and frustration.

    Error Message Likely Cause Immediate Solution
    Upload Failed Filename contains unsupported characters; file size exceeds limits. Rename file to use only alphanumeric characters. Compress the image if it's too large.
    Processing Error Temporary server issue; incompatible image structure. Wait a few minutes and try the upload again. If persistent, the corruption might be too severe for the automated tool.
    Preview Not Showing Significant header corruption; image data is largely unreadable. The tool may not be able to generate a preview. Proceed to repair and check the final download.
    Poor Repair Quality Corrupted header doesn't match available healthy ones; severe data loss. Try a different online repair service or use a known good header from an identical shot if possible.
    Unsupported Format Uploaded file is not a standard JPEG or common image format. Convert your image to JPEG or PNG using basic photo editing software before uploading.

    It's rare, but sometimes the corruption is simply too deep for automated online tools to fix. This often happens when critical parts of the image data have been overwritten.

    When Online Tools Reach Their Limit

    Online repair services are incredibly convenient for most common issues, like fixing header problems or minor data corruption. However, they do have limitations. Severely damaged files, especially those with extensive data loss or overwritten sections, might not yield satisfactory results through automated online processes.

    If you've tried multiple online services and are still not getting the desired outcome, it's time to consider more advanced solutions. These methods often involve specialized desktop software or even manual intervention by experts.

    The Hard Truth: Automated online tools excel at common issues. For deep corruption, specialized software or manual review becomes necessary.

    Common Errors and Quick Fixes

    When an online photo repair tool falters, it usually signals one of a few common issues. Understanding these errors saves you time and frustration.

    Error Message Likely Cause Immediate Solution
    Invalid file format Unsupported image type or corrupted header. Convert the image to a widely accepted format like JPEG or PNG.
    Upload failed Network interruption, large file size, or filename issue. Check your internet connection. If file size is the problem, reduce the image's resolution. Rename the file to contain only alphanumeric characters.
    Processing error Severe corruption, unsupported compression, or tool limitation. Try a different online repair service or consider advanced desktop software.

    A fix invalid file format error often means your photo wasn't saved in a standard format the tool recognizes. Simply converting it using basic photo editing software usually resolves this. For filename issues, avoid special characters or spaces. Renaming image files to contain only alphanumeric characters is a quick win.

    If you're hitting a file size limitation, you might need to shrink the image before uploading. Tools like TinyPNG can compress images without significant quality loss, making them suitable for upload.

    For a broader understanding of common image errors, their causes, and practical solutions, including issues with file types and filenames, consult this resource.

    Encountering a processing error photos message can be more complex. It might indicate that the damage to your image is too severe for standard online algorithms, or the file uses a specific type of compression the tool doesn't support. In such cases, exploring specialized desktop software or reaching out for a custom recovery service becomes the next logical step. We've found that for deep corruption, this manual review can often salvage details automated processes miss.

    Exploring Advanced and Offline Repair Methods

    When online photo repair hits its limits, it's time to consider more potent, offline solutions. This is particularly true when dealing with severely corrupted images, files that exceed upload size limits, or specific damage patterns that automated online tools can't decipher. You might encounter messages indicating that the damage is "too complex for standard algorithms" or that the file's data blocks are "irreparably overwritten." In these scenarios, desktop software offers a deeper level of intervention.

    Our team found that EaseUS Fixo Photo Repair stands out as a robust offline option. This advanced image repair software is designed to tackle issues that online services often miss. It specifically targets corrupted JPEG headers, pixelation, distortion, underexposure, overexposure, and blurriness.

    Here’s what sets it apart for severe photo corruption:

    While it requires installation, this offline photo repair tool provides a more thorough and reliable method for salvaging precious memories when online attempts fall short. We recommend this for any cherished photograph that seems beyond simple digital restoration.

  • DIY Photo Restoration vs Pro Services: Which Is Right For Your Photos?

    DIY Photo Restoration vs Pro Services: Which Is Right For Your Photos?

    You know the feeling.

    You pull out that old shoebox, filled with generations of memories.
    And there they are: faded smiles, crumbling edges, tears, and water damage that tell their own sad story.

    You stare at them, a knot in your stomach, wishing you could bring them back to life.

    You’ve probably even tried a quick fix yourself. You dove into some photo editing software, only to emerge hours later, frustrated and defeated.

    It feels like a massive, overwhelming project, right? You tell yourself it’s either too complicated for DIY, or professional services are just too expensive.

    But what if preserving your family’s legacy didn’t have to be a headache or break the bank?

    The real struggle isn’t the damage itself. It’s knowing whether to tackle it yourself or trust a pro. We get it.

    That’s why we’re here to give you the no-fluff, honest truth about both options. We’ll lay out exactly when DIY makes sense and when bringing in the experts is the only way to go.

    We even built our tool, BringBack, to make that choice easier and ensure your memories get the care they deserve. This isn’t about pushing one over the other; it’s about empowering you to make the best decision for your treasured photos.

    Understanding Photo Damage: What Can Actually Be Fixed?

    Before you decide “DIY or Pro,” you need to know what you’re up against.

    Let’s break down the most common culprits that attack your precious memories:

    • Scratches: These surface-level annoyances are usually the easiest to tackle.
    • Tears: Ranging from small rips to significant missing chunks, tears demand more finesse.
    • Fading: Colors bleed out over time, leaving photos washed out and lifeless.
    • Water Damage: Warping, discoloration, and staining are the ugly results of water exposure.
    • Mold: A particularly nasty issue, mold literally eats away at the photo’s emulsion.

    DIY: When to Roll Up Your Sleeves

    Got a few scratches or minor fading? DIY might be your answer.

    Photo editing software, like Adobe Photoshop, can work wonders. You can often achieve impressive results with patience and a good tutorial.

    But proceed with caution.

    Calling in the Pros: When It’s a Must

    Are you dealing with extensive water damage, major tears, or mold?

    It’s time to call a professional.

    These severe issues require specialized skills and software to truly restore the image. Professional restoration services employ experienced digital artists who manually repair each photo. They use non-destructive processes with complex layering and masking techniques, ensuring the original photo’s integrity is preserved.

    DIY has its limits. If you’re not careful, you risk causing more damage or losing precious detail forever.

    We’ve seen it all here at BringBack. Photos that were “fixed” with the wrong techniques, making the problem ten times worse.

    That’s why we always recommend a professional for anything beyond basic touch-ups.

    Your DIY Photo Restoration Guide (If You Dare)

    If you’re still determined to give it a shot yourself, here’s a basic guide. We’ll walk you through the process, from digitizing your photos to the first restoration steps.

    Step 1: Digitize Your Photo

    First, you need a high-quality digital version of your photo.

    • Scanning: Use a flatbed scanner for the best quality. Set it to a high resolution (at least 600 DPI).
    • Smartphone: If you don’t have a scanner, a smartphone can work in a pinch. Just ensure you have bright, even lighting and hold the camera perfectly steady and parallel to the photo.

    Step 2: Choose Your Weapon (Software)

    Next, import your digital photo into editing software.

    • Adobe Photoshop: The professional-grade industry standard.
    • GIMP: A powerful and completely free alternative.
    • Online Editors: Many web-based editors offer basic tools for quick fixes.

    Step 3: Correct the Color

    Old photos often have faded or bizarrely skewed colors.

    • Adjust Levels: Use the “Levels” tool to correct the overall brightness and contrast.
    • Adjust Color Balance: Fine-tune the color sliders (Cyan/Red, Magenta/Green, Yellow/Blue) to bring back natural hues.
    • Experiment: Don’t be afraid to play with different settings, but make small adjustments.

    Step 4: Remove Scratches

    Scratches are common, but they can often be fixed.

    • Healing Brush Tool: Use this tool to sample nearby pixels and paint over the scratches.
    • Clone Stamp Tool: The clone stamp is also effective for larger scratches or blemishes.
    • Be Precise: Work carefully and zoom in to avoid blurring important details like eyes or text.

    Step 5: Repair Tears

    Tears require more advanced skills and a lot of patience.

    • Patch Tool: The patch tool lets you select a clean area to copy over the damaged section.
    • Content-Aware Fill: Photoshop’s Content-Aware Fill can sometimes magically fill in missing areas.
    • Patience is Key: This is not a quick fix. Tear repair can be extremely time-consuming.

    Step 6: Enhance the Details

    Finally, you can sharpen the image to bring out crisp details.

    • Unsharp Mask Filter: Use this filter sparingly. Too much will create ugly digital “artifacts.”
    • Adjust Clarity: Increasing clarity can enhance textures and details without over-sharpening.
    • Zoom In: Always check your work at 100% zoom to spot any unwanted effects.

    A Word of Caution

    DIY photo restoration can be rewarding.

    But it can also be frustrating and incredibly time-consuming. If you’re not careful, you could easily make the damage worse.

    Companies like Forever Studios and Pixels Photo Art have years of experience and have restored thousands of images. They have the skills and tools to handle even the most challenging cases.

    An Easier Alternative: BringBack

    We built BringBack to simplify photo restoration for everyone.

    • AI-Powered: Our tool uses AI to automatically fix many common issues in seconds.
    • User-Friendly: No technical skills are required. Just upload your photo.
    • Fast Results: See your restored photos in minutes, not hours.

    Our tool offers a powerful balance between DIY and professional services. It’s the perfect option if you want to restore your photos quickly and easily, without a steep learning curve.

    DIY Software Options: Beyond Photoshop

    Photoshop is the industry standard, but it’s not the only game in town. If you want more manual control than an AI tool, here are some other options.

    • GIMP: A free and open-source image editor.

      • Pros: It offers many of the same features as Photoshop, at no cost.
      • Cons: The interface can be clunky and has a steeper learning curve.
      • Cost: Free
    • Fotor: A user-friendly photo editor with a range of tools.

      • Pros: Easier to use than Photoshop or GIMP. Offers one-click enhancements.
      • Cons: The free version is limited. Advanced features require a subscription.
      • Cost: Free, with paid upgrades. Subscriptions start around $8.99/month.
    • Photopea: A free online photo editor that works in your browser.

      • Pros: No software installation required. It supports many file formats.
      • Cons: Can be slower than desktop software and requires an internet connection.
      • Cost: Free (with ads)
    • BringBack: Our AI-powered photo restoration tool.
      • Pros: Dramatically simplifies the restoration process using AI. Extremely user-friendly with fast results.
      • Cons: Lacks the granular manual controls of traditional software. Best for users who prioritize speed and ease of use.
      • Cost: Starts with a free trial, with subscription options available.

    The best option depends on your skill level and budget. If you’re a tech-savvy artist, GIMP or Photoshop are powerful choices. If you just want it done, Fotor or BringBack are a better fit.

    Professional Photo Restoration: What to Expect

    If the damage is severe or the photo is simply too important to risk, it’s time to call a pro.

    Professional services offer a comprehensive, hands-off approach. They handle everything from start to finish. You just provide your damaged photo and receive a beautifully restored image.

    The process typically involves these steps:

    1. Consultation: You describe the damage and what you want fixed.
    2. Digitizing: You’ll mail the physical photo or upload a high-quality scan.
    3. Restoration: An experienced digital artist gets to work, manually repairing your photo pixel by pixel.
    4. Review & Delivery: You get a proof to approve before they send the final digital file and any prints.

    Professionals use non-destructive editing techniques. They preserve every detail of the original photo while performing complex repairs.

    Services are often broken into tiers:

    • Basic Restoration: Fixes minor issues like light scratches and fading.
    • Advanced Restoration: Tackles more significant damage, such as tears and water spots.
    • Difficult Restoration: Handles severe issues like missing pieces or heavy mold.

    Turnaround times vary, but you can often expect a proof within a few business days.

    Companies like Pixels Photo Art have over 15 years of experience restoring historical images. Forever Studios has been a leader in high-quality restorations since 2011.

    Keep in mind that professional photo restoration can be expensive. The cost reflects the incredible expertise and time involved. For severely damaged or irreplaceable photos, the results are almost always worth the investment.

    DIY vs. Professional: The Ultimate Showdown

    Choosing between DIY and pro services comes down to your priorities. You need to weigh your budget, the time you can invest, and the quality you expect.

    This table breaks down the pros and cons of each approach:

    FeatureDIY Photo RestorationProfessional Photo Restoration
    CostLower initial cost; software can be a one-time purchase or subscription.Higher cost, based on the severity of the damage.
    TimeExtremely time-consuming, requires a huge investment to learn and execute.Fast turnaround; professionals work much more quickly.
    QualityQuality varies wildly depending on your skill and patience.Consistently high-quality results due to expertise and specialized tools.
    Skill LevelRequires technical skill and familiarity with complex software.No skill required; the experts handle everything.
    ControlFull creative control over the entire restoration process.Less direct control, but you can provide feedback and request revisions.
    ComplexityBest for simple fixes like minor scratches or color correction.Handles complex damage like severe tears, water damage, or missing pieces.
    RiskHigh risk of further damaging the photo if not done correctly.Low risk, as professionals use non-destructive techniques.
    ConvenienceInconvenient. You have to learn software, troubleshoot, and invest hours.Extremely Convenient. They handle the entire process for you.

    Cost Analysis: Breaking Down the Real Expenses

    So, what will this actually cost you? Let’s break it down.

    DIY Photo Restoration: The Hidden Costs

    DIY might seem cheaper upfront, but don’t forget the hidden costs:

    • Software Subscriptions: Adobe Photoshop costs $20-$30 per month. Even “cheaper” options add up.
    • Hardware (Scanner): A decent flatbed scanner will set you back $100-$300.
    • Your Time: This is the big one. Let’s say you value your time at just $20 per hour. Restoring a moderately damaged photo might take 5-10 hours of learning and careful work. That’s $100-$200 in your own labor for one photo.

    Suddenly, “free” DIY software doesn’t seem so free.

    Professional Photo Restoration: What You’re Paying For

    Professional services charge based on the complexity of the work. Here’s a general pricing guide:

    • Basic Restoration: (Minor scratches, color correction) $25 – $75 per photo.
    • Advanced Restoration: (Tears, significant water damage) $75 – $200 per photo.
    • Difficult Restoration: (Missing pieces, severe mold, facial reconstruction) $200+ per photo.

    While the initial cost is higher, you’re paying for guaranteed results, expertise, and your own time back.

    The Final Verdict: When to DIY vs When to Go Pro

    How do you decide when to roll up your sleeves and when to call in the cavalry?

    It boils down to these key factors:

    • Extent of Damage:
      • DIY: Minor scratches, dust, or slight fading.
      • Pro: Major tears, water damage, missing pieces, or mold. Don’t risk it.
    • Your Skill Level:
      • DIY: You’re already comfortable with photo editing software.
      • Pro: You lack the technical skills or patience for tedious work.
    • Your Available Time:
      • DIY: You have plenty of free time to learn and experiment.
      • Pro: You’re short on time and need it done right, fast.
    • Emotional Value:
      • DIY: A fun, interesting old photo with low sentimental value.
      • Pro: An irreplaceable photo of a loved one. The only existing copy. This is an investment in your family history.

    Consider these scenarios:

    • Scenario 1: You have a box of old vacation photos with minor scratches and faded colors.
      • Recommendation: Try an AI tool like BringBack first. Our tool can quickly fix these common issues. If you want more control, explore other DIY software.
    • Scenario 2: You have a single, irreplaceable wedding photo with a large tear and water damage.
      • Recommendation: Go Pro. No question. The emotional value of this photo warrants the investment in professional restoration.
    • Scenario 3: You’re a hobbyist who enjoys learning new skills and has time to dedicate to the craft.
      • Recommendation: Dive into DIY. Start with a free program like GIMP and work your way up.

    Ultimately, the decision is yours. Weigh the pros and cons and consider your specific needs.

    Common DIY Mistakes (And How to Avoid Them)

    If you’re going the DIY route, be aware of the common pitfalls. It’s frighteningly easy to make mistakes that can ruin your photos forever.

    Here are the most common errors we see:

    • Over-Sharpening:
      • The Mistake: Applying too much sharpening creates harsh, ugly digital artifacts.
      • The Fix: Use the “Unsharp Mask” filter sparingly. Zoom in to 100% to check your work. Less is more.
    • Bad Color Correction:
      • The Mistake: Over-saturating colors or getting skin tones wrong, making people look like aliens.
      • The Fix: Use adjustment layers for non-destructive edits. Make subtle changes.
    • Working on the Original Scan:
      • The Mistake: Editing your only digital copy and saving over it, losing the original scan forever.
      • The Fix: ALWAYS work on a duplicate copy of your file. Never, ever alter the original scan.
    • Over-Processing:
      • The Mistake: Using too many filters or noise reduction tools until the photo looks fake, plastic, and artificial.
      • The Fix: Use a light touch. Your goal is restoration, not an airbrushed glamour shot.
    • Forgetting to Save:
      • The Mistake: Working for two hours straight and having the program crash without saving.
      • The Fix: Save your work constantly. Back it up!

    By avoiding these common mistakes, you can achieve much better results with your DIY projects.

    Restore Your Memories in Minutes With BringBack

    Tired of the complexity of DIY and shocked by the cost of professional services?

    We built BringBack to be a better way. Our tool blends the simplicity of a one-click app with the power of advanced restoration technology.

    We designed BringBack to fix the most common frustrations of photo restoration. Our AI-powered tool offers one-click fixes for scratches, fading, and color damage.

    • It’s incredibly easy to use.
    • No technical skills are required.
    • You’ll get stunning results in minutes.

    Plus, BringBack can colorize black and white photos or even animate the faces of your loved ones, adding a touch of magic to your family history.

    We understand that these memories are private. That’s why we built BringBack with robust privacy features. Your photos are always protected, and we never share your data.

    BringBack is more affordable than professional services and infinitely faster than DIY.

    Ready to see the difference?

    Try BringBack today and watch your memories come back to life!