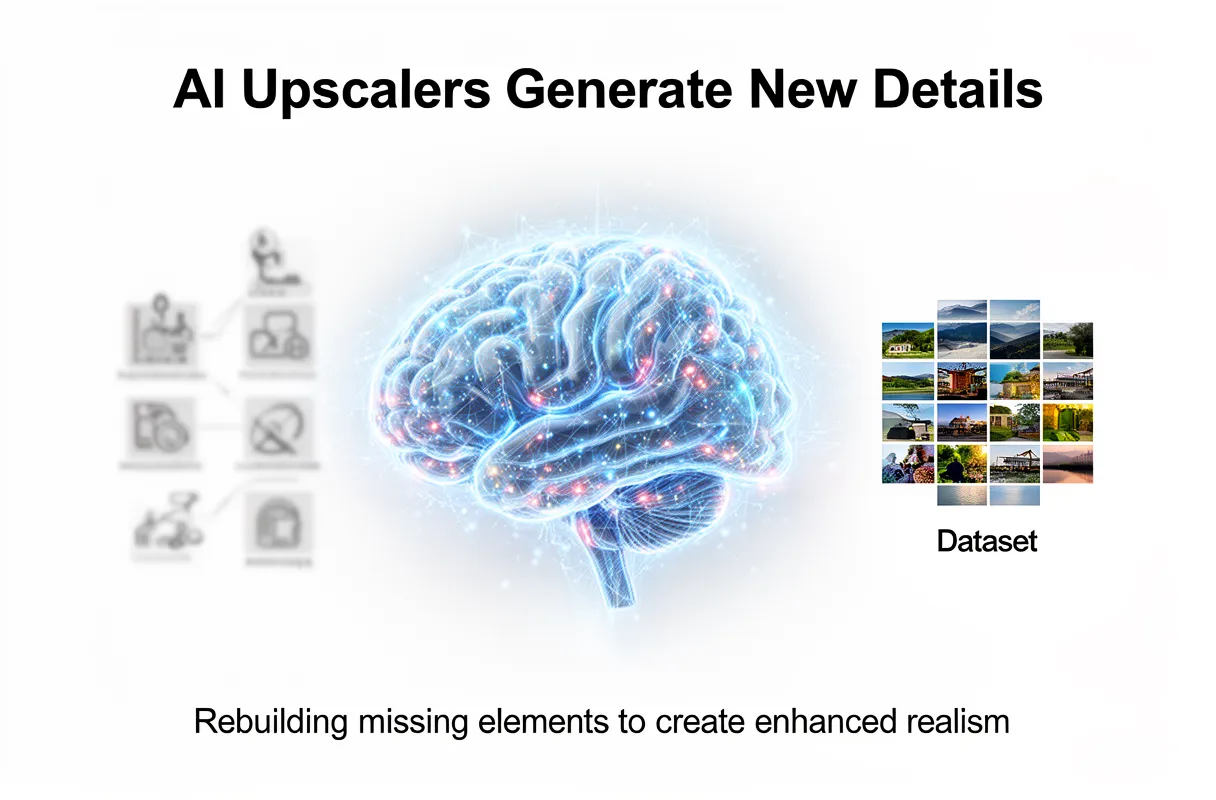
AI image upscalers actively generate new details, rather than solely preserving existing ones, by reconstructing plausible visual elements based on vast training data. This process often yields sharper images than the original low-resolution source, unlike traditional upscaling methods which primarily interpolate pixels, causing blur or pixelation.
Key Characteristics:
Generative Reconstruction: Creates novel pixel data where none existed.
Deep Learning Models: Leverages neural networks trained on image pairs.
Potential for Artifacts: Can introduce details not present in the original.
Authenticity Concerns: Directly impacts historical accuracy in images.
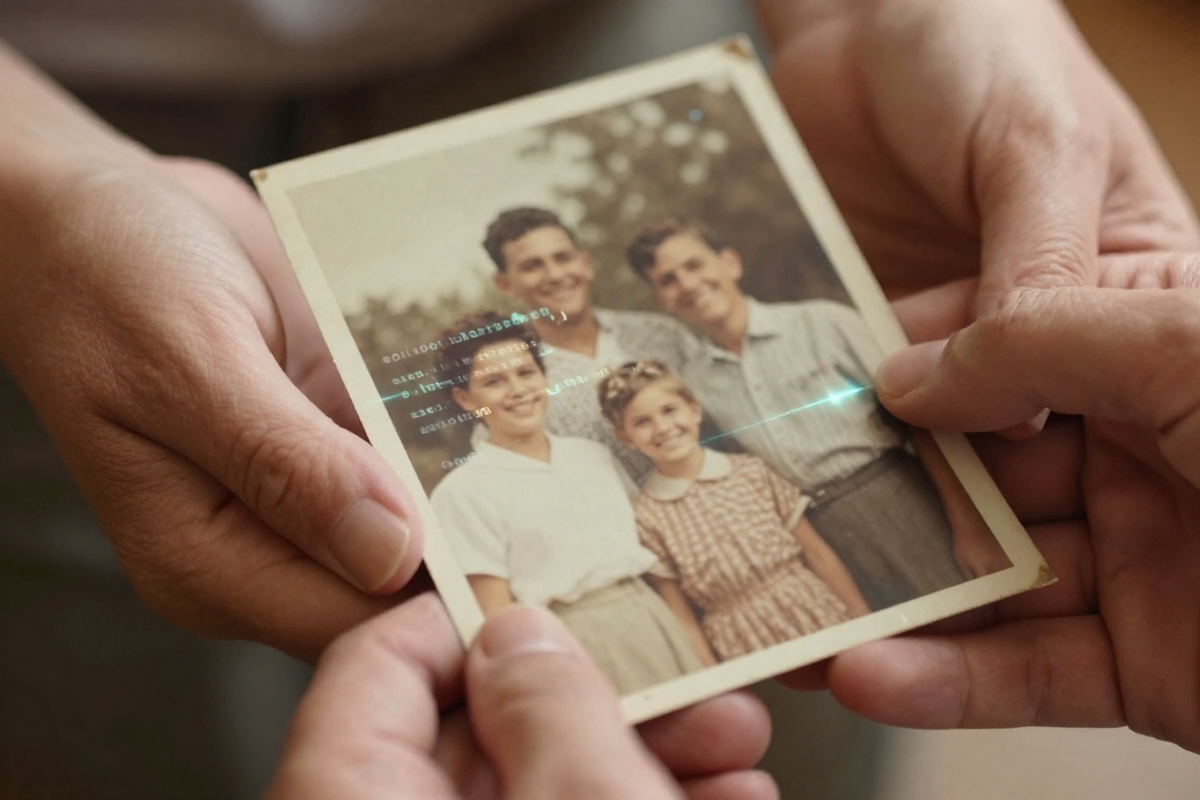
People often wonder if AI tools truly just 'enhance' an old photograph. The reality is more complex: ai image upscalers do not merely preserve detail; they rebuild missing elements. This capability is especially important when enlarging photos that hold sentimental value, like 'ai generated family photos'.
By the end of this guide, you will understand how AI upscaling works and learn to discern authentic enhancements from artificial additions, ensuring your cherished memories maintain their historical accuracy.
AI Upscalers Actively Generate New Details, Not Just Enhance
AI image upscalers do not just 'enhance' an old photograph. They actively reconstruct and generate new details, making images appear sharper than the original low-resolution source. Unlike traditional methods that rely on mathematical guesswork, AI reconstructs missing elements.
Traditional upscaling methods, such as nearest neighbor or bilinear interpolation, average neighboring colors or copy pixel values. This process inevitably leads to blurriness or pixelation because these techniques cannot recover truly missing data. They are fundamentally limited by the information present in the original, low-resolution image.
AI upscaling, however, employs deep learning algorithms and neural networks. These systems are trained on vast datasets comprising millions of high-resolution and low-resolution image pairs. This allows them to understand image content, like faces, textures, and patterns. Prominent examples include Super-Resolution Generative Adversarial Networks (GANs) and tools like Real-ESRGAN.
These networks function through a generator and discriminator pair. The generator attempts to create a high-resolution image from a low-resolution input, while the discriminator evaluates its realism. This adversarial process pushes the AI to produce increasingly plausible details. For a deeper dive into how AI enhances and restores photos, not just upscales them, you can explore what AI photo restoration entails.
Because AI upscalers can "rebuild missing elements," they can produce details where none originally existed, making them appear even more accentuated and realistic. This capability is particularly important when enlarging photos that hold sentimental value, like those in 'ai generated family photos.'
AI Upscaling vs. Traditional Methods: A Detail Comparison
AI upscaling actively generates new details, not just enhances existing ones. Traditional methods, however, are fundamentally limited by mathematical interpolation.
Traditional upscaling techniques like Nearest Neighbor, Bilinear, and Bicubic interpolation work by averaging or copying surrounding pixel data. This process cannot invent information that isn't there. Consequently, enlarging an image with these methods often results in a softer, blurrier, or pixelated appearance, as the original sharp edges are smoothed out or new, blocky pixels are introduced. They simply cannot recover truly "missing" data.
AI upscalers, conversely, learn from vast datasets of high-resolution and low-resolution image pairs. Using deep learning algorithms, they understand image elements like faces, textures, and edges. When upscaling, AI models can intelligently reconstruct and generate plausible details where none existed in the original low-resolution image. This content-aware processing makes upscaled images appear sharper and more detailed than the original source material. For a comprehensive analysis of the fundamental differences and quality comparisons between AI and traditional upscaling methods, refer to this detailed article.
Minor enlargements where slight softening is acceptable.
AI upscaling offers a transformative leap in image enlargement quality by actively creating believable detail.
Navigating the New Reality: Ethical Concerns & 'AI Hallucinations'
AI upscaling, while magical for reviving old photos, introduces complex ethical questions because it actively creates new details. This isn't just cleaning up pixels; it's plausible reconstruction, and that carries risks.
If the original image data is severely degraded, the AI might struggle to invent meaningful detail. Instead, it can magnify existing flaws, making artifacts look worse. This is often the first sign of trouble: an image that looks sharper but also strangely artificial.
We also see 'AI hallucinations' when the AI tries too hard. This means introducing strange textures, odd halos around edges, or completely fabricated elements. For a cherished family photo, this could mean a distorted smile or an impossible pattern on Grandma’s dress.
Furthermore, the AI's output is only as good as its training data. If that data has biases – for example, insufficient representation of certain skin tones or historical fashion – the AI may generate inaccurate or suboptimal details for those specific cases. This is a significant concern when seeking authentic results for ai generated family photos.
The Ethics of AI-Generated Details in Cherished Memories
The ability of AI to generate realistic details can blur the line between restoring a photo and creating a new one, raising significant ethical questions about authenticity of photos. For cherished family portraits, the desire to "perfect" them can lead to unintended consequences. When AI fills in gaps or enhances existing features, it's no longer just a faithful reconstruction; it becomes an interpretation, potentially altering the original record of a moment and its associated memories.
This act of "digital reconstruction" becomes particularly sensitive when dealing with historical documentation. If an AI generates an element that wasn't present, or misinterprets the original context, it can lead to a distorted understanding of the past. For a deeper understanding of the inherent and algorithm-specific limitations of image upscaling, including data loss, compression issues, and AI biases, refer to this discussion on the limitations of image upscaling. The impulse to have ai generated family photos look "better" must be balanced against the need to maintain their truthfulness.
When dealing with severely damaged photos, like water-damaged ones, AI might need to generate significant details, making it even more important to understand these ethical considerations. Learn more about fixing water-damaged photos using AI. Ultimately, the goal of preserving memories should not come at the cost of their genuine historical integrity. Transparency about what has been generated versus what was original is paramount for respecting the authenticity of photos and the legacy they represent.
Achieving Authentic Upscaling Results for Your Family Photos
To ensure your family photos gain clarity without losing their soul, aim for authentic upscaling by following these key practices. It’s about enhancing what's there, not inventing what's not.
Here's how to get the most genuine results:
Start with the best possible original.
Understand AI’s limitations to avoid manufactured details.
Critically review any AI-generated elements.
Prioritize Original Quality
The AI upscaler's success hinges on the source. A scan from a dusty album is a better starting point than a deeply corrupted digital file. If your photos are physically damaged, consider professional scanning services that can correct physical flaws before AI enhancement. Higher original resolution dramatically improves the AI's ability to add meaningful detail rather than just noise.
Minimizing AI Artifacts
AI can sometimes "hallucinate" details, creating unnatural smoothness or strange patterns. This often happens when the AI struggles to interpret extremely degraded parts of an image. Look out for facial features that appear too smooth or clothing patterns that seem invented rather than restored. Minimizing AI artifacts means being selective and understanding that perfection isn't always achievable without some creative interpretation.
Evaluating AI Details
When you're restoring old photographs, a keen eye is your best friend. Don't just accept the upscaled image at face value. Carefully inspect faces for unnatural distortions or anachronistic elements. Check the textures of fabric, hair, or backgrounds. If a detail looks "off" or doesn't align with what you know of the photo or the era, it might be an AI hallucination. Remember, the goal is preserving memories, not creating them anew.
Evaluating Plausibility and Minimizing Artifacts
When you're restoring old photographs, a keen eye is your best friend. Don't just accept the upscaled image at face value. Carefully inspect faces for unnatural smoothness or distortion. Check the textures of fabric, hair, or backgrounds. If a detail looks "off" or doesn't align with what you know of the photo or the era, it might be an AI hallucination. Remember, the goal is preserving memories, not creating them anew.
Image Inspection Tips
To truly evaluate AI details and ensure the plausibility of images, we always advise a close review. Look for these common tells:
Facial Anomalies: Are eyes too wide? Is skin unnaturally smooth, lacking pores or wrinkles that should be there? Unintended smiles or missing teeth can also be flags.
Texture Inconsistencies: Check how fabric appears. Does it have a uniform, synthetic sheen? Is hair unnaturally clumped or flowing too perfectly?
Edge Halos and Sharpness: Sometimes AI can over-sharpen edges, creating a faint "halo" effect around objects or people. This looks artificial.
Anachronistic Elements: Does a person have a hairstyle or clothing accessory that doesn't fit the time period of the photo? This points to AI generating details that weren't present.
Comparison to Original: If you have any other photos from the same event or person, use them as a benchmark. Does the AI's interpretation align?
Minimizing AI Artifacts
Preventing AI-induced artifacts often starts before the upscaling even happens. Here’s how we recommend minimizing them:
Start with the Best Source: Use the highest-resolution scan of your original photo possible. Dust, scratches, and grain can confuse the AI.
Experiment with Models: Not all AI upscalers are created equal. We suggest trying different tools or even different models within a single tool. Each has its strengths and weaknesses.
Adjust Enhancement Levels: Some tools allow you to control the intensity of the AI’s "corrections." Lowering these settings can sometimes prevent over-processing and the introduction of artifacts.
Careful review is crucial, especially for ai generated family photos. Your personal knowledge of the memory is the ultimate authenticity check.
Selecting the Right AI Upscaler for Your Precious Photos
Choosing the best AI upscaler for your precious photos means finding a tool that understands the delicate task of repair. Not all AI tools are built for nuanced damaged photo repair, especially when dealing with irreplaceable family memories. Our approach at BringBack is designed precisely for this: reviving your cherished photographs with care and precision.
To start, a simple phone scan of your old photo is all it takes to capture the best possible digital copy. Then, upload this scanned, damaged image directly to our BringBack AI tool. The system automatically analyzes the subtle signs of damage, like fading, tears, or creases, and applies targeted repairs in mere seconds. You can then review your restored, high-resolution photo. For specific steps on how an AI tool like BringBack can revive cherished historical images, learn how to restore great-grandparents' wedding photos with AI.
Our platform offers a straightforward, one-time payment model for credit packs, including Starter, Pro, and Family options. These credits are designed to be flexible; they never expire and can be used for both restoration and animation projects. This ensures you have a cost-effective, simple solution for preserving family photos for generations to come. When searching for the best AI upscaler for old photos, consider tools that focus on authenticity and ease of use, like BringBack.
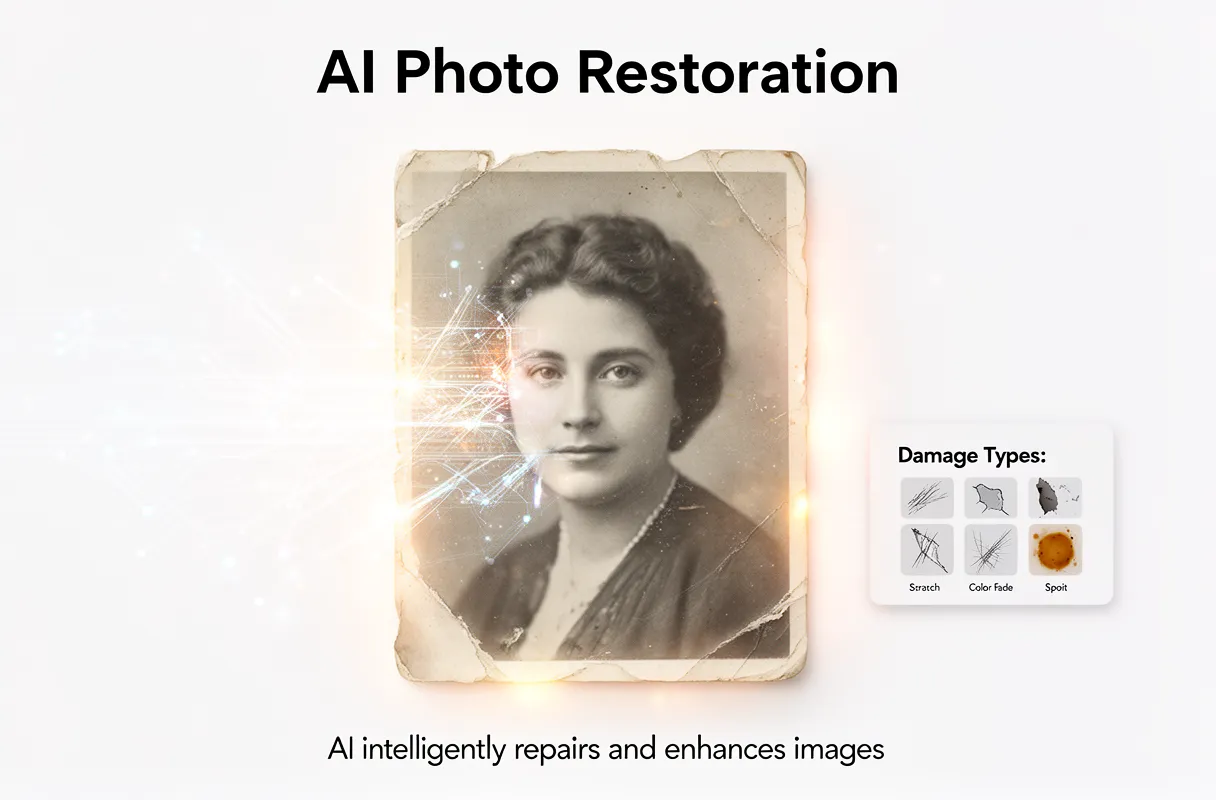
AI photo restoration is a digital process that uses deep learning algorithms to repair and enhance damaged images. This AI photo restoration technology aims to automatically remove scratches, fading, and discoloration, effectively tackling damaged photo restoration by intelligently reconstructing missing or imperfect visual data. The underlying photo restoration algorithm processes flaws like blur and tears, bringing old images back to life.
Key Characteristics:
Automated Repair: AI algorithms identify and correct various image imperfections.
Deep Learning Core: Uses Generative Adversarial Networks (GANs) and diffusion models to reconstruct details.
Time Efficiency: Transforms manual tasks that took hours into seconds or minutes.
Flaw Coverage: Addresses scratches, fading, blur, tears, and color absence.
Seeing cherished family photos fade, torn, or covered in scratches feels like losing a piece of history. These images hold priceless memories, moments that connect us to our past. Yet, the physical damage often makes them difficult to truly appreciate or share, leaving a feeling of irreversible loss.
This guide helps you understand how an AI photo restoration algorithm actually works to recover those images. By the end, you will grasp the underlying technology for damaged photo restoration and remove scratches from your own photos, without resorting to expensive, time-consuming manual efforts.
What is AI Photo Restoration and Scratch Removal?
AI photo restoration is the process where AI photo restoration algorithms automatically fix and improve damaged photos. These intelligent systems use deep learning to mend imperfections like scratches, fading, and color loss, bringing cherished memories back to life.
These algorithms are designed to tackle a range of image degradation. They work by analyzing the existing pixel data and intelligently reconstructing what's missing or damaged. This means old, cherished photographs can be revived without the need for extensive manual editing.
AI excels at repairing various types of photo damage, including:
Scratches and tears
Fading and discoloration
Dust and spot marks
Blurriness and lack of sharpness
Absence of color in black-and-white photos
The fundamental shift is from time-consuming, manual techniques to automated processes. Where once a single photo might take hours to restore, AI tools can now fix many images in minutes. For a deeper dive into the fundamental concepts of AI photo restoration, explore our comprehensive guide on the power of AI in reviving memories. This technology fundamentally changes how we preserve our visual history, making it more accessible than ever.
The Evolution of Digital Image Repair
The journey of digital image repair traces back to early computer graphics. Initially, fixing damaged photos meant painstaking manual work. Experts used software like Adobe Photoshop, meticulously cloning pixels, retouching blemishes, and painstakingly recoloring faded areas. This process was incredibly time-intensive, often taking hours or even days for a single photograph.
This manual approach dominated for years. Then, the emergence of machine learning began to shift the paradigm. Algorithms started to learn patterns from vast datasets of images. This laid the groundwork for automated repair. The historical timeline of AI photo restoration truly accelerated with the advancements in deep learning and increased computational power.
The true revolution arrived with AI-driven techniques. These intelligent systems can now analyze an image, identify damage like scratches, tears, and fading, and intelligently reconstruct missing information. This represents a fundamental shift from traditional photo restoration, drastically reducing processing time from days to mere minutes per image. This evolution makes preserving our precious memories more accessible than ever before.
How AI Algorithms Reconstruct Damaged Photos?
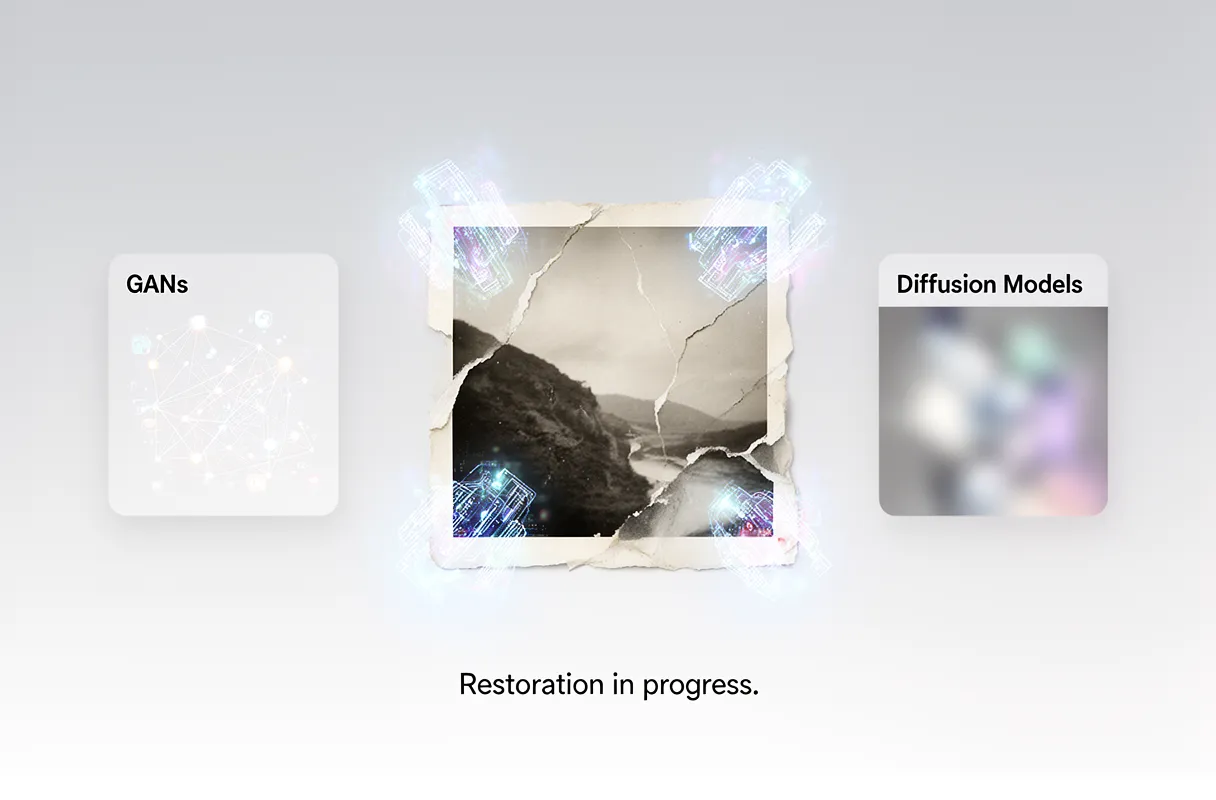
AI algorithms reconstruct damaged photos by intelligently filling in missing or corrupted pixel data. This process relies heavily on deep learning techniques, primarily Generative Adversarial Networks (GANs) and Diffusion Models.
GANs work by pitting two neural networks against each other: a generator, which creates new image data, and a discriminator, which tries to distinguish between real and generated data. Through this adversarial process, the generator learns to create highly realistic pixels that blend seamlessly with the original image content. For complex regeneration, multiple GAN frameworks can be sequentially integrated, alongside inpainting techniques often based on OpenCV for partial image restoration after initial scratch patching. This approach is detailed in research on sequential GAN frameworks.
Diffusion Models, on the other hand, reconstruct missing information by iteratively refining noisy images. They start with a degraded image, add noise, and then learn to reverse this process, gradually removing noise to reveal a clean, reconstructed version.
Here's a look at how these core technologies compare:
Feature
GANs for Image Restoration
Diffusion Models for Photo Repair
Mechanism
Adversarial training (generator vs. discriminator) to create realistic pixels.
Iterative denoising process, learning to reverse noise addition to reveal clean data.
Strengths
Can produce sharp, detailed results; good for generating novel content and texture.
Excellent at generating high-fidelity and diverse outputs; often more stable training.
Weaknesses
Can be prone to training instability and "mode collapse" (limited output variety).
Can be computationally intensive and slower for inference due to iterative steps.
Primary Use
Filling large missing areas, creating realistic textures, and enhancing detail.
High-quality image synthesis, background generation, and advanced restoration tasks.
An image typically takes 3 to 5 minutes to process with AI restoration tools; smaller images or those with fewer faces process faster. This is similar to how a skilled artist might carefully reconstruct a torn canvas, imagining the missing brushstrokes based on the surrounding details and their understanding of the overall artwork. Understanding how AI can mend various forms of damage helps us appreciate the sophistication of these reconstruction methods.
Specific Techniques for Scratch Elimination
Scratch removal algorithms adapt to various scratch types by first identifying their characteristics. Fine scratches, often mere surface abrasions, require delicate texture reconstruction. Deeper, more prominent scratches demand more aggressive artifact removal and content-aware filling. Algorithms analyze color shifts and textural disruptions to classify the damage.
To tackle these imperfections, sophisticated techniques are employed. Scratch distribution extraction helps pinpoint all affected areas. Then, Gaussian blur maps are generated to isolate the scratch regions from genuine image content. This map guides the AI in knowing where to apply repair and how intensely. The AI effectively "paints over" the scratch, blending new pixel data with the surrounding image's color and texture.
Evaluating these methods relies on quantitative performance metrics. Scores like PSNR (Peak Signal-to-Noise Ratio), SSIM (Structural Similarity Index Measure), and FID (Fréchet Inception Distance) help measure the quality of the restoration. Higher PSNR and SSIM indicate better fidelity, while lower FID suggests the restored image is more statistically similar to real images.
Advanced tools ensure lossless restoration capabilities, meaning your original photo's resolution isn't compromised. Many services also offer practical user limits, such as free processing for images up to 3000x3000px and under 10MB. This allows for extensive testing without immediate cost.
Practical Applications and Ethical Considerations of AI Restoration
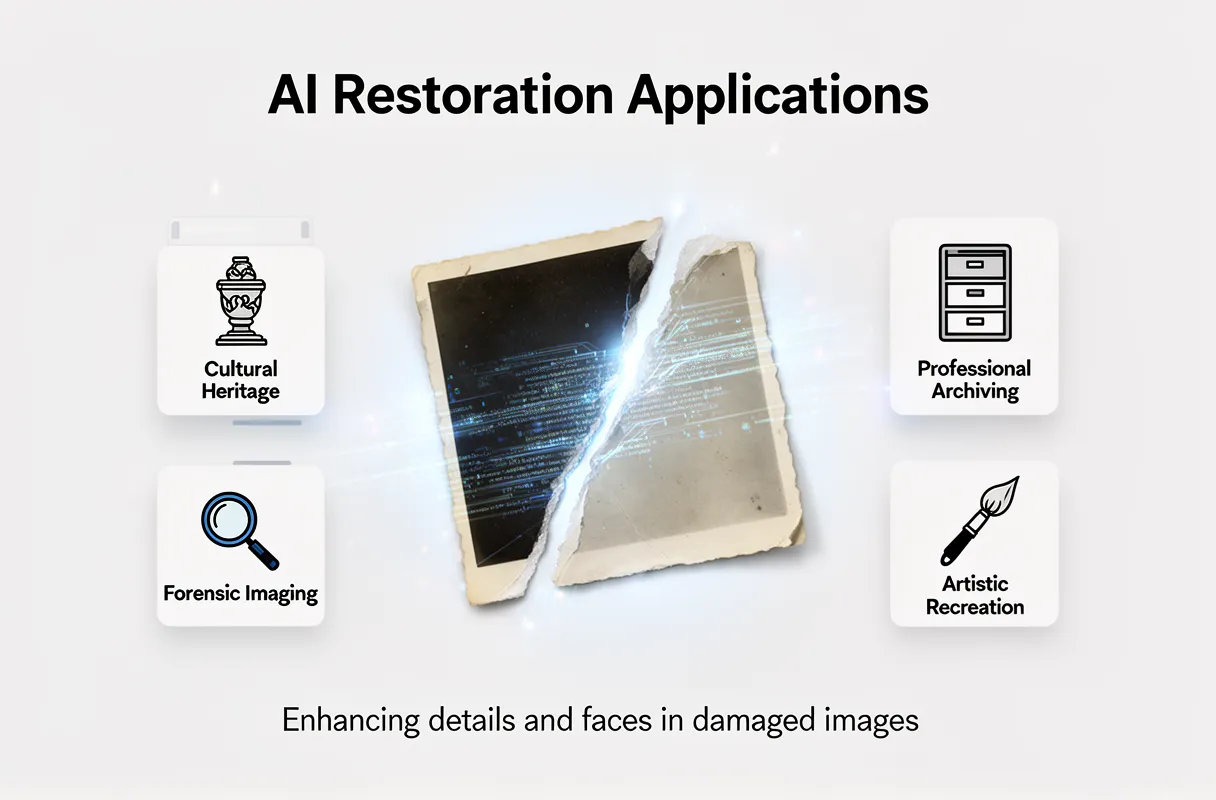
AI photo restoration tools extend far beyond personal keepsakes, offering significant value across various fields. These technologies enhance details, improve color fidelity, and sharpen fuzzy areas, making them indispensable for professionals.
Cultural Heritage Preservation: Museums and archives use AI to restore faded documents, historical photographs, and artwork, making precious artifacts accessible for study and public viewing.
Forensic Imaging: Law enforcement agencies employ AI to clarify damaged or low-quality evidence images, potentially revealing crucial details like faces or license plates that would otherwise be lost.
Professional Archiving: Businesses and institutions can use AI to digitize and restore vast collections of old records, ensuring long-term preservation and easy retrieval.
Artistic Recreation: Artists can leverage AI to reimagine historical images, blending old and new aesthetics for contemporary creative projects.
Beyond general restoration, AI excels at targeted enhancements, particularly for human faces. This capability can revive the expressiveness in a child's smile or the wisdom in an elder's eyes, adding a profound emotional layer to the restored image.
However, this power comes with ethical responsibilities. The ability to alter and enhance images raises concerns about accuracy and potential bias. We must consider the implications of these tools as we move forward.
Using AI for Your Damaged Photos
Scanning your precious physical photos at a 90-degree angle is the first vital step for superior AI restoration. Ensure clear focus and good lighting, avoiding shine, and orient them correctly for the best results.
Next, upload your scanned, damaged image directly to the BringBack AI tool. Our sophisticated AI instantly analyzes the specific damage – whether it’s cracks, fading, or discoloration – and applies precise, targeted repairs within seconds.
Finally, review your revitalized, high-resolution restored photo or even an animated video. You can then easily download your cherished memories and share them with family and friends. Ready to bring your old photos back to life? Start your revive your treasured memories today.
For your peace of mind, many AI services, including ours, implement strict data safety guarantees. We ensure uploaded images are deleted within 24 hours after processing, safeguarding your personal history.
Navigating the Ethical Landscape and Future of AI Restoration
AI photo restoration tools face complex ethical questions. The risk is subtle alteration of features and the imposition of modern beauty standards. This often stems from biased datasets, particularly from 'WEIRD' countries. A 2010 analysis found that 96% of research subjects in top psychology journals came from Western, Educated, Industrialized, Rich, and Democratic societies. This data bias means AI might unintentionally erase historical and cultural accuracy in its restorations.
The future of AI photo restoration promises even greater capabilities. We are seeing research in real-time processing for instant results and handling more extreme damage, like severe tears and fading.
Expert Opinion: "The next frontier is AI that understands context, not just pixels. It needs to grasp intent and historical nuance to restore authentically."
This ongoing research aims to push the boundaries of what's possible, making AI photo scratch removal and general restoration more powerful and nuanced.
Generative AI in photo restoration reconstructs missing or damaged image areas by creating new, plausible content. This advanced technology uses complex algorithms to analyze surrounding pixels, interpreting context to predict how an image should appear. It helps to bring old, faded, or torn photos back to life, moving beyond traditional manual editing and accelerating the repair of treasured memories. Modern AI models can even fill in large gaps or extend backgrounds realistically.
Key Characteristics:
Core Function: Automatically repairs tears, fills gaps, and removes blemishes from old photographs.
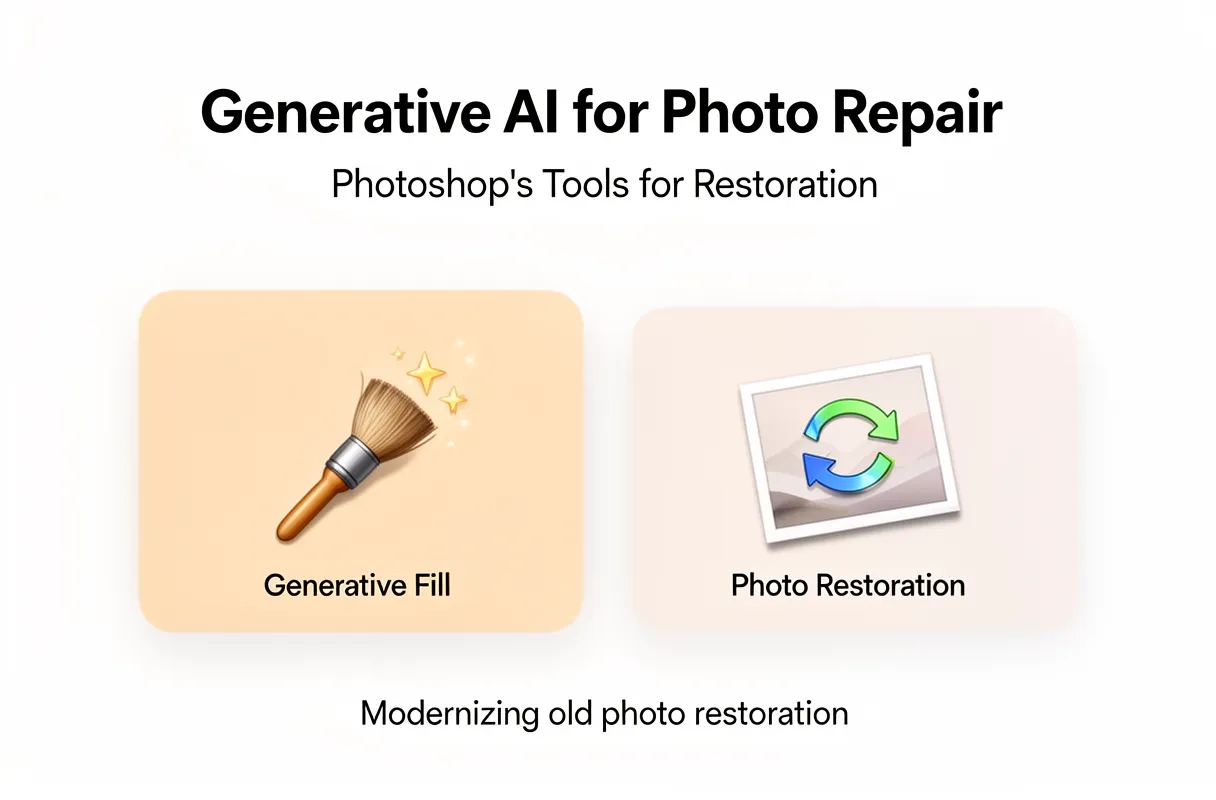
Primary Tools: Adobe Photoshop's Generative Fill and Photo Restoration Neural Filter.
Operational Method: Utilizes AI models to interpret image context and generate realistic new pixels.
User Benefit: Significantly speeds up complex restoration, making it accessible for everyone.
Few things sting like finding a cherished family photo, only to see it faded, torn, or covered in scratches. These images hold our past, our stories, our connection to who we are. Bringing them back often felt like a painstaking task, reserved for experts with hours to spare. Now, AI changes that, offering powerful solutions to restore these irreplaceable visual legacies.
This guide helps you choose the right tool to repair old photos using either Photoshop's generative features or specialized AI alternatives. You will understand when to use which method to fix various types of damage, without wasting hours on ineffective techniques.
Understanding Photoshop's Generative AI for Photo Repair
Photoshop's generative AI offers powerful tools to repair old photos, moving beyond tedious manual work. These intelligent features understand image context to reconstruct damaged areas quickly and effectively.
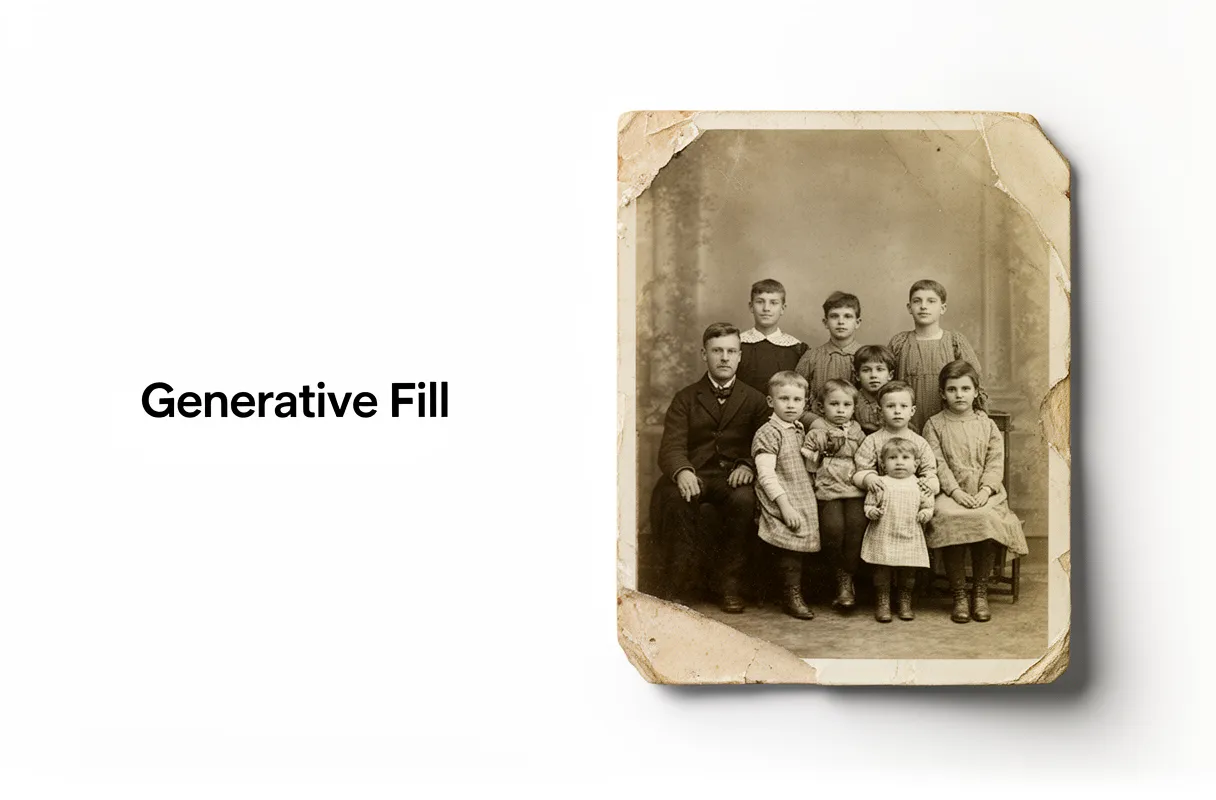
Generative Fill is Photoshop's AI that generates entirely new content based on an image and a text prompt. It excels at reconstructing large missing areas, extending backgrounds, and removing unwanted objects with natural results.
The Photo Restoration Neural Filter is specifically designed to automatically detect and remove fine damage like scratches, dust, and marks from old photographs.
These AI capabilities represent a significant advancement. They allow us to bring cherished memories back to life without requiring hours of painstaking manual editing.
Generative Fill Core Functions:
Restoring torn corners and edges.
Filling in gaps from missing photo sections.
Seamlessly blending reconstructed areas.
Photo Restoration Neural Filter Core Functions:
Scratch removal.
Dust and noise reduction.
Subtle color correction.
Generative Fill: Reconstructing Large Missing Areas
Generative Fill tackles large missing areas in repair old photos by creating new content based on your image and a text prompt. This capability moves beyond simple touch-ups, letting you fill in entire sections that are gone. Think reconstructing a torn corner or filling a significant gap where a piece of the photo is missing.
It works by analyzing the surrounding pixels and understanding the context of the image. You can then guide it with a prompt, such as "reconstruct the missing corner with wood texture" or "fill the torn edge with sky." The AI generates plausible content that blends seamlessly with the original photograph.
This approach is a huge leap from the painstaking manual methods of the past, which involved hours of cloning, healing, and color matching. Generative Fill operates non-destructively, working on separate layers. This means your original photo remains untouched, and you can easily refine or undo changes.
Here are some prompt ideas for optimal results when using Generative Fill to repair old photos:
For torn edges/corners: "continue the brick wall pattern," "recreate the blue sky with clouds," or "match the background texture and color."
For missing sections: "fill with antique paper texture," "reconstruct the subject's arm," or "complete the facial features subtly."
For background extension: "extend the landscape with a forest scene," or "add more of the garden background."
Always start with a broad selection of the area you need to fill. Then, refine your prompt for more specific results. Experimentation is key; sometimes, a few tries with slightly different prompts yield the best outcome.
Photo Restoration Neural Filter: Specialized for Fine Damage
The Photo Restoration Neural Filter in Photoshop specifically targets fine damage that manual tools struggle with. This AI-powered filter automatically detects and removes subtle imperfections like fine scratches, dust specks, and small marks, making it ideal for bringing clarity back to your cherished photographs.
Unlike Generative Fill, which reconstructs larger missing areas, the Neural Filter works at a micro-level. It’s designed for precision, fixing the tiny blemishes that mar an otherwise good image. You can see its function and ease of use highlighted by reputable photography news sites, demonstrating how it can quickly repair old photos in Photoshop.
The filter offers real-time adjustments, allowing you to preview the results instantly and fine-tune the intensity. Its primary functions include:
Scratch removal
Dust and noise reduction
Subtle color correction
This targeted automation means you spend less time on painstaking detail work. You can achieve a remarkably polished look on even heavily degraded images, preserving the essence of your precious memories with just a few clicks.
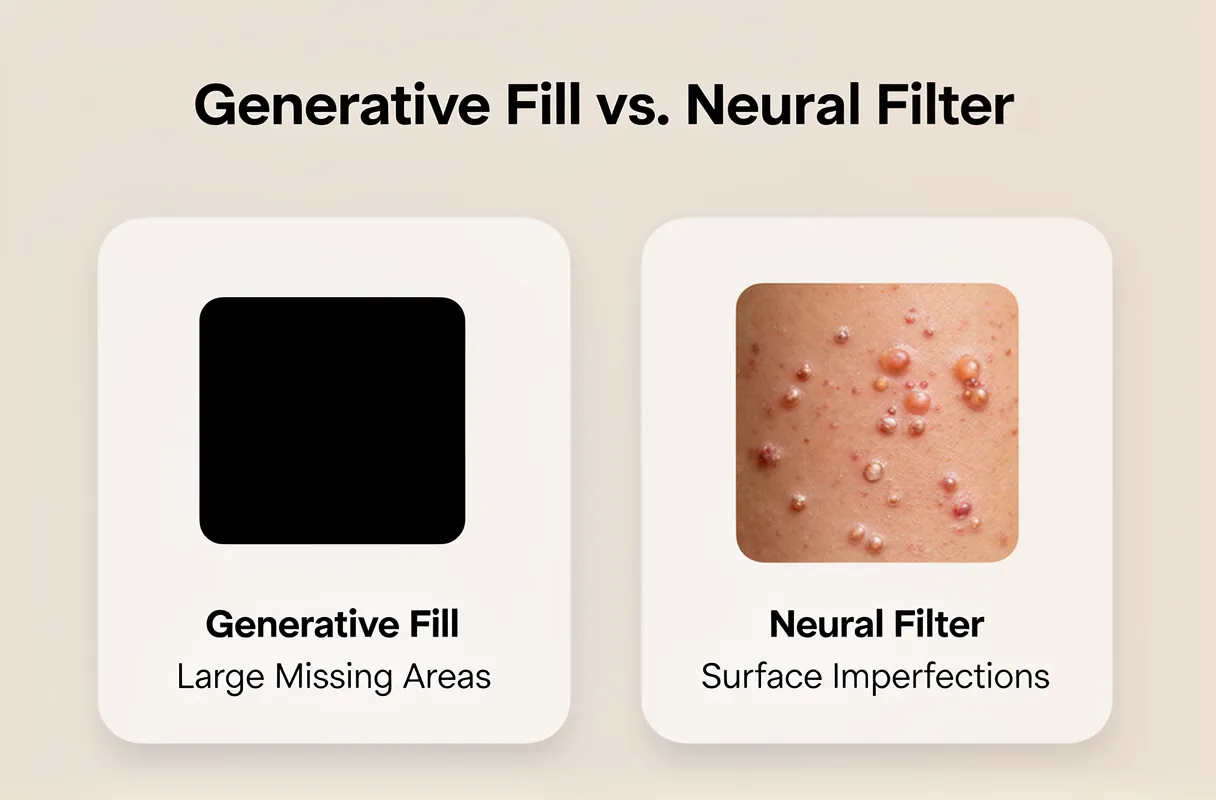
When to Choose Which: Generative Fill vs. Neural Filter
For significant photo damage, Generative Fill excels at reconstructing large missing areas, while the Neural Filter is your go-to for refining surface imperfections like scratches and dust. Choosing correctly saves time and yields superior results.
Here's a guide to selecting the right AI tool for specific photo restoration tasks:
Damage Type
Generative Fill Suitability
Neural Filter Suitability
Large tears/missing corners
High. Excellent for generating plausible content to fill gaps.
Low. Not designed for large-scale reconstruction.
Severe fading/discoloration
Moderate. Can help rebuild color tone in broad areas.
High. Targeted color correction features improve faded images.
Fine scratches/dust/noise
Low. Can sometimes blur or incorrectly fill these details.
Excellent. Specifically designed for automatic removal.
Water damage (partial areas)
Moderate. Can attempt to reconstruct affected textures.
Moderate. Can help blend and smooth water-damaged textures.
Facial reconstruction (minor)
Moderate. Can fill small missing facial features.
High. Can subtly refine and restore facial details.
Background extension
Excellent. Ideal for expanding scenes naturally.
Not applicable.
Removing small unwanted objects
High. Can generate seamless removals.
Low. Better suited for surface blemishes, not distinct objects.
Generative Fill is generally faster for broad reconstruction tasks because it operates on a larger scale. However, the Neural Filter often provides more precise, higher-fidelity results for fine detail work due to its specialized algorithms. Expect Generative Fill's output to sometimes require minor touch-ups, while the Neural Filter might offer a more polished, albeit less transformative, result for surface damage.
Optimizing Your Workflow with Combined Approaches
Combining Photoshop's AI features and traditional tools creates a powerful restoration workflow. Generative Fill excels at reconstructing significant missing areas, while the Photo Restoration Neural Filter precisely targets surface imperfections like scratches and dust. Even so, traditional Photoshop tools remain essential. Tools like the Healing Brush, Spot Healing Brush, Content-Aware Fill, and the Remove Tool offer granular control for final clean-up.
Here’s a practical approach for heavily damaged photos:
Major Reconstruction: Start with Generative Fill to intelligently reconstruct large tears, missing corners, or significant object removal. This handles the bulk of the "heavy lifting."
Surface Imperfection: Apply the Photo Restoration Neural Filter to automatically remove fine scratches, dust specks, and minor blemishes that Generative Fill might not address perfectly.
Fine-Tuning: Employ traditional tools like the Healing Brush and Spot Healing Brush to perfect edges, blend areas, and remove any remaining minor artifacts that AI might have missed or introduced.
Contextual Refinement: For very specific areas, the Content-Aware Fill or Remove Tool can provide precise manual control that AI might not grasp.
Some Photoshop AI capabilities, such as generative upscale, AI denoise, and AI sharpen, may utilize underlying models from partners like Topaz AI. For a broader understanding of restoring old damaged photos, including various techniques and tools, explore our comprehensive guide to photo restoration.
Pro Tip: Always consider historical accuracy. AI can sometimes "hallucinate" details not present in the original. Manually review and correct any AI-generated elements that feel anachronistic or incorrect for the photo's era.
Purpose-Built AI: A Powerful Alternative for Old Family Photos
For users who find Photoshop's generative features complex, specialized AI tools offer a direct path to restoring old photos. These purpose-built platforms automate the repair of damage like scratches, fading, and color loss, delivering professional results with minimal user input.
This approach bypasses the learning curve of advanced software. It focuses solely on reviving cherished memories, understanding that your primary goal is a quick, high-quality revival of precious family photographs. These tools are designed to be your empathetic digital conservator.
When considering alternatives to repair old photos photoshop workflows, dedicated AI restoration tools shine for their simplicity and targeted effectiveness. While Photoshop offers powerful generative capabilities, purpose-built AI platforms deliver automated, high-quality results specifically for damaged images.
Key Insight: External AI photo restoration services exist because they address a distinct need: offering an effortless, automated solution for anyone wanting to revive old family photos without mastering complex editing software.
Here’s a look at how these specialized tools compare to more general generative AI:
Damage Type
Generative Fill Suitability
Neural Filter Suitability
Purpose-Built AI Suitability (e.g., BringBack)
Large tears/missing corners
High (requires manual guidance)
Low (not designed for reconstruction)
Very High (specialized reconstruction)
Severe fading/discoloration
Medium (can be unpredictable)
Medium (colorization feature)
Very High (dedicated color restoration)
Fine scratches/dust
Medium (may create artifacts)
High (Photo Restoration Filter)
Very High (precise scratch removal)
Water damage (partial)
Medium (requires careful masking)
Low (not specific)
High (can intelligently infer missing data)
Facial reconstruction (minor)
Medium (can introduce errors)
High (Restoration Filter)
High (often trained on faces)
Background extension
High
Not applicable
Not applicable (focus on repair)
Output quality from purpose-built AI can be exceptionally high, often matching or exceeding what a novice user could achieve in Photoshop. Processing speed is typically rapid, with many tools completing restorations in seconds to minutes, a stark contrast to the hours some complex Photoshop edits might take. These tools are built to understand the unique challenges of aged photographs.
BringBack: Automated, High-Quality Restoration for Cherished Memories
Output quality from purpose-built AI can be exceptionally high, often matching or exceeding what a novice user could achieve in Photoshop. Processing speed is typically rapid, with many tools completing restorations in seconds to minutes, a stark contrast to the hours some complex Photoshop edits might take. These tools are built to understand the unique challenges of aged photographs.
While Photoshop's Generative Fill offers immense power, specialized external AI photo restoration tools provide a streamlined alternative. Services like LetsEnhance, HitPaw, and DeeVid AI are designed with a singular focus: bringing old photos back to life. LetsEnhance, for instance, features a dedicated 'Old Photo' restoration model and an 'Authentic mode' toggle, preserving the original photo's character while fixing damage. This specialized approach is precisely why many users are exploring these options, echoing the broader trend of adopting generative AI for restoring old photos.
For those seeking an effortless yet powerful solution for their most precious memories, our tool, BringBack, offers a direct path to revival. We've built our platform specifically for family heirlooms, ensuring a user-friendly experience from scan to share.
Here’s how easily you can bring your cherished photos back to life with BringBack:
Scan Your Photo: Use your smartphone camera to capture the best possible digital image of your physical photograph.
Upload to BringBack: Simply upload the scanned, damaged photo into our intuitive AI tool.
AI Analyzes & Repairs: Our AI instantly analyzes the damage, applying targeted repairs for scratches, fading, and tears in mere seconds.
Review & Download: Preview your restored, high-resolution photo. You can also choose to generate an animated version.
Share the Magic: Relive and share your revived memories with loved ones.
We understand that sentimental value often outweighs cost. That's why BringBack offers a one-time payment for credits that never expire. You can mix and match these credits for photo restoration or captivating animation, ensuring you always get the most out of your preserved memories. Understanding the specialized approach of AI tools like BringBack can be invaluable for those looking to revive highly sentimental photographs, and you can learn more about how to restore wedding photos with AI on our blog.
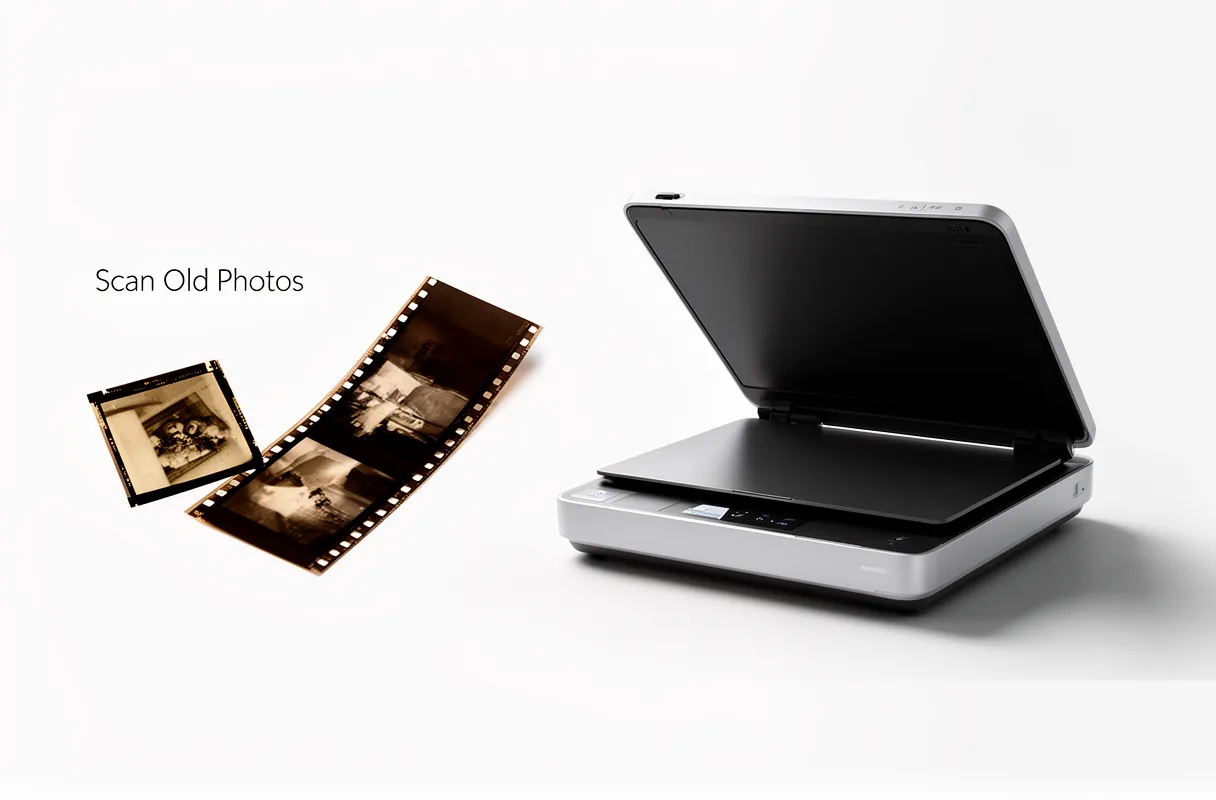
The best approach for digitizing standard prints is often 300-600 DPI using a flatbed scanner, ensuring quality without bloated files. However, slides and negatives demand higher resolutions like 2400-4800 DPI to capture their immense detail. For truly restoring faded or damaged old photos, modern AI tools, such as BringBack, are essential, going beyond what scanning alone can achieve.
Solution
Best For
Key Benefit
DIY Scanning
Control, Budget
Max Detail Capture
Pro Digitizing
Large Collections
Time Saving
BringBack AI
Faded, Damaged Photos
True Restoration
I tried scanning a blurry print at 4800 DPI, expecting a miracle. It only yielded a massive file, not a clearer image. The truth: DPI won't fix blur or fade already present in the original photo.
There is no reason to scan prints above their native resolution just to 'future-proof' them, when the damage is already ingrained.
By the end of this guide, you will know exactly which methods fit your collection size, budget, and restoration needs for preserving your precious memories.
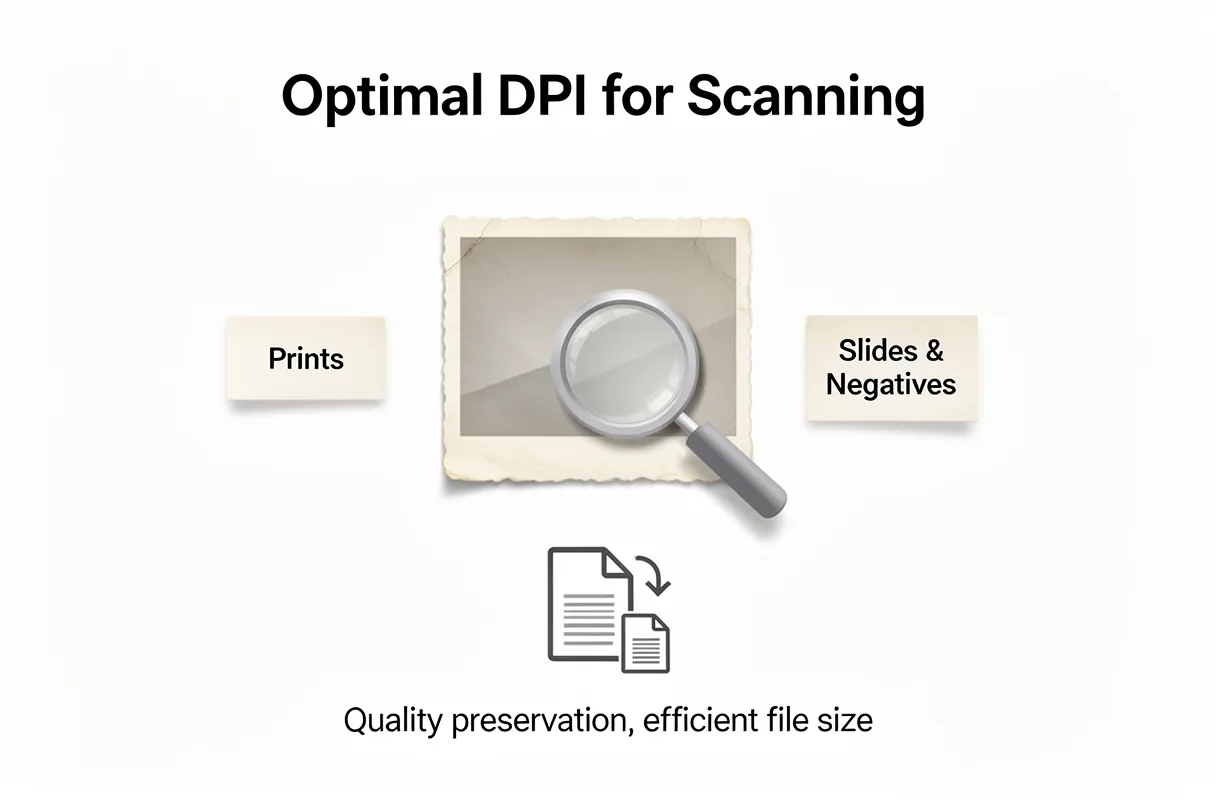
Optimal DPI for Scanning Old Photos: A Resolution Guide
Choosing the right scanning resolution, measured in Dots Per Inch (DPI), directly impacts the quality and usability of your digitized old photos. For a detailed explanation of DPI and its implications when digitizing various types of old photos, including optimal resolution choices for standard print sizes, you can find more information here.
Here's a straightforward guide:
Standard Prints (e.g., 4×6 inches): Aim for 300 DPI. This captures the full detail present in most printed photos. Scanning at this resolution provides ample quality for everyday viewing and sharing online. A 4×6 print scanned at 300 DPI results in a digital image around 1200 pixels on its longest side.
Slides and Negatives: These formats hold significantly more detail in a smaller physical space. You'll want to scan them at much higher resolutions, typically ranging from 2400 to 4800 DPI. This higher DPI is essential for capturing the fine grain and richness of these original film formats. Scanning at these higher settings is crucial for enabling significant cropping or future enlargements.
Scanning at a DPI higher than what's necessary for the original photo type doesn't magically add detail. Instead, it creates larger files that consume unnecessary storage space. The key is to match the DPI to the original's inherent detail. For a deeper understanding of how to achieve the best possible scan quality, explore methods for high-resolution photo digitization.
Remember, DPI won't fix blur or fade already present in the original photo.
There is no reason to scan prints above their native resolution just to 'future-proof' them, when the damage is already ingrained.
By the end of this guide, you will know exactly which methods fit your collection size, budget, and restoration needs for preserving your precious memories.
DPI for Standard Prints: What's Optimal?
When digitizing standard prints, the goal is to capture the original detail without oversampling. For most common photo prints, like those from a 4×6 inch snapshot, the optimal scanning resolution is 300 DPI. This setting matches the native print resolution, ensuring you capture everything the original image holds.
Scanning a standard 4×6 inch print at 300 DPI creates a digital file approximately 1200 pixels wide. This is more than enough detail for everyday use. You can easily view these digital images on screens, share them via email, or even print them at their original size.
Trying to scan prints at significantly higher DPIs won't magically add more detail. It simply interpolates existing information, resulting in much larger file sizes without a corresponding visual improvement. For general archiving and sharing of standard prints, 300 DPI strikes the perfect balance. It preserves your memories faithfully without creating unwieldy files.
Scanning at Higher DPI for Future Needs and Film Formats
Scanning prints at more than 300 DPI doesn't add detail; it just inflates file size. However, higher DPIs become essential for film formats and when you anticipate needing to crop or enlarge images later. For slides and negatives, which hold significantly more fine detail than prints, a much higher resolution is crucial. Scanning these smaller formats at 2400-4800 DPI captures their inherent richness.
Think of it like zooming in on a tiny painting. You need a high-resolution scan of the negative or slide to reveal all the subtle textures and colors, just as you’d need a detailed photograph of the painting itself. This ensures you have enough data to work with for future photo enlargement or intricate restoration projects.
Here’s a general guide for scanning resolutions:
Standard Prints (4×6, 5×7, etc.):
300-600 DPI: Sufficient for general viewing and moderate enlargement.
1200 DPI: For significant cropping or potential large prints.
Slides and Negatives:
2400 DPI: Good for standard print sizes (e.g., 8×10).
4800 DPI or higher: Essential for maximum detail capture, allowing for very large enlargements and extensive editing.
Choosing the right DPI for slides and negatives is key to unlocking their full potential for archival purposes.
DIY Scanning vs. Professional Services: Your Digitization Options Compared
Choosing how to digitize your precious memories involves weighing a few key trade-offs. You can tackle the task yourself with a scanner, or hand it over to a professional service. Both approaches have distinct advantages and disadvantages that impact your final results, your wallet, and your valuable time.
Scanning photos yourself offers ultimate control over the process. You decide exactly when and how each image is scanned, applying your preferred settings for resolution, color correction, and file format. This is a major plus if you have specific archiving goals or want to meticulously restore certain damaged photos. However, DIY photo scanning can be a time sink, especially with large collections. Setting up a scanner, handling each individual print, and managing the digital files can consume hundreds of hours.
Professional photo digitization services, on the other hand, excel in convenience. You simply box up your photos, slides, or negatives, and the service handles the rest. This is ideal for those who want to preserve their memories but lack the time or inclination for DIY scanning. The cost of scanning photos through these services is typically per item, which can add up quickly for extensive archives. While quality can be high, you relinquish direct control over the scanning process itself.
Here’s a quick breakdown:
Feature
DIY Scanning
Professional Digitization Services
Control
High: You manage all settings.
Low: Service dictates the process.
Time Commitment
Very High: Hundreds of hours for large collections.
Low: Minimal effort from you.
Initial Cost
Moderate to High: Scanner purchase.
Low: Pay per item/box.
Result Consistency
Variable: Depends on your skill and equipment.
Generally High: Professional equipment and staff.
Best For
Meticulous archivists, small collections, unique needs.
Large collections, time-strapped individuals, convenience seekers.
Ultimately, the best path depends on your personal priorities: convenience vs control, and how much time and money you're willing to invest.
Weighing Your Options: Cost, Time, Quality, and Media Type
Deciding between digitizing photos yourself or hiring a service boils down to balancing cost, time, and the quality you expect, especially considering the different media types involved.
Cost Comparison: Initial Outlay vs. Per-Item Fees
DIY scanning demands an upfront investment in equipment. A good flatbed scanner, essential for handling prints and fragile items, can range from $150 to $500. Add to that the cost of external hard drives for storage, potentially $50-$100. This initial outlay allows for complete control over the scanning process for your entire collection.
Professional services, conversely, often have a lower entry barrier. Pricing models typically vary from per-item fees (e.g., $0.30-$0.50 per print) to pre-packaged boxes where you pay a flat rate for a set number of items. While seemingly more affordable upfront for small batches, costs can escalate quickly with large collections.
Time Commitment: Your Hours vs. Their Turnaround
The time investment for DIY scanning is significant, particularly for large archives. Scanning a single photo might take only a minute or two, but digitizing hundreds or thousands of images can consume weeks or even months of your personal time. This includes not just the scanning itself, but also organizing, cleaning, and post-processing.
Professional services offer a trade-off: you save your time but relinquish control over the timeline. Turnaround times can range from a few weeks to several months, depending on the service's workload and the complexity of your order. For urgent needs or large projects where your time is at a premium, this can be a major consideration.
Quality and Control: Precision vs. Consistency
DIY scanning puts you in the driver's seat for quality. You control resolution (DPI), color correction, and file format. This is invaluable for restoration work or when dealing with delicate, damaged, or unique media like slides and negatives, where specialized equipment and careful handling are paramount. Using a dedicated flatbed scanner is often superior to all-in-one printer scanners for detail and color accuracy.
Professional services generally provide consistent, high-quality results due to specialized equipment and trained staff. However, you have less direct control over the scanning process. While many offer options for resolution and basic edits, deep restoration or handling of extremely fragile items might be limited or come with additional charges.
Media Type Handling: Versatility Matters
Different media require different approaches. Prints are straightforward for flatbed scanners. Slides and negatives, however, demand higher resolutions and specialized scanning equipment (often built into higher-end flatbeds or available through dedicated film scanners) to capture their rich detail. Some professional services excel at handling all media types, while others may specialize or charge more for specific formats. If your collection includes a mix of prints, slides, and negatives, carefully compare how each option handles these diverse formats.
Current Landscape of Professional Digitizing Service Pricing (March 2026)
When considering professional photo scanning service pricing in March 2026, it's important to acknowledge that old benchmarks like "39 cents per photo" or "21 cents per slide" are likely outdated. The actual cost for preserving your cherished memories through a service has evolved.
Current pricing models often vary significantly based on the media type and the volume of items you send. You'll frequently see options structured around:
Per-Item Tiers: Different price points for standard prints, larger prints, slides, and negatives. Slides and negatives typically command a higher price due to the specialized scanning and higher resolutions required to capture their detail.
Box-Based Services: Companies like the Kodak Digitizing Box often operate on a fixed-price model for a certain number of items within a box. It’s important to note that this service isn't directly run by Kodak; rather, it's a licensed partnership managed by AMB Media, which also oversees brands such as LegacyBox and Southtree. This structure offers a predictable cost upfront.
Volume Discounts: Sending larger collections almost always unlocks better per-item rates, making it more economical for those with extensive archives.
Obtaining precise, up-to-the-minute photo scanning service pricing 2026 requires checking directly with providers. For services like DigMyPics or ScanMyPhotos, pricing can fluctuate.
The "Kodak Digitizing Box" pricing is a fixed cost per box, but remember it's a partner service and not direct Kodak operation.
We’ve observed that services like LegacyBox pricing also fall within a similar range, often providing package deals. To get the most accurate estimate, always request a current quote tailored to your specific media types and collection size. This ensures you’re working with the latest figures and understand all included services.
Choosing the Right Tools and Services for Photo Digitization
Deciding between digitizing your photos yourself or using a professional service involves balancing your budget, time commitment, and desired quality. DIY methods can be cost-effective for small batches but require an initial investment in equipment. For large collections, the sheer time commitment can become overwhelming, making professional services a more practical choice despite a higher per-item cost. Quality is also a factor; while home scanners offer control, consistency across thousands of photos can be challenging. Professional services often employ specialized equipment and trained staff to ensure a high, uniform standard, especially for delicate or damaged media.
For expert reviews and current recommendations on the best photo scanners available in 2026, based on extensive hands-on testing, consult the best photo scanners.
Here's a rapid comparison to help you decide:
Product/Service
Price Range (Estimated)
Best For
Key Features
Pros
Cons
DIY Flatbed Scanner
$150 – $500+ (one-time)
High volume, ultimate control, diverse media (prints, slides)
High resolution (up to 6400 DPI), dust/scratch removal (e.g., Digital ICE)
Full control over settings, cost-effective for massive archives, immediate access
Significant time investment, learning curve, potential for inconsistent quality, requires storage
Kodak Digitizing Box
$99 – $399 (per box)
Convenience, mixed media, sentimental value
Mail-in service, all media types accepted, basic digital restoration
Easy to use, hands-off process, preserves memories safely
Less control over quality, fixed box sizes, longer turnaround times, potential for damage in transit
DigMyPics
~$0.45 – $0.75 per print
Medium to large collections, good quality
Various resolution options, editing services available, online gallery
Good balance of quality and cost, accessible online platform
Can add up quickly for very large collections, requires sorting before sending
ScanMyPhotos
~$0.39 – $0.89 per print
Large volume, budget-conscious
Bulk scanning discounts, fast turnaround for prints, online ordering
Competitive pricing for large batches, quick processing for prints
May require more upfront sorting, quality can vary depending on service tier, slide/negative prices higher
Your choice hinges on how much time you can dedicate and your comfort level with technology. For those with thousands of cherished photos and limited free time, outsourcing to a reputable service often provides the peace of mind that precious memories are being handled with care and expertise.
Top Picks for DIY Photo Scanners
When you want to bring your precious old photos back to life yourself, picking the right scanner makes all the difference. We've found that two flatbed scanners consistently stand out for their ability to handle photos and film with excellent results: the Epson Perfection V600 and the Canon CanoScan LiDE 400.
Epson Perfection V600: The All-Around Performer
The Epson Perfection V600 is a powerhouse for digitizing a wide range of media, especially if you have slides and negatives. It offers impressive resolution and quality for both prints and film.
Overview: This scanner is designed for users who need high-quality scans of photos, slides, and negatives, with features that make restoring faded or damaged originals easier.
Key Features:
6400 x 9600 dpi optical resolution: Captures incredible detail.
Digital ICE Technology: This is the standout feature, automatically removing dust and scratches from film and prints. (We’ve seen this technology work magic on faded negatives.)
Multiple Transparency Adapters: For scanning slides and film strips.
Scan to Cloud and Scan to Email: Convenient sharing options.
Pricing: Generally found in the $200-$250 range.
Pros: Exceptional image quality, particularly with Digital ICE for film restoration, versatile for various media types.
Cons: Can be slower for large batches of prints, higher price point than basic models.
Best For: Those who prioritize detail and restoration, especially for film, and have a good budget.
Canon CanoScan LiDE 400: The Budget-Friendly Workhorse
For a more accessible entry into DIY scanning, the Canon CanoScan LiDE 400 is a fantastic option. It's compact, affordable, and delivers solid performance for everyday photo scanning needs.
Overview: This is a user-friendly, compact scanner that plugs directly into your computer via USB, offering good quality scans without a hefty price tag.
Key Features:
Up to 4800 x 4800 dpi optical resolution: More than enough for most photo prints.
Z-lid: Lifts straight up, accommodating thicker items like photo albums.
Fast scan speeds: Ready to go in seconds after power-up.
Single USB cable: For power and data, simplifying setup.
Pricing: Typically available for $70-$100.
Pros: Excellent value for money, very compact and easy to use, the Z-lid is practical for books.
Cons: Lacks dedicated film scanning capabilities and advanced restoration features like Digital ICE. We’ve found that for the LiDE 400, scanning prints at 2400 DPI offers a great balance of quality and file size, even though its optical max is higher.
Best For: Individuals primarily scanning prints, looking for an affordable, no-fuss solution.
Your choice between these two depends on your budget and the types of media you plan to scan. For those starting out or focusing on prints, the Canon LiDE 400 is an incredibly capable and cost-effective tool. If film restoration and the highest detail are your goals, the Epson V600 is a superb investment.
Leading Professional Digitizing Services
When your shoeboxes overflow and flatbed scanners feel like a chore, professional mail-in services offer a welcome alternative. They handle the bulk, saving you hours and often providing specialized equipment for the best results.
Kodak Digitizing Box vs. LegacyBox: Choosing Your Mail-In Path
Kodak Digitizing Box provides a straightforward system for digitizing various media. You fill the box with your photos, tapes, or films, and they handle the conversion.
Overview: A well-known brand name offering a convenient, all-in-one mail-in solution.
Key Features: Digitizes photos, slides, negatives, VHS tapes, and 8mm/Super 8 film. Includes a return shipping label and digital delivery via cloud or USB.
Pricing: Varies based on media type and quantity. Photo digitizing typically starts around $0.50 per photo for larger quantities, with other media priced separately.
Pros: Familiar brand, simple process, handles diverse media types.
Cons: Can be more expensive than some competitors for large batches of photos. Turnaround time can vary.
Best For: Those prioritizing a trusted brand name and a simple, comprehensive service for mixed media.
LegacyBox, a direct competitor, offers a similar service but often emphasizes a more hands-on, personalized approach.
Overview: A popular mail-in service focused on preserving analog media by converting it to digital formats.
Key Features: Accepts photos, VHS tapes, 8mm film, MiniDV, and more. Provides a pre-paid shipping kit and digital copies on USB drives or cloud.
Pricing: Offers tiered pricing packages based on the number of items. Smallest kits start around $60 for 1-5 items, with larger kits offering better per-item value.
Pros:Personalized guidance and tracking, handles a wide range of media. Known for their careful handling.
Cons:Can be pricier than services focused solely on photos, especially for smaller orders. Turnaround time can be several weeks.
Best For: Individuals with a mix of media types who appreciate a high level of service and detailed tracking.
DigMyPics and ScanMyPhotos: High-Volume and Budget-Friendly Options
DigMyPics often appeals to those with massive collections. They provide a system that aims for efficiency.
Overview: A service known for handling large volumes of photos, offering competitive pricing for bulk orders.
Key Features: Specializes in photo scanning, accepting prints, slides, and negatives. Offers various resolution options and digital delivery.
Pricing: Known for being among the most affordable for high volumes, often under $0.20 per photo for large scans.
Pros: Excellent value for bulk photo scanning, fast turnaround on large orders.
Cons: Less focus on other media types like tapes or film. Customer service can be less personal for very large jobs.
Best For: Anyone with thousands of prints looking for the most cost-effective solution.
ScanMyPhotos is another strong contender in the budget-friendly, high-volume space. They pride themselves on speed and accessibility.
Overview: A long-standing service specializing in efficient and affordable photo digitizing.
Key Features: Primarily focuses on photo prints, slides, and negatives. Offers express scanning services and various digital output options.
Pricing: Very competitive, especially for bulk photo orders. You can find deals for as low as $0.10-$0.15 per photo during promotions.
Pros: Extremely competitive pricing for photos, fast processing times.
Cons: Primarily photo-focused; may not be the best choice for mixed media. Quality can vary slightly with the lowest-tier pricing.
Best For: Budget-conscious individuals with extensive photo collections who need them digitized quickly.
These services take the burden off your shoulders, allowing you to reclaim your time and enjoy your rediscovered memories.
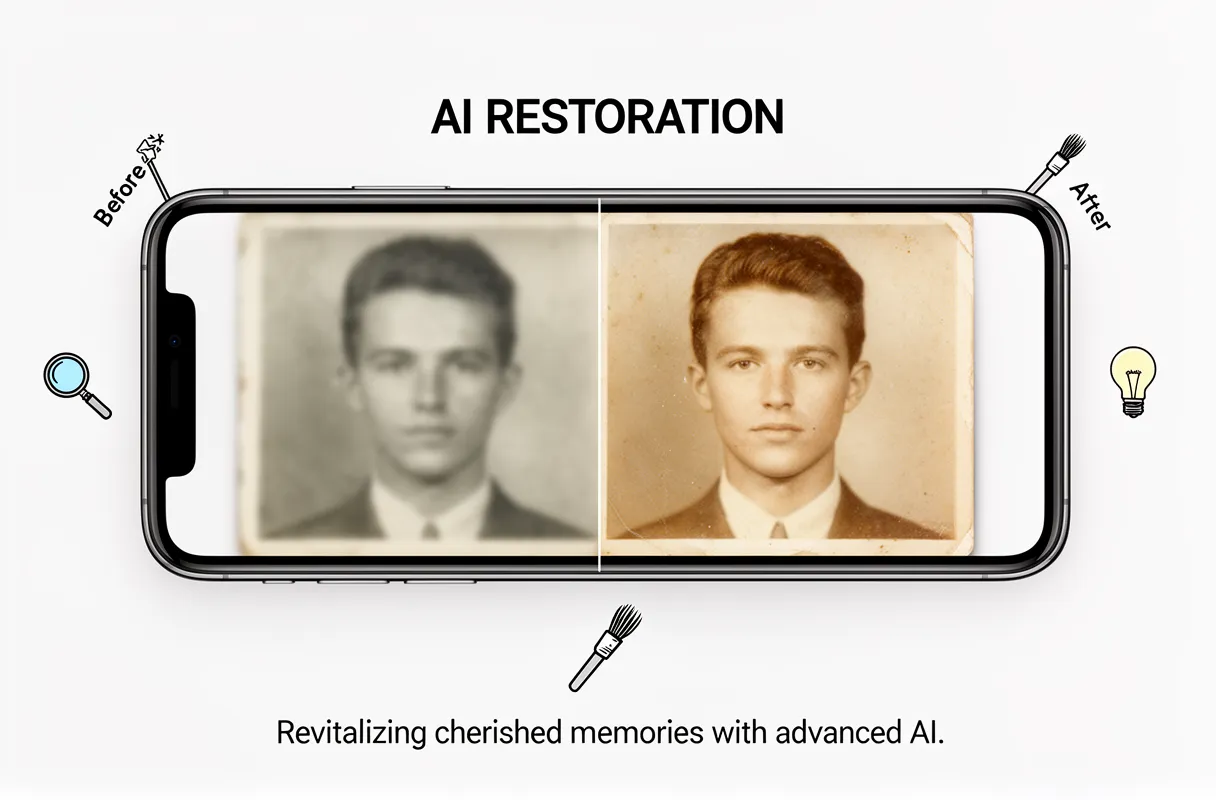
Enhancing Digitized Photos: AI Restoration and Damage Repair
Scanned photos, even with the best scanners, often retain imperfections like fading, scratches, and minor damage. Modern AI tools go far beyond basic edits to breathe new life into these precious memories.
AI photo restoration tackles issues that traditional software struggles with. It can intelligently reconstruct missing details, sharpen blurred areas, and even colorize black and white images with remarkable accuracy. This means those faded portraits and scratched landscapes can look almost as good as new. For those specifically looking to rescue faded or blurry family pictures, AI offers powerful solutions that basic editing tools simply can't replicate.
Think of AI as an expert restorer. It analyzes the content of your photo, identifying areas of degradation. Then, it applies targeted fixes, like filling in cracks or correcting color loss, with a level of sophistication that mimics years of human skill. This process can significantly improve the emotional impact and legibility of your digitized heritage.
BringBack's AI-Powered Restoration Process
Think of AI as an expert restorer. It analyzes the content of your photo, identifying areas of degradation. Then, it applies targeted fixes, like filling in cracks or correcting color loss, with a level of sophistication that mimics years of human skill. This process can significantly improve the emotional impact and legibility of your digitized heritage.
BringBack AI tool streamlines this rescue mission. You simply scan your old photos with a phone app, capturing the best digital copy you can. Then, upload that scanned, damaged image directly to our platform.
Our AI analyzes the degradation in seconds. It intelligently repairs fading, scratches, and blur, bringing your precious memories back to life. You can even explore AI photo animation to add a magical touch.
You then review your revitalized photo or animated video and download it in high resolution. Sharing these revived treasures with loved ones becomes a source of pure joy.
Unlike subscription models, BringBack uses a one-time payment for credits that never expire. This makes restoring your cherished legacy both accessible and remarkably straightforward.
Restore Your Cherished Memories with BringBack:
Scan Your Photo: Use your phone's camera to capture a clear digital image of your old photograph.
Upload to BringBack: Submit your scanned, damaged photo to our AI tool.
AI Restoration: Our intelligent system analyzes and repairs the image in seconds.
Review & Download: See your restored photo or animated video, then download it in high resolution.
Share Your Legacy: Relive and share your revitalized memories with family and friends.
Strategies for Scanning Badly Damaged Photos
Handling badly damaged or degraded photos requires a careful approach before and during scanning. Even with advanced tools, the initial scan quality dramatically impacts the final restoration.
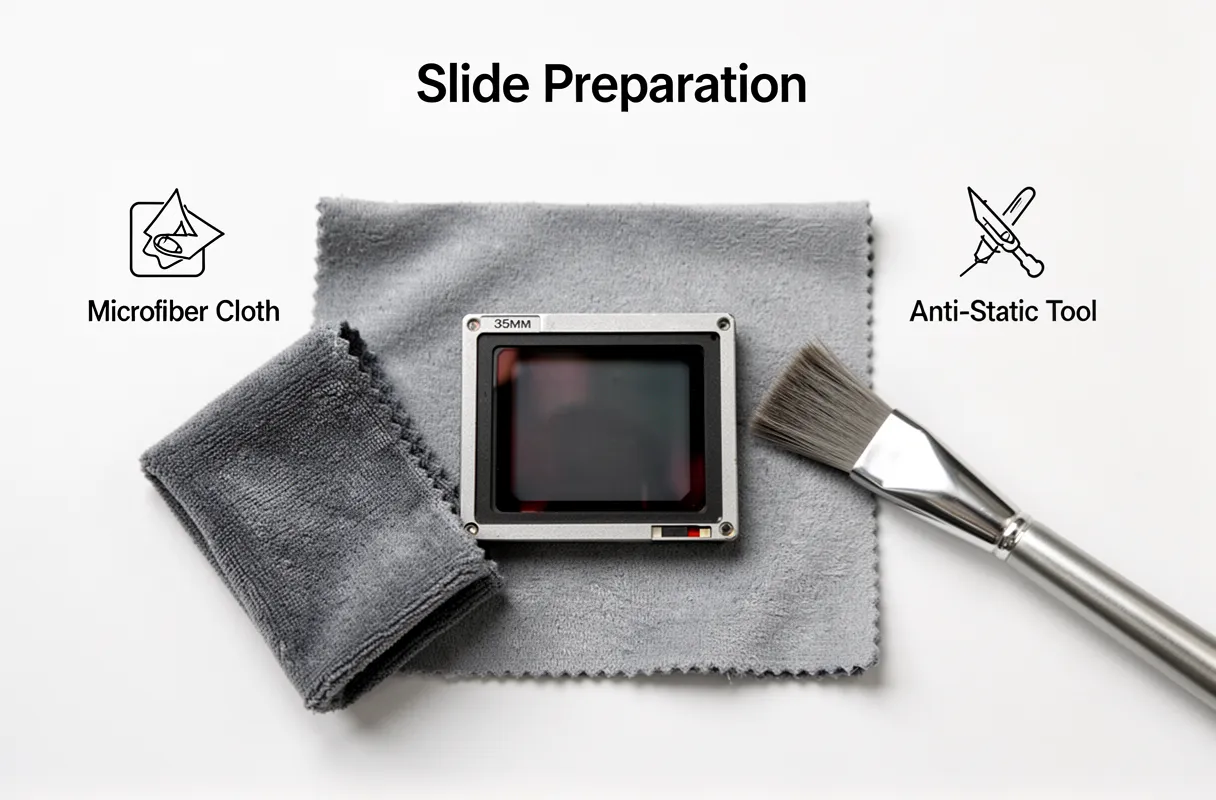
For severely creased, torn, or brittle photos, gentle preparation is key. You might need to carefully flatten warped images under a heavy book for a few days, or use a soft brush to remove loose dust particles. Avoid any moisture or harsh chemicals.
When scanning, look for specific features on your scanner. Some higher-end models, like the Epson V600, offer Digital ICE technology. This feature automatically detects and corrects dust and scratches on film and prints during the scanning process. It's a significant help for photos with surface imperfections.
For images with significant fading, color shifts, or deep-seated damage that even scanner software can't fully address, advanced AI repair becomes indispensable. These tools can reconstruct missing pieces, sharpen blurred areas, and bring back lost color saturation in ways that manual editing cannot replicate effectively.
Scanning badly damaged photos often means accepting that some level of imperfection will remain digitally. The goal is to capture the best possible source material.
Deep Creases: These can create permanent lines that scanners interpret as dark streaks.
Mold or Water Stains: These often embed into the emulsion and are incredibly difficult to remove completely.
Severe Fading: Colors can be lost to the point of near-irrelevance, requiring AI guesswork for accurate reconstruction.
These challenges highlight why post-scan AI enhancement is so critical for truly bringing cherished, degraded photos back to life.
Organize and Preserve Your Digital Photo Collection Long-Term
Deep creases and water stains on old photos mean your scanner might miss details or create unwanted artifacts. Because the AI restoration process works best with the clearest possible digital scan, even seemingly minor damage demands attention before uploading. Gentle handling and specific scanner settings (like Epson's Digital ICE for dust and scratches) make a significant difference here. For severely faded prints, consider AI's ability to intelligently guess missing color and detail, a task far beyond simple image adjustments.
Preserving your digitized photos long-term means treating them like precious artifacts. You need a clear plan for organization and protection. This ensures your family's visual history remains accessible for generations.
Here’s a concise checklist for effective long-term digital photo preservation:
File Naming: Use a consistent format like YYYY-MM-DD_Event_Description.
Metadata Tagging: Add dates, people, and locations to every image.
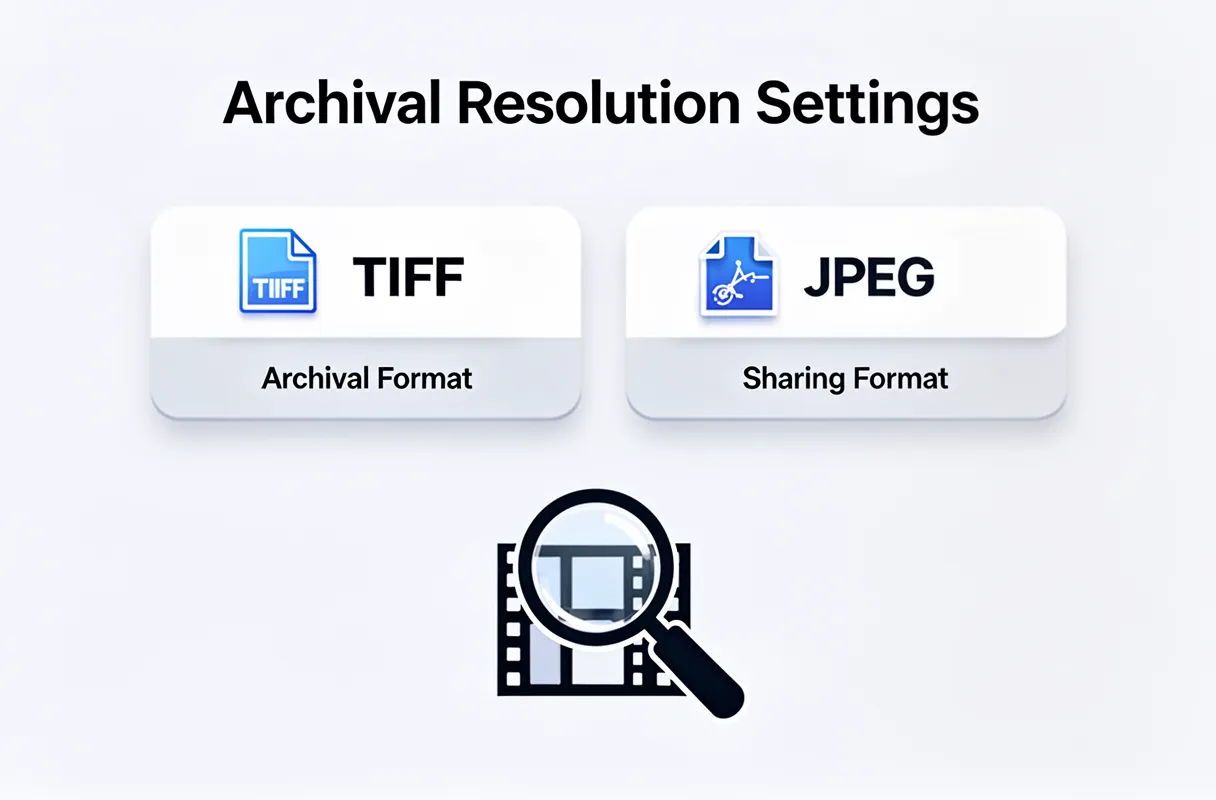
Master Files: Save in a lossless format like TIFF.
Working Copies: Create compressed JPGs for everyday use, scaled appropriately (e.g., 2160px on the short side at 300 DPI).
Backup Strategy: Implement both cloud and local backup solutions.
This structured approach transforms a chaotic digital dump into a searchable, safe archive. It’s about making sure those rediscovered memories bring joy, not frustration, down the line.
Essential File Management for Digitized Collections
After scanning, your digital photo archive needs structure to remain useful. Proper file management prevents a chaotic digital dump and ensures your cherished memories are accessible for generations.
File Naming Conventions: Clarity Through Consistency
A clear file naming system is the bedrock of digital photo organization. We recommend a consistent format that includes key information at a glance.
Choose one format and stick to it. This makes sorting and searching infinitely simpler than generic names like IMG_1234.jpg.
Enriching Files with Metadata
Beyond the filename, metadata adds critical layers of information for future discovery. Think of it as digital breadcrumbs leading you back to the memory.
Essential Metadata:
Dates: The exact date, or at least the year, of the photograph.
People: Names of individuals present.
Locations: Where the photo was taken.
Events: Weddings, birthdays, vacations, etc.
Many photo viewing and management programs allow you to easily add and edit this data. For advanced archiving, consider software that supports IPTC or EXIF standards.
File Formats: Masters and Working Copies
To truly preserve your digitized memories, you need to think about file formats.
Master Files: Always save your original scans in a lossless format like TIFF. This format retains all image data without compression, offering the highest quality for future edits or re-scanning.
Working Copies: For everyday viewing, sharing, or web use, create compressed JPG files. Scale these appropriately (e.g., 2160 pixels on the short side at 300 DPI) to balance file size with good display quality.
This tiered approach ensures you have the archival-quality original and a practical version for immediate use. This structured method transforms a potentially overwhelming collection into a treasure trove, ready for rediscovery.
Robust Backup Solutions: Cloud vs. Local
Protecting your precious photo memories requires a two-pronged approach: cloud storage and local backups. We recommend using both to safeguard against data loss.
Cloud storage offers accessibility and off-site protection. Services like Google Photos provide generous free tiers and excellent searchability powered by AI. For larger collections or if you prefer more control, Dropbox or IDrive offer dedicated plans. These are fantastic for daily access and sharing.
Local backups provide a physical copy you control completely. An external hard drive is a straightforward option. For a truly resilient system, consider a Network Attached Storage (NAS) device. A NAS acts like your own private cloud, accessible from anywhere, giving you vast storage capacity and RAID configurations for redundancy.
Here’s a look at how they stack up:
Feature
Cloud Storage (e.g., Google Photos, Dropbox)
External Hard Drive
NAS Device (e.g., Synology, QNAP)
Capacity
Varies by plan, often expandable
Fixed, choose size upfront
High, expandable, RAID options
Cost
Monthly/annual subscription
One-time purchase
Higher one-time purchase
Accessibility
Anywhere with internet
Direct connection required
Anywhere with setup, local network
Data Loss Risk
Low (provider managed)
Moderate (physical damage)
Low (with RAID configuration)
Redundancy
Built-in (provider's infrastructure)
None inherently
High (with multiple drives/RAID)
Think of cloud storage as your primary vault and an external drive or NAS as your secure safe deposit box at home. We've found that combining these strategies ensures your digital legacy is irreplaceable.
Your Ultimate Guide to Scanning Old Photos for the Best Results
Deciding on the best way to digitize old photos involves balancing your time, budget, and desired quality. For those with a modest number of photos and a desire for hands-on control, a DIY scanning setup can be cost-effective. This approach allows you to scan at your own pace and choose the exact resolution.
However, the "scanning myth" is that resolution alone fixes everything. Blurry or damaged originals remain blurry and damaged. This is where post-scan enhancement becomes critical, transforming a digital copy into a revitalized memory.
For individuals seeking the highest quality or dealing with vast collections of family history, outsourcing to a professional service is often the wisest path. These services use specialized equipment and expertise to handle delicate originals and deliver superior results, especially for irreplaceable images.
Ultimately, a smart photo preservation strategy combines careful scanning with advanced digital restoration. We've found that even basic scanning advice needs to be paired with the understanding that the real magic happens when you can bring faded colors back to life and sharpen forgotten details.
Our Recommendation:
DIY Scan: For under 500 photos, budget-conscious individuals, or those who enjoy the process. Focus on scanning at 600 DPI for good detail.
Professional Scan: For over 500 photos, delicate or damaged originals, or when prioritizing convenience and professional quality. These services often include basic color correction.
Always Enhance: Regardless of how you scan, plan for post-scan enhancement using tools like BringBack to truly revive your cherished images. This final step is what truly preserves your legacy.
Who Should DIY Scan and Who Should Outsource?
Whether you scan your precious photos yourself or hand them over to a professional service often hinges on a few key factors: your budget, the sheer volume of your collection, and your tolerance for time and complexity.
DIY Scanning is best for you if:
You're on a tight budget and need to spread costs out over time.
You have a smaller collection, say under 100 photos, or a few key albums.
You want complete control over the scanning process, resolution, and organization.
You enjoy hands-on projects and have patience for detail work.
Your photos are mostly in good condition, requiring basic digitization.
Professional scanning services shine when the scale or condition of your photos presents significant challenges. If you're looking at hundreds or thousands of images, or if your originals are fragile, torn, or deeply faded, outsourcing becomes a practical necessity. These services offer speed and expertise for large batches. They also handle a wider range of media, from slides and negatives to different print sizes.
Ultimately, the sheer volume of your photos is the biggest tipping point. For a shoebox, DIY is fine. For a lifetime's worth, professional help saves sanity.
Even if you choose to scan yourself, remember that the quality of the scan is just the first step. We find that clients who scan at home often then use our tool to bring their images back to life.
The Power of Post-Scan Enhancement
Scanning your precious memories captures a digital snapshot, but it's often just the beginning of their revival. True photo enhancement after scanning happens when you move beyond simple digitization.
Think of it like this: a 1200 DPI scan is like getting a high-resolution blueprint of a damaged building. It shows every crack and imperfection. It doesn't magically fix the crumbling plaster or faded paint.
That's where advanced software steps in. Our AI photo restoration benefits are designed to do precisely that – to breathe life back into your faded, blurry, or damaged photographs. We focus on bringing out the hidden details, correcting colors, and sharpening images in ways a standard scan simply cannot achieve.
Beyond the Pixel: AI-Powered Restoration
Consider a cherished photo with a significant blur. Scanning at the highest resolution will give you a clearer digital image of that blur, but it won't make the subject sharp. Our BringBack features use intelligent algorithms to analyze and reconstruct the image. We can:
Sharpen faces that are slightly out of focus.
Restore faded colors to their original vibrancy.
Remove scratches and tears that mar the image.
Enhance contrast to bring out subtle details.
The true magic happens after the scan. It’s the post-processing that transforms a good digital copy into a stunning, revitalized memory.
We find that our clients are often amazed by the difference. They bring us scanned images they thought were beyond saving, and our AI tools reveal the joy and emotion that were almost lost to time. Scanning is essential, but post-scan enhancement is what makes your memories unforgettable.
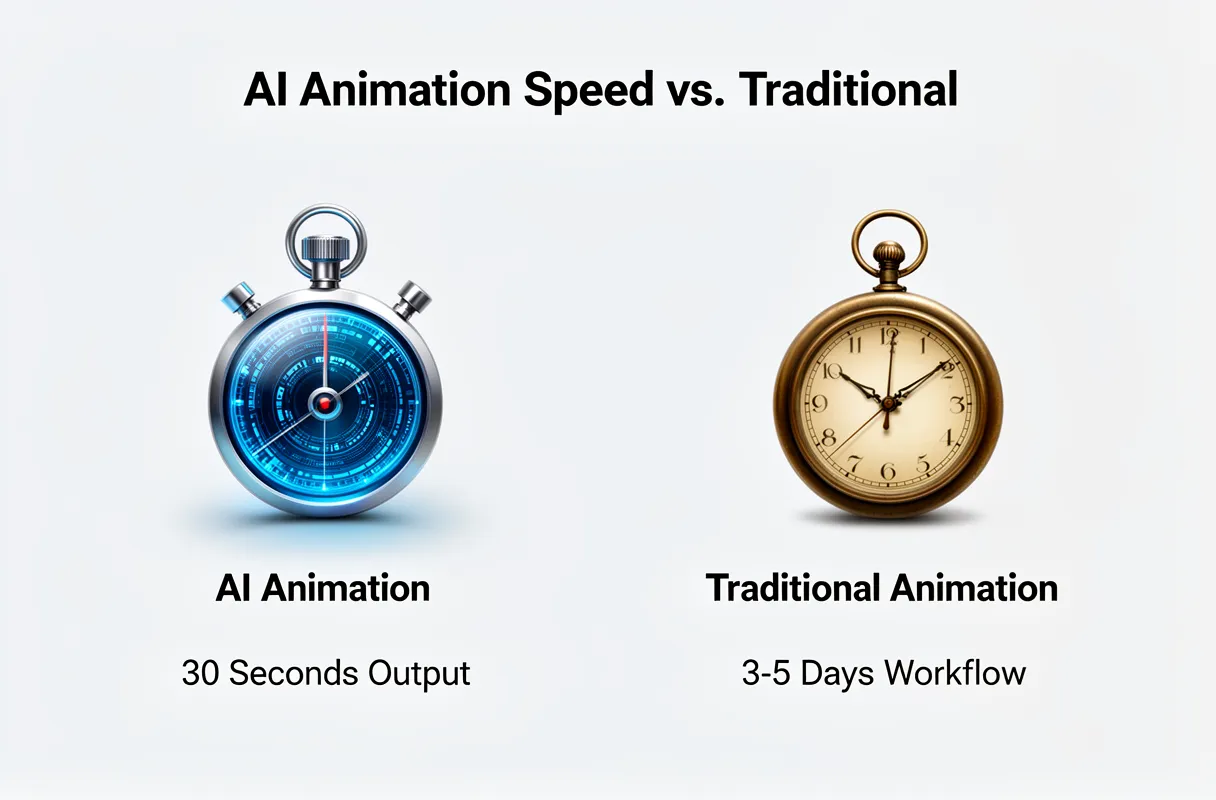
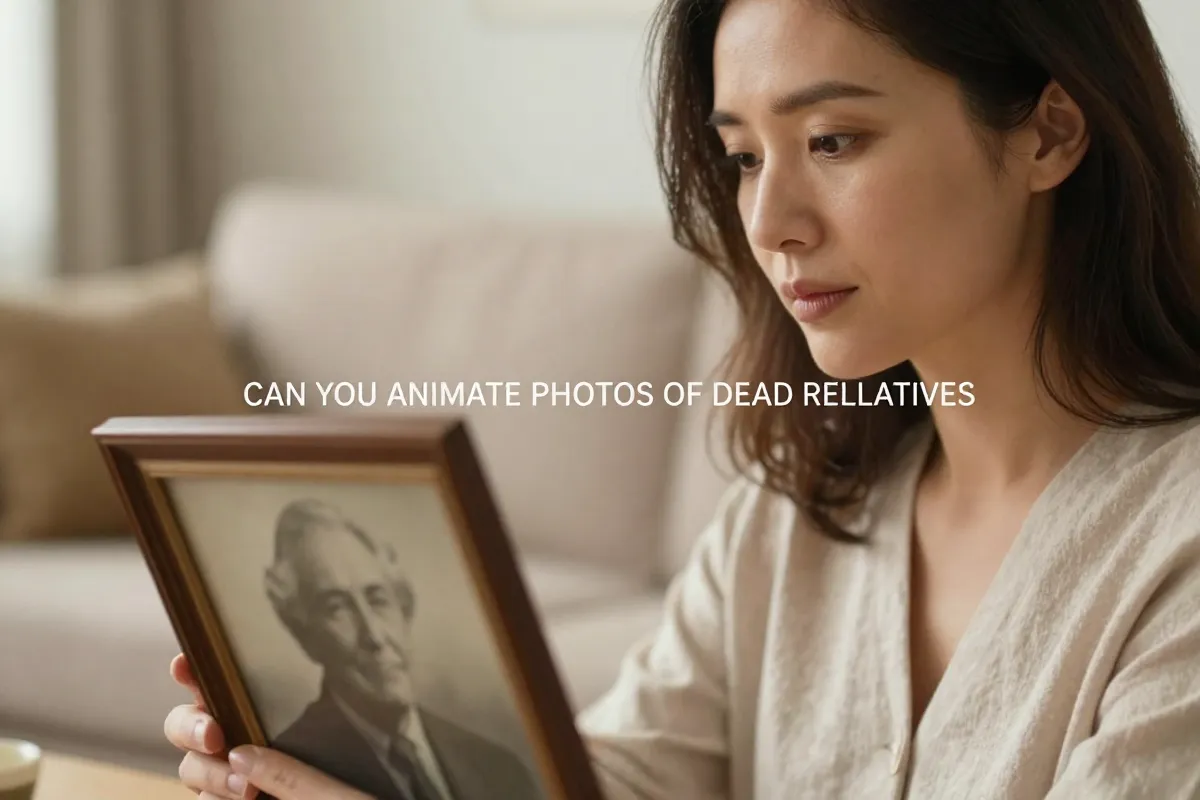
To honor precious memories with animated photos of deceased loved ones, you must choose best AI tools to animate still photo of deceased person 2026 and carefully prepare the source image. This process often takes as little as 30 seconds per animation and requires minimal technical effort.
What You Need:
A clear, high-resolution digital photo of the individual.
Reliable internet access.
Access to a premium photo to animation AI service like BringBack.
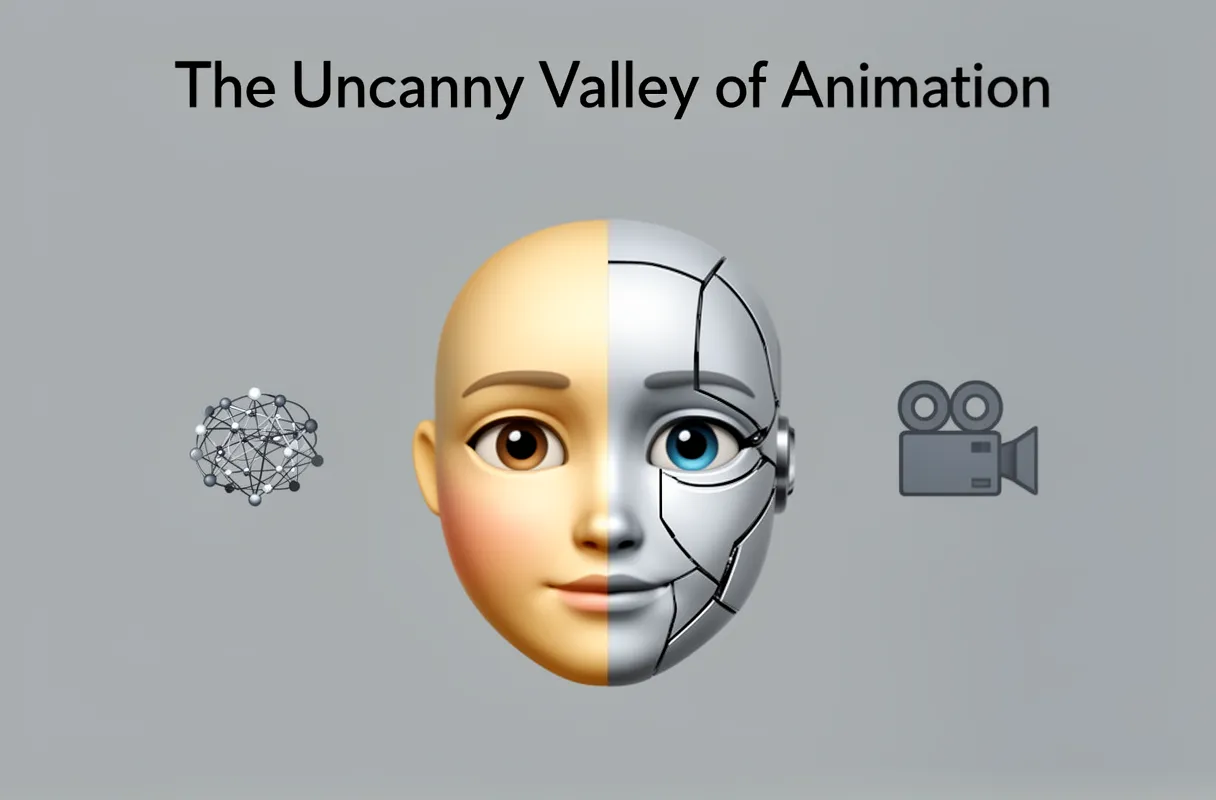
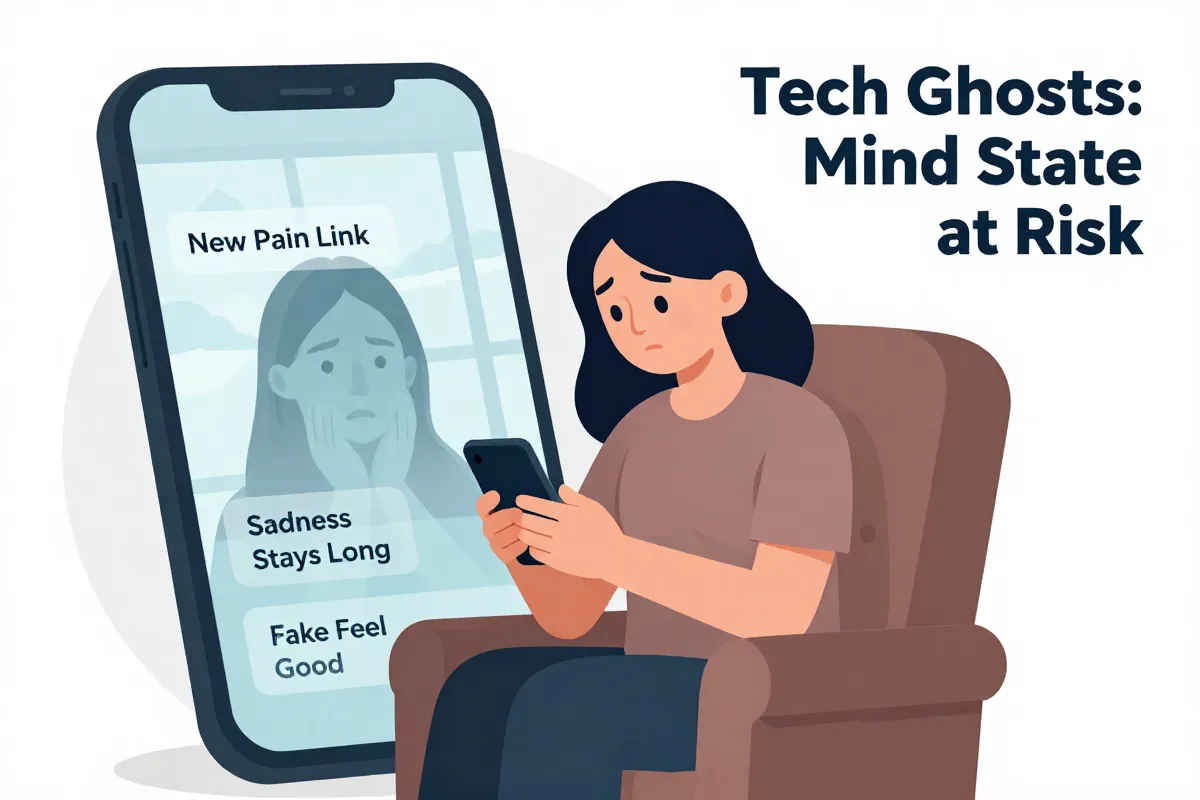
Many attempts to animate cherished old photos end in disappointment, producing stiff, unnatural movements. This often lands squarely in the uncanny valley. Generic free tools simply lack the algorithms needed to capture subtle micro-expressions, transforming precious memories into unsettling distortions instead of vibrant tributes. You deserve better.
By the end of this guide, you will create truly respectful, natural-looking animated memories. Preserve the essence of your loved ones for future generations.
Why "Free" AI Photo Animators Often Fail Emotional Moments
Even the most cherished old photos end in disappointment, producing stiff, unnatural movements. This often lands squarely in the uncanny valley. Generic free tools simply lack the algorithms needed to capture subtle micro-expressions, transforming precious memories into unsettling distortions instead of vibrant tributes. You deserve better.
AI photo animation relies on Deep Learning and Generative Adversarial Networks (GANs), trained on extensive video data of human faces. This advanced technology enables the nuanced movements that bring a photograph to life. Free tools, however, typically use simpler, less sophisticated models. They often fail to grasp the subtle shifts in gaze, the gentle curve of a smile, or the slight flutter of eyelids. This results in animations that feel robotic, detached, and frankly, a bit unsettling, especially when trying to capture the warmth of a loved one. It’s a critical distinction: AI photo generation creates new images, but AI photo animation breathes life into existing ones.
The limitations of these basic free animators become painfully obvious when attempting to animate photos meant to evoke deep emotion. You'll often see jerky head turns or unnaturally wide smiles that miss the mark entirely. This is a far cry from the delicate, lifelike animations needed for true remembrance. You're looking for a respectful tribute, not a digital puppet show.
This is why understanding the technology behind animation is key. The foundational elements of this technology, such as deep learning and GANs, are complex and require significant computational power and refined training data to yield convincing results. Free services simply do not invest in this level of sophistication for their users.
Selecting the Right AI Tool for Animating Deceased Photos in 2026
Choosing the right AI tool for animating cherished photos of loved ones is a deeply personal process. You need a solution that respects the memory, not just an algorithm to mimic life. The global AI video market surged to over $10 billion in 2025, a testament to its growing capabilities, yet not all tools are created equal, especially when dealing with sensitive moments. AI animation workflows can transform an image into video output in as little as 30 seconds, a stark contrast to traditional photo animation workflows that typically take 3-5 days and cost $50-$500 per asset.
Here are the critical factors to consider when selecting an AI photo animation tool in 2026:
Emotional Nuance and Realism: Look for tools that prioritize subtle, lifelike micro-expressions over exaggerated movements. The goal is to evoke a gentle sense of presence, not to create a jarring, artificial impression.
Ethical Data Handling & Privacy: Your loved one's photos are irreplaceable. Understand the tool's data retention policies and how your images are secured. Transparency is paramount.
Ease of Use vs. Control: Do you prefer a one-click solution, or do you want fine-grained control over the animation process? Some platforms offer presets, while others allow for detailed adjustments.
Cost Model: Consider whether a one-time payment, subscription, or credit-based system best suits your needs. For infrequent use or to avoid ongoing charges, a model with credits that never expire offers peace of mind.
Understanding the core technology behind AI photo animation is crucial for selecting the right tool. The effectiveness hinges on sophisticated Deep Learning and Generative Adversarial Networks (GANs) trained on vast datasets of human facial movements, a level of complexity typically beyond free offerings.
Key Considerations and a Comparative Overview of Tools
Choosing the right tool for animating deceased loved ones' photos requires careful thought, balancing technological capability with emotional sensitivity. We've seen many users initially drawn to free options, only to find the results jarring or unnerving.
The core considerations when selecting an AI photo animation tool in 2026 often boil down to a few critical areas:
Output Quality & Subtlety: Does the animation capture a lifelike twinkle, or does it lean towards an unsettling, robotic flicker? Look for tools that prioritize nuanced, gentle movements over exaggerated lip-syncing or head-bobbing.
Ethical Approach & Data Privacy: How does the service handle your precious memories? Ensuring robust data privacy policies and clarity on photo retention is paramount.
Cost Model: Are you looking at a recurring subscription that might add up, or a straightforward one-time fee? For sentimental projects, predictable costs are often preferred.
Ease of Use vs. Control: Some tools offer a highly automated experience, while others allow for more granular adjustments. The ideal balance depends on your technical comfort and desired outcome.
To help you navigate these choices, we've compiled a comparison of popular AI photo animators in 2026:
Feature
Picto.Video
MyHeritage Deep Nostalgia™
Create AI Clips
OnReplay
AnimateOldPhotos.org
LIA
BringBack
Price Model
Credits/Subscription
Subscription
Subscription/Credits
Subscription
Free (limited) / Paid
Subscription
One-time Payment / Credits Never Expire
Animation Style/Quality
Variable; can be exaggerated
Subtle, focused on eye/mouth movement
Often animated characters/effects
Realistic, subtle movements
Basic animation, often less refined
Realistic, can be impressive
Subtle, natural, respectful animations
Multi-Photo Support
Yes
Yes
Yes
Yes
No (typically one at a time)
Yes
Yes
Data Privacy/Retention
Varies; review policies
Varies; review policies
Varies; review policies
Varies; review policies
Varies; review policies
Varies; review policies
Strong; photos deleted after animation
Accessibility
Web-based
Web-based
Web-based
Web-based
Web-based
Web-based
User-friendly, intuitive interface
Best Use Case
Social media content, short clips
Bringing historical photos to life
Creative video content, animated personas
Restoring motion to old family footage
Quick, simple animations
Advanced animation effects
Preserving cherished memories with dignity and realism
When evaluating comparing AI photo animators 2026, remember that while many tools offer impressive technology, the most fitting option for memorializing a loved one prioritizes naturalism and respect above all else. Our platform is built with this understanding, offering a cost-effective, no-subscription way to bring your most precious memories back to life.
Step-by-Step Guide: Animating Deceased Photos with BringBack
Bringing a cherished photograph to life doesn't require complex software or days of work. With our platform, you can animate deceased photos in just a few simple steps.
Digitize Your Photo: Scan your precious image using your smartphone or a scanner to create a high-quality digital copy.
Upload to BringBack: Simply upload the scanned photo to our AI tool. It instantly analyzes and restores any damage.
Animate and Download: Preview the gentle animation and download your restored photo or animated video.
Our aim is to make this process intuitive and deeply personal. We understand the emotional significance of these memories, which is why we focus on subtle, respectful animation that honors your loved ones. For a deeper dive into the nuances of making old photos move and smile naturally, consider advanced techniques like natural photo animation methods.
This approach ensures that each animated photo feels authentic, capturing the essence of the person you remember. It's a magical way to reconnect with the past and share those moments with future generations.
Preparing Your Photo for Optimal Animation
To capture the magic of animating your cherished memories, the quality of the original photo is paramount. We've found that starting with the best possible photo selection for AI animation is the first, most impactful step.
When choosing a photo, look for these key elements:
Clear Lighting: Soft, even lighting works best. Avoid harsh shadows or blown-out highlights that obscure facial details. Natural daylight from a window is often ideal.
Forward or Slight Angle: Faces looking directly at the camera or with a gentle, slight turn are easiest for AI to interpret. Extreme profiles can sometimes be challenging.
High Resolution: The sharper and more detailed the original, the better the animated result. Avoid cropped or pixelated images.
Unobscured Features: Ensure the eyes, nose, and mouth are clearly visible. Glasses can sometimes cause glare that interferes with the animation process.
Digitizing these precious images is the next crucial step. For older physical photos, we recommend a two-pronged approach depending on your resources.
High-Quality Scanning: If you have a scanner, use a high DPI setting (at least 600 DPI). Lay the photo flat and avoid glare by adjusting the lighting or using a matte finish if possible. Scan the photo in a lossless format like TIFF for maximum detail.
Phone Scanning Apps: Many modern smartphone apps are surprisingly capable. They use your camera to capture the photo and often offer features to automatically crop, straighten, and enhance the image. Look for apps that explicitly mention high-resolution scanning and allow manual adjustments for lighting and perspective. This is a fantastic way to digitize old photos for animation quickly and effectively.
Remember, the goal is to create a clean, digital copy that retains as much original detail as possible. This lays the groundwork for the AI to perform its restorative and animating magic, bringing your memories back to life with gentle, lifelike movements.
The BringBack Animation Process
Bringing your cherished photographs back to life is remarkably simple with our process. You'll scan your old photo to create a clean digital copy, upload it to the BringBack AI, and then review your animated memory.
Here’s how BringBack how it works:
Scan Your Precious Photo: After preparing your image, the first step is to get it into our system. Use your phone's camera or a scanning app to create the highest quality digital version you can. Aim for clarity and good lighting.
Upload the Photo to BringBack: Once you have your clean digital file, simply upload the scanned photo to our platform. Our AI immediately analyzes the image for any damage or areas that need restoration. It then works its magic, intelligently repairing imperfections and preparing the image for animation.
Review and Download Your Animated Memory: Within moments, you’ll see the results. The AI has not only restored the photo but also applied a gentle, lifelike animation. You can then review animated video BringBack has created and download your high-resolution restored photo or the animated clip, ready to share or cherish.
We focus on subtle, respectful movements. Our goal is to evoke the feeling of life without creating anything uncanny. This ensures your animated memories feel authentic and deeply personal.
It's a magical process, designed to be intuitive for everyone.
Ensuring Natural Results and Ethical Sharing of Animated Memories
To ensure your animated memories feel authentic and are shared respectfully, focus on subtle animation and clear ethical guidelines. A quick way to troubleshoot common animation issues like flickering or distorted features is to try a slightly different angle of the original photo or adjust the AI's intensity settings. For ethical sharing, always prioritize consensus and respect for the individual depicted.
Troubleshooting AI Animation:
Subtle Adjustments: If a feature appears distorted, try regenerating the animation with a slightly lower intensity.
Photo Selection: If one photo yields unnatural movement, select an alternative photograph with clearer features and lighting.
Refine Intensity: Most tools offer a slider or setting for animation intensity; aim for gentle, lifelike motion rather than exaggerated expressions.
Ethical Sharing:
Family Consensus: Always obtain agreement from close family members before animating photos of deceased loved ones.
Cultural Sensitivity: Be mindful of cultural norms and traditions surrounding remembrance and memorialization.
Emotional Readiness: Consider the emotional impact on viewers, especially if sharing widely.
Animated photographs can powerfully preserve memories, offering comfort and helping individuals process emotions, much like traditional photos. the power of photographs play a significant role in this. When sharing these revived moments, remember that dynamic content generates 400% more engagement than static images.
When dealing with the sensitive topic of animating photos of deceased relatives, it’s important to tread with care and respect. For detailed information on the ethical considerations of animating photos of deceased relatives, refer to our comprehensive guide. Our approach focuses on gentle, respectful animation that honors the memory.
It's about capturing the essence of a moment, not creating a digital puppetry. Our goal with BringBack is to offer a way to reconnect with cherished memories in a deeply personal and meaningful way, ensuring that each animated piece feels true to the spirit of the original photograph.
Troubleshooting Unnatural Animations and Best Practices for Sharing
Sometimes, even with the best tools, animations can look a bit off. If your animated photos appear unnatural or fall into the 'uncanny valley,' don't worry; there are simple fixes.
Common Animation Issues and Fixes:
Distorted Features: Eyes too wide, mouth unnaturally stretched. Try a different source photo with clearer features, or look for tools that offer more control over facial expressions.
Unnatural Movement: Jerky transitions or limbs moving independently. This often happens when the AI misinterprets the 3D space of the photo. Re-scanning the photo at a higher resolution can sometimes help.
Flickering or Artifacts: Pixels or strange visual noise appearing. This can be a sign of a low-quality scan or AI processing errors. A higher-quality scan or a different processing setting might clear this up.
'Uncanny Valley' Effect: The animation is close, but just not quite right, creating an unsettling feeling. Focus on tools that prioritize subtle, gentle animations. Sometimes, less is more. If a specific photo consistently produces this, it might be best to use an alternative or simply enjoy the restored still image.
Ethical Sharing of Animated Memories:
When animating photos, especially of those who are no longer with us, sensitivity is key. Good AI photo animation aims for natural, subtle expressions rather than generating 'deepfakes.'
Family Consensus is Paramount: Before animating images of deceased relatives, ensure all close family members are in agreement. This avoids causing distress.
Respect Cultural Norms: Be mindful of how different cultures perceive the animation of memories.
Manage Emotional Impact: Animated memories can evoke strong feelings. Be prepared for both joy and sadness.
Creating a cohesive memorial video from multiple animated clips is a beautiful way to share a loved one's story. Consider using editing software like Adobe Premiere Pro or Final Cut Pro to blend clips smoothly. Focus on gentle transitions and background music that complements the mood.
When sharing, remember most people find solace in preserving memories through photos, and dynamic content generates 400% more engagement than static images.
Social Media: Tag relevant family members and use appropriate hashtags like #memorialvideo or #cherishedmemories.
Memorial Websites: Many platforms are designed for sharing life stories; these animated clips can add a unique dimension.
Digital Photo Frames: A touching way to keep a loved one’s animated memory present in your home.
We built BringBack to help you reconnect with these precious moments in a way that feels authentic and respectful. Our approach is designed to capture the essence of a memory, not to create something artificial.
AI photo restoration is a sophisticated digital process using advanced artificial intelligence algorithms for automated photo restoration, repairing, enhancing, and revitalising damaged or degraded images. It works by addressing imperfections like scratches, fading, blurriness, and discolouration, effectively bringing precious old photographs back to life with enhanced clarity.
Key Capabilities:
Automatic imperfection removal for scratches, spots, creases, and tears.
Significant improvement in facial details and overall image clarity.
Accurate colourisation for monochrome or sepia-toned images.
Browser-based accessibility, requiring no manual expertise or software downloads.
You hold an old, faded photograph – perhaps of a grandparent, a childhood home, or a forgotten celebration. Decades of wear, tear, and time have blurred the faces and dulled the colours, threatening to erase these cherished moments entirely. We understand that feeling of loss. But now, the advent of AI photo restoration changes that narrative, offering a powerful way to reclaim these visual legacies.
By the end of this guide, you will understand exactly what AI photo restoration entails. We will explain how it fundamentally works, its profound benefits, inherent limitations, and how to choose the best tools available in 2026. This overview provides a truly comprehensive and authoritative perspective for you, filling crucial knowledge gaps often missed elsewhere.
What is AI Photo Restoration? A Modern Definition
AI photo restoration is the use of advanced artificial intelligence algorithms to automatically repair, enhance, and revitalise damaged images. It precisely addresses imperfections like scratches, spots, tears, fading, blurriness, and colour discrepancies, breathing new life into cherished memories.
This powerful technology changes the narrative for those precious, yet degraded, visual legacies. It offers a way to reclaim and preserve them for generations to come. For a foundational understanding of AI's role in image restoration, Wikipedia provides a comprehensive overview of definitions, techniques, and applications on image restoration by artificial intelligence.
Here's how it stacks up against older methods:
Feature
Traditional Restoration Methods
AI Photo Restoration
Speed
Hours to days per photo
Seconds to minutes per photo
Manual Effort
Significant (requires skilled technician)
Minimal to none (fully automated)
Accessibility
Limited (requires specialised software/skills)
High (often browser-based, no downloads needed)
Imperfection Fix
labour-intensive, often imperfect
Automatic, precise removal of scratches, tears, spots
Colourisation
Complex manual process
One-click colourisation for black-and-white photos
Facial Details
Difficult to improve
Significantly enhanced, sharper facial features
Key capabilities include instantaneous repair, automatic removal of common flaws, dramatic improvement of facial details, overall image clarity enhancement, and the magical ability to add colour to monochrome photographs. Many tools are browser-based, supporting common formats like JPG, JPEG, PNG, and WEBP, making it incredibly simple to explore how online platforms offer immediate solutions. AI restoration aims to preserve the original image quality while enhancing clarity and fixing dull areas, without compromising its natural appearance or resolution.
How AI Repairs Image Damage: The Core Technologies
AI actually "learns" to fix your old photos by studying countless examples. It uses sophisticated algorithms to identify patterns in damage and then regenerate what's missing or correct imperfections.
Core Technologies at Play
Several key AI technologies work together to bring your cherished images back to life. These are not magic wands, but rather advanced computational models trained on massive datasets.
Generative Adversarial Networks (GANs): These are incredibly powerful for creating new, realistic image data. In restoration, one part of the GAN tries to create a restored image, while another part tries to detect if it's fake or real. This constant competition forces the generator to produce increasingly convincing results, making them ideal for tackling issues found in historical illustrations and complex image synthesis.
Deep Neural Networks (DNNs): Think of these as layered systems that process information. Specific types, like DnCNNs (Denoising Convolutional Neural Networks), are particularly adept at cleaning up noise and visual artefacts in old photos. A 2022 paper by Ruoyan Wang highlighted their effectiveness in restoring and denoising old photographic images.
K-Nearest Neighbor (KNN): While not always the primary driver, KNN algorithms can assist in realistic image quality restoration. They work by finding data points (pixels or image sections) that are "closest" to the damaged area and using their characteristics to fill in the gaps. This is especially useful for tasks like adding realistic colour to black-and-white photos or even extracting text from faded documents.
These modern AI techniques build upon foundational traditional image restoration methods. Spatial domain techniques like median filtering and frequency domain methods like inverse filtering are often integrated or mimicked by AI models.
This combination of learning and algorithmic processing allows AI to precisely target and reverse various forms of degradation, from scratches and fading to blurriness and colour shifts, often achieving results that were previously impossible or required immense manual effort.
AI Restoration vs. Image Enhancement: Key Differences
AI restoration precisely reverses image degradation, while AI enhancement aims to improve existing image qualities. This distinction is crucial because restoration tackles specific damage like scratches and fading to recapture original detail, whereas enhancement might alter colours, sharpness, or contrast for a more aesthetically pleasing, but not necessarily original, look.
The core difference lies in their objective: restoration seeks to undo damage, bringing an image back to its prior state, while enhancement aims to make an image better according to subjective criteria.
Feature
AI Image Restoration
AI Image Enhancement
Primary Goal
Repairing damage, reverting to original quality
Improving aesthetic appeal, clarity, or visual impact
Understanding this difference matters because restoration, like what we offer at BringBack, prioritises the genuine preservation of your precious memories. We aim to bring back the exact colours, details, and clarity as they were, ensuring your photographs remain authentic legacies for generations to come. Enhancement tools, while useful for new photography, don't typically focus on the meticulous repair of historical damage, potentially altering the very essence of a cherished older photograph.
The AI Restoration Process: Learning to Fix Imperfections
The AI restoration process is akin to teaching a student by showing them thousands of examples of what's broken and how it should look. This isn't magic; it's a meticulous learning journey. We present the AI with a vast AI training data set, comprised of countless pairs of degraded images alongside their pristine, original versions.
This is how the generative process AI learns to fix photos. Think of it like a student apprentice. We show them a scratched photo and then the perfectly restored version. The AI then tries to "guess" the restoration itself. It compares its guess to the correct answer using a "loss function," which is essentially a measurement of its mistakes.
The AI then adjusts its internal workings, refining its guessing strategy. This iterative cycle – guess, measure error, adjust – repeats millions of times.
The goal is for the AI to internalise the patterns of damage and learn precisely how to reverse them, making the final output as close as possible to the original, untouched photograph.
Research papers often quantify this learning. For instance, advancements in AI restoration are frequently showcased by improved metrics like higher PSNR (Peak Signal-to-Noise Ratio) or SSIM (Structural Similarity Index Measure) values. These benchmarks indicate that the AI is becoming significantly better at accurately reconstructing details and minimising visual artefacts compared to older methods. This continuous refinement is what allows AI to tackle complex issues like fading, discolouration, and even minor physical damage with increasing precision.
The Evolution of AI in Image Repair: A Timeline
The timeline of AI in image repair traces a journey from basic digital manipulation to sophisticated deep learning. Early digital image processing in the latter half of the 20th century laid the groundwork, focusing on algorithms for noise reduction and contrast adjustment. These were more about enhancement than true restoration, often requiring significant manual intervention.
The real shift began with the advent of machine learning.
1990s – Early Machine Learning: Researchers started exploring algorithms that could learn patterns. While primitive by today's standards, this marked the initial steps towards automated correction, often used for scientific imaging.
2000s – Statistical Methods and Pattern Recognition: More advanced statistical models emerged, allowing AI to recognise and attempt to correct common degradation types like blur or noise based on learned statistical properties of images.
2010s – Deep Learning Revolution: The widespread adoption of deep convolutional neural networks (CNNs) was a watershed moment. Models trained on vast datasets of degraded and perfect image pairs began demonstrating remarkable abilities to infer missing information and reconstruct details. This period saw a significant leap in the quality and authenticity of AI-driven restoration.
Late 2010s – Generative Adversarial Networks (GANs): GANs further propelled the field. By using two competing neural networks (a generator and a discriminator), AI could create incredibly realistic reconstructions, essentially "imagining" what the original image might have looked like with higher fidelity. This led to advancements in colourisation and detail generation.
Today, advancements in AI restoration are frequently showcased by improved metrics like higher PSNR (Peak Signal-to-Noise Ratio) or SSIM (Structural Similarity Index Measure) values. These benchmarks indicate that the AI is becoming significantly better at accurately reconstructing details and minimising visual artefacts compared to older methods. This continuous refinement is what allows AI to tackle complex issues like fading, discolouration, and even minor physical damage with increasing precision.
Understanding AI's Current Limitations and Ethical Considerations
AI's remarkable strides in image repair come with inherent constraints and raise important ethical questions that we must acknowledge. A significant limitation is AI's tendency to fall short in understanding nuances, emotions, and historical accuracy. This can lead to alterations in facial features, distortions, or 'artifacts' that make an image feel artificial.
For a professional's perspective on the common flaws and limitations of AI photo restoration, this source offers valuable insights into why human expertise remains crucial. AI colourisation, for instance, can be wildly inaccurate. Models may take liberties with colour and tone choices, resulting in completely wrong or historically insensitive hues.
The Ecce Homo restoration case is often cited as a prime example highlighting the complexities and potential for unintended alterations, even with human intent. When critical information is simply missing from the original, AI cannot invent it truthfully; it can only guess or create something plausible but fictional. This is where AI image repair problems become apparent. These restoration efforts, while technically impressive, can sometimes strip away the authentic character of the original.
We must be mindful that AI's understanding is based on patterns it has learned, not on lived experience or true contextual comprehension. This means it can miss the subtle cues that define a person's likeness or the historical period an image belongs to.
When Human Expertise Still Matters Most
It can only guess or create something plausible but fictional. This is where AI image repair problems become apparent. These restoration efforts, while technically impressive, can sometimes strip away the authentic character of the original.
We must be mindful that AI's understanding is based on patterns it has learned, not on lived experience or true contextual comprehension. This means it can miss the subtle cues that define a person's likeness or the historical period an image belongs to.
Human photo repair expertise remains indispensable when damage is severe or context is paramount. AI struggles most with extreme degradation, where information is genuinely missing rather than just obscured.
Severe damage and ambiguity demand a human touch. Think of photographs where large sections are torn, water-damaged, or completely lost. AI might try to "hallucinate" these missing pieces based on probabilities, leading to inaccurate or even nonsensical reconstructions. A human restorer, however, can draw upon their artistic judgment and understanding of the subject matter to make informed decisions about how to best reconstruct the image.
This is especially true for portraits where subtle facial nuances are key. AI can smooth over blemishes or attempt to sharpen features, but it can also inadvertently alter the distinct character of a person’s face, making them look artificial or even unrecognizable. A skilled human restorer understands the importance of preserving the unique spirit of the individual.
Historical context also plays a massive role. An AI might not grasp the significance of specific clothing, architectural styles, or even background elements that are crucial for historical accuracy. For instance, an AI might colourise a 1920s photograph with colours that are anachronistic or inconsistent with the period's fashion and technology. Human experts, conversely, can research and apply this contextual knowledge, ensuring the restoration is not just technically sound but historically truthful.
When faced with the choice between an AI's plausible guess and a human's considered interpretation, trusting human photo repair expertise is often the path to true authenticity. It's about more than just fixing pixels; it's about respecting the original story the photograph tells.
Ethical Concerns and Data Bias in AI Restoration
The reality of AI restoration isn't always about flawless recovery; it hinges heavily on the data it learned from. Ethical concerns exist around the authenticity of AI-restored images, especially historical ones, and questions about the moral implications of using AI arise, particularly when training data might include other copyrighted works.
AI models are trained on vast datasets. If this data disproportionately represents certain demographics or cultural aesthetics, the AI can inherit those biases. This might lead to AI photo restoration that, for instance, consistently misinterprets or inaccurately renders skin tones, hair textures, or cultural attire from underrepresented groups, making restorations feel less authentic or even insensitive.
This inherent AI photo bias means that the 'truth' an AI presents in a restored image is, in fact, a reflection of its training. When dealing with precious family memories or historical archives, this skewed perspective can inadvertently rewrite visual history.
Furthermore, the source of the training data is a significant ethical minefield. If AI models learn from images protected by copyright without proper licensing or consent, there are profound moral and legal implications for the output. This isn't about simply cleaning up a photo; it's about the origin and integrity of the data that drives the AI's "creative" decisions.
User privacy is also a significant consideration. Fortunately, some online tools address this by guaranteeing the deletion of uploaded images within 24 hours after processing, offering a layer of reassurance for sensitive personal archives.
Choosing and Using an AI Photo Restoration Tool Effectively
Selecting the right AI photo restoration tool requires careful consideration of several factors to ensure your precious memories are treated with the respect they deserve. It's about finding a digital artist that understands nuance, not just an algorithm that applies filters.
When evaluating these tools, prioritise those that deliver natural-looking results. We've seen far too many 'restorations' that leave faces looking oddly plastic or create textures that simply weren't there. Look for side-by-side previews; these are essential for directly comparing the original image with the AI's proposed changes before committing.
Here’s a breakdown of what to examine:
Output Naturalness: Does the AI avoid an over-processed, artificial 'glow'?
Control Options: Can you adjust the intensity of repairs or selectively reapply certain elements?
Damage Specialisation: Some tools excel at faded colours, others at scratches or tears.
Pricing Model: Are you looking at a one-time purchase, a subscription, or a credit system? (We find one-time credit packs, which never expire, offer the best value and flexibility.)
Privacy Policy: What happens to your uploaded images? (We guarantee deletion within 24 hours.)
Some advanced tools offer features like bulk photo restoration via APIs and those crucial side-by-side previews to compare original and restored versions. Remember, these applications extend beyond just reviving cherished family memories and vintage photographs. They're increasingly used for archival preservation of historical images and illustrations, medical imaging, and even forensic analysis. Understanding these broader applications can help you appreciate the sophistication and potential pitfalls of the technology.
Choosing a tool is as much about preserving authenticity as it is about repair.
Restoring Your Memories with BringBack AI
Restoring your most precious memories is surprisingly straightforward with BringBack AI photo restoration. Our intuitive process transforms faded or damaged photographs into vibrant, lifelike images in mere moments.
First, take a clear digital copy of your old photo. A simple scan using your phone's camera is often all that's needed to capture the best possible detail. This scanned, damaged image is then uploaded to our BringBack AI tool.
Our advanced AI meticulously analyses the damage, from creases and tears to faded colours, and applies precise repairs. This easy photo repair AI works swiftly, delivering a high-resolution restored photograph in seconds.
But we don't stop at stills. You can also choose to transform your restored photo into a magical animated video, perfect for sharing the joy with family and friends. To learn more about preparing your photos for AI restoration to achieve the best possible results, you can explore our guide on how to prepare old photos for AI enhancement.
What truly sets us apart is our commitment to simplicity and value. We offer a one-time payment model for credit packs – Starter, Pro, and Family. There are no ongoing subscriptions, and your purchased credits never expire. Use them for as many restorations or animations as you need, whenever inspiration strikes. We believe preserving your legacy shouldn't involve complex manuals or recurring fees.
To rescue your old 35mm slides, you must meticulously clean them, choose an appropriate scanning method—from a smartphone setup to a dedicated slide scanner—and then use software for digital capture, often followed by AI-powered restoration. This process can take a few hours to a full weekend depending on your collection size, and is moderately difficult initially.
What You Need:
Your collection of 35mm slides (Kodachrome, Ektachrome).
A computer (Windows or macOS).
Your chosen scanning hardware (dedicated 35mm scanner like Plustek OpticFilm 8300i, a flatbed scanner with transparency adapter, or a smartphone with a uniform light source).
Cleaning supplies (microfiber cloth, anti-static brush like Kinetronics Tiger Cloth or PEC-PADs).
Scanning software (SilverFast, VueScan, or a dedicated app).
Access to BringBack AI for restoration.
That shoebox of 1970s Kodachrome and Ektachrome slides sitting in the attic isn't getting any younger. Most professional services mean a 3-week wait and can be surprisingly expensive. DIY offers instant gratification, letting you capture quality ranging from a good 2000-3000 DPI up to 7200 DPI for professional archival prints.
By the end of this guide, you will have a high-fidelity digital collection of your precious memories, ready for sharing, advanced restoration with our BringBack AI tool, and secure archival.
Prerequisites for Home Slide Digitization
Before you even think about touching those cherished slides, gather these essentials. Having them ready streamlines the entire digitization process.
Your 35mm Slides: Of course! Make sure they are easily accessible and organized by year or event if possible.
A Capable Computer: You'll need a machine that can handle image files and the scanning software. A modern laptop or desktop with at least 8GB of RAM and sufficient hard drive space is ideal.
Scanning Hardware: This is your core tool. Choose between a flatbed scanner with a slide adapter, a dedicated film scanner, or even a smartphone scanning app (though quality varies wildly).
Basic Cleaning Supplies: A few key items will keep your slides pristine before they hit the scanner. Think microfiber cloths and a gentle blower brush. (More on specific cleaning next time!)
External Storage (Optional but Recommended): A dedicated external hard drive or cloud storage service ensures your digital memories are backed up and safe.
And remember, the magic happens when preparation meets patience.
Safe Cleaning Methods for Vintage 35mm Slides
Cleaning vintage 35mm slides before digitizing them demands a gentle touch to avoid damaging these precious memories. Proper cleaning ensures dust and grime don't translate into digital artifacts.
The safest and most effective method for cleaning 35mm slides involves dry dusting with specialized tools. Start by using a gentle blower brush to dislodge loose particles. For stubborn smudges, a microfiber cloth or specialized slide cleaning paper is essential.
Never use common household cleaning agents or even 70% isopropyl alcohol on older film types like Kodachrome or Ektachrome. These can cause irreversible color transfer on slides that are 60-70 years old. Always opt for photographic-specific cleaning solutions if absolutely necessary, but dry methods are preferred.
Consider using anti-static tools to prevent dust from re-settling. Products like the Kinetronics Tiger Cloth or PEC-PADs are designed to clean without leaving residue and actively repel dust.
It's critical to clean each slide immediately before scanning. Dust and oils from fingerprints can easily transfer and become permanent digital blemishes if not addressed just prior to digitization.
For more detailed guidance on the safest practices, consult resources that detail slide cleaning techniques. This step, while seemingly minor, significantly impacts the final clarity of your digitized images.
Comparison of Home Scanning Methods
When you're ready to turn those dusty slides into digital memories, you've got a few paths to choose from, each with its own trade-offs. Understanding these options helps you pick the best slide to digital converter for your specific needs and budget.
The speed, quality, and cost vary wildly between the most common home scanning methods.
Method
Speed
Image Quality
Cost
Best For
Smartphone Apps
Fastest (seconds per slide)
Highly Variable (dependent on app/light)
Free – $50
Quick previews, sharing casual memories, very tight budgets
Flatbed Scanners
Slow to Moderate (minutes per slide)
Good (up to 2400-4800 DPI)
$100 – $500
Mixed media, occasional slides, general photo digitization
Dedicated Slide Scanners
Moderate to Slow (minutes per slide)
Excellent (up to 7200 DPI, higher MP)
$200 – $1000+
Preserving maximum detail, archival quality, large collections
A smartphone app paired with a light source can give you a result in seconds, making it the fastest option for a quick peek. However, this speed often comes at the expense of detail.
Flatbed scanners offer a decent middle ground, capable of producing good quality scans suitable for most viewing needs. They are versatile, handling photos and documents alongside slides.
For those prioritizing the absolute best image fidelity, dedicated 35mm slide scanners are the top choice. Devices like the Plustek OpticFilm 8300i, for instance, can achieve 7200 DPI, rendering incredible detail compared to lower-end 'scan n go' models that might only manage 14-22 MP. This level of resolution is essential for archival purposes or if you plan to significantly enlarge your digitized images.
While dedicated scanners are pricier, often starting around $200 and going up to $1000 or more for professional models, the output quality is often worth the investment for preserving cherished family history. Our approach at BringBack prioritizes capturing that maximum detail, understanding that these images represent irreplaceable legacies.
Scanning Slides with Phone Apps and Light Boxes
Scanning slides with your phone can be a quick way to digitize your memories, but getting good results requires a bit of setup. We've found that a stable tripod, a consistent light source like a tablet or dedicated light box, and a way to keep the film perfectly flat are key.
You'll need to rig your phone to capture the slide precisely. A DIY slide holder made from cardboard or a 3D printed jig works wonders. This keeps the fragile film from curling and ensures the entire image is in focus.
The light source needs to be uniform. Placing your slide over a bright tablet screen displaying a white image can work in a pinch. For better, more even light, a dedicated LED light box is ideal. The goal is to avoid any hot spots or uneven illumination that would mar your scan.
Shooting in RAW format, if your phone allows, gives you the most flexibility later in post-processing. You'll want to capture the image with just enough light, ensuring you don't blow out highlights or crush shadows. We’ve seen many attempts that look washed out or too dark simply because the exposure wasn't dialed in correctly.
Post-processing is where the magic happens. Apps like Adobe Lightroom Mobile or even built-in photo editors allow you to crop, adjust exposure, and correct color casts. Think of it as your digital darkroom, allowing you to bring those cherished images back to life.
How to Use Dedicated 35mm Slide Scanners
Dedicated 35mm slide scanners offer a significant leap in quality for your 35mm slide conversion projects. Unlike smartphone methods, these devices are built specifically for the task, yielding superior detail and color accuracy. Devices like the Plustek OpticFilm series or the PowerSlideX Plus provide a more professional workflow, especially when tackling large collections.
Loading slides into these scanners is generally straightforward, designed for efficient batch processing. Most models utilize a tray or a feeder mechanism. You'll typically align your slides within the designated tray, ensuring the emulsion side (the duller side) faces the correct direction as per the scanner's instructions.
For high-volume scanning, such as hundreds of slides, the key is consistent loading. Take your time to ensure each slide sits correctly in the tray. A misaligned slide can cause scanning errors or even damage the film. This meticulous approach upfront saves considerable time during post-processing.
Once loaded, the scanner and its accompanying software, like SilverFast or the manufacturer's utility, take over. They handle the digitization process, often allowing for batch settings to be applied across all images. This automation is where dedicated scanners truly shine, turning a tedious task into a manageable process. Remember, the Plustek OpticFilm 8300i is a prime example, offering 7200 DPI for exceptional detail, a far cry from the limited resolution of some basic scanners.
Steps for Efficient High Volume Batch Scanning
To process hundreds, even thousands, of slides efficiently, a methodical approach is key. It's not about speed alone, but about a streamlined workflow that minimizes errors and maximizes throughput.
1. Organize Your Slides
First, gather all your slides and sort them logically. This could be by year, event, or even by family member. Having them in order from the start saves immense time later when you’re trying to locate specific images.
2. Batch Pre-Cleaning
Do not try to clean each slide individually right before scanning. Instead, take them in small batches – say, 10 to 20 at a time. Use a blower brush or canned air to remove loose dust and debris. This prevents dust from spreading and contaminating your scanning surface or the scanner itself.
3. Leverage Software Presets
Once you've loaded your slides into the scanner's tray, your scanning software (like SilverFast or VueScan, which we'll cover more deeply later) is your best friend. Create and save presets for common slide types and desired resolutions. This automates tasks like auto-cropping, auto-color correction, and basic dust removal, significantly speeding up the process.
4. Initial Verification Run
Before letting the software run wild on hundreds of slides, scan the first five to ten slides with extra attention. Check for common issues like focus problems, color casts, or unexpected artifacts. If these initial scans look good, you can be confident in letting the batch process continue. If not, adjust your presets and rescan. This small step prevents you from having to re-scan hundreds of images later.
Configuring Software for Archival Resolution
Configuring your scanning software is where you truly set the stage for archival quality. It’s not just about hitting "scan"; it's about telling the software precisely how to capture every nuance.
3. Setting the Resolution: DPI Matters
For archival purposes, you’ll want to capture the maximum detail your slides offer. This means setting the right Dots Per Inch (DPI).
2000-3000 DPI: This range is generally sufficient for most archival needs, providing excellent detail for digital viewing and standard print sizes.
7200 DPI: You’ll want to push to this higher resolution if you plan on making very large professional prints or if you know the original slide has exceptional detail you want to preserve for future, unforeseen uses. Higher DPI means larger file sizes, so plan your storage accordingly.
4. Choosing the Right File Format
The file format you select dictates how you can use and edit your scans long-term.
TIFF (.tif) or DNG (.dng): These are lossless formats. Think of them as the uncompressed master recordings of your photos.
TIFF: Widely compatible, great for editing, but files can be quite large.
DNG (Digital Negative): Adobe's open-source raw format. It's also lossless, often smaller than TIFF, and contains all the metadata. Many professional editors work natively with DNG.
JPEG (.jpg): This is a lossy format. While it’s great for quick sharing online or saving space, you sacrifice image data with every save.
Use JPEGs for: Immediate sharing with family or previews.
Avoid JPEGs for: Your primary archival copy if you ever plan to do significant editing.
We always recommend saving your master archival copies as TIFF or DNG files. You can always create JPEGs from these later.
5. Software Presets and Configuration
When using scanning software like SilverFast or VueScan, you'll encounter numerous settings. Don't be intimidated.
Scan Driver Settings: This is where you’ll set the DPI and file format.
Color & Tone Controls: Many programs offer auto-correction features. While convenient, for archival scans, we prefer to have fine-grained manual control over color balance and exposure. This ensures we capture the original intent of the photographer.
Dust and Scratch Removal: Be cautious with these. While tempting, overly aggressive settings can sometimes remove genuine detail or create artificial artifacts. Start with a low setting or even turn it off and rely on post-processing if needed. We often find that cleaning the slides physically before scanning yields better results than relying solely on software correction.
And that’s how you get your software set up to capture the magic of your memories for years to come.
Troubleshooting Common Image Quality Issues
8. Troubleshooting Common Image Quality Issues
When scanning, you might run into a few snags, but don't worry. We've seen these before, and the fixes are usually straightforward.
The key to a great scan is a clean source and appropriate settings.
Common Issues and Their Fixes
Problem
Cause
Solution
Color Casts
Inaccurate color balance during scanning.
Use software auto-leveling features. Most scanning software has an "Auto Levels," "Auto Color," or "Auto White Balance" function. This is a good starting point. If that's not enough, manually adjust white balance using a neutral gray area in the image.
Blurriness
Out of focus, or the slide/photo isn't flat.
Check the scanner's focus. Ensure the film holder or scanner bed is clean and the media is seated correctly. For slides, verify they are perfectly flat within their mounts; sometimes a slightly warped slide causes focus issues.
Digital Artifacts
Dust on the scanner's glass or sensor.
Clean the scanner's glass and sensor. Use a lint-free cloth and an approved glass cleaner. Even a tiny speck can create noticeable lines or dots. Perform a test scan on a blank white document to check for debris before scanning your precious originals.
Graininess
High ISO film or aggressive sharpening.
This is often inherent to the original film. While some software can attempt to reduce grain, overdoing it can make the image look plasticky. We recommend a light touch, or accept that a bit of film grain adds to its character.
Loss of Detail
Scanning at too low a resolution.
Increase your DPI setting. For archival purposes, we recommend 2000-3000 DPI for prints up to 8×10 inches. If you plan on making large professional prints, consider 7200 DPI. Always save in TIFF or DNG format for maximum editing flexibility.
Sometimes, the issue isn't with the scanner at all, but with the physical condition of the slide or photo itself. Things like scratches or minor damage are best addressed during the scanning process if possible, but extensive restoration often requires more advanced tools.
Restoring Faded Slides with BringBack AI
Faded colors and minor imperfections on old slides don't mean the memory is lost. BringBack AI offers a straightforward way to bring those cherished images back to life.
Simply upload your scanned, faded slide to our platform. Our advanced AI then gets to work, meticulously analyzing the image for color degradation and damage. It applies precise, targeted repairs to restore vibrancy and clarity in mere seconds.
You can then preview your revitalized photo or even see it transformed into a short animated video. Download your high-resolution, restored memories and start sharing them with family and friends, reliving those precious moments. This makes digitizing old slides a truly rewarding process.
Organizing and Naming Digitized Slide Collections
Keeping your digitized slides organized and easily searchable means more than just having them on a hard drive. A good system ensures you can find that specific memory from decades ago in moments, rather than digging through thousands of files.
Folder Structure: The Foundation of Order
A logical folder hierarchy is your first line of defense against digital clutter. We’ve found a simple Year-Event structure works best for most family archives.
Year: Start with the broadest category – the year the photos were taken.
Event: Within each year, create subfolders for specific events or themes. Think "Summer Vacation," "Christmas 1988," or "High School Graduation." This makes browsing intuitive.
This simple approach ensures that when you're looking for photos from, say, your childhood, you can quickly jump to the correct decade and then pinpoint the specific occasion.
Naming Convention: Making Each File Findable
Beyond folders, the filename itself is a powerful tool. A consistent naming convention transforms a jumble of digital files into an accessible archive.
A solid convention includes the Year, a brief Description, and a Sequential Number.
Example:1974_Summer_Vacation_001.jpg
1974: The year is always first, making chronological sorting automatic.
Summer_Vacation: A descriptive phrase tells you what the photos are about at a glance. Use underscores to separate words; spaces can sometimes cause issues with older software.
001: A three-digit sequential number ensures uniqueness within that event and makes sure files stay in order, even if you add more later.
This systematic approach means you’ll never have to open 50 blurry photos just to find the one of Aunt Carol at the beach. You'll know exactly where to look.
Data Backup Strategies for Digital Archives
Digital files, unlike their physical counterparts, are surprisingly fragile. A dropped hard drive, a corrupted download, or even a simple file system error can wipe out precious memories in an instant. Because of this, a solid backup strategy isn't just good practice; it's essential for safeguarding your digital legacy.
The widely adopted 3-2-1 backup rule provides a simple yet powerful framework to ensure your digitized archives are safe. This strategy means you’ll have three copies of your data, stored on two different types of media, with one copy kept offsite.
Here's why this layered approach works:
Three Copies: Having multiple copies significantly reduces the risk of total data loss. If one or even two copies become inaccessible, you still have a fallback.
Two Different Media Types: Storing data on disparate media (e.g., an external hard drive and cloud storage) protects against failures specific to one technology. For instance, a fire might destroy your external drive, but your cloud backup remains intact.
One Offsite Copy: This is the critical safeguard against localized disasters like fire, theft, or flood. Keeping a copy in the cloud or at a different physical location means your memories are safe even if your home is affected.
Digital files are remarkably easy to lose if not managed correctly. Without a robust backup plan, your painstakingly digitized slides and photos could vanish with a single technical glitch.
The bottom line: Treat your digital memories like gold. Protect them with redundancy.
If you’re looking for a quick filter to slap on a blurry vacation snapshot, expecting a single tap to fix a century of decay, basic apps work fine. They’re cheap, often free, and offer a superficial edit. But that convenience comes at the cost of genuine depth. You get a slightly sharper image that lacks the soul and historical integrity of the original. It fails to connect you to the past.
The photos you hold dear aren’t just pixels. They are fragments of family history, whispers of loved ones, and echoes of moments that shaped your story. These are precious memories requiring authentic restoration and vivid re-animation.
We built BringBack AI as a dedicated service for those sacred images. Our platform focuses on meticulously reviving fragile remnants, acknowledging that every faded crease holds a narrative. We preserve history; we don’t just edit pixels. Our AI photo restoration online techniques are built on a foundation of technical precision.
We go beyond mere restoration. We resurrect smiles, relight eyes, and transform still images into moving, breathing moments. Our Nostalgic Hug Video Generator creates animated videos designed to evoke the warm, familiar feeling of a reunion. It offers a new way to interact with restored old family photos.
The 2025 Buyer’s Guide: 4 Pillars of AI Photo Restoration
Navigating AI restoration is difficult when marketing noise drowns out technical reality. How do you choose a tool that honors your memories?
Restoration Quality: Beyond a “Sharpen” Filter
The first pillar is the quality of the restoration itself. This goes beyond removing a few scratches. Look at how the system handles color fading, significant structural damage, and facial reconstruction.
Many tools offer basic enhancements, but few recapture original vibrancy without creating a “plastic” look.
Demand before-and-after examples showing natural texture. For example, LetsEnhance uses an “Authentic mode” to help preserve the original feel. This is the standard you should look for.
Animation Realism: Breathing Life Responsibly
AI animation has exploded, but the results often fall into the “uncanny valley.”
Does the movement feel fluid, or is it creepy? Pay attention to facial expressions and eye movements. The goal is warmth and connection, not an unsettling puppet effect.
Data Privacy: Your Memories, Your Control
User privacy is a necessity. These tools process your family’s history.
Review the privacy policies before uploading. Understand exactly how your data is stored and protected. Choose services that prioritize user control and transparent data handling.
Ease of Use: From Upload to Reunion
A powerful system is useless if the interface is confusing.
Test these criteria by uploading a sample photo to different platforms. Don’t just look at the final result—watch the entire process. Which tool feels like it respects the emotional weight of your memories?
Comparing the Top AI Restoration & Animation Tools
Tool Name
Platform
Pricing
BringBack AI
Web
Starts at $4.99
Photo Revive AI
iOS / macOS
Starts at $3.49/week or $39.99 lifetime
Renew
iOS
$9.99/week or $49.99/year
LetsEnhance
Web
10 free credits; Plans start at $9/mo
HitPaw (FotorPea)
Windows / Mac / iOS
Starts at $27.99/mo (PC) or $162.99 lifetime
Our system and Photo Revive AI are the only services offering a dedicated mobile-friendly experience.
Photo Revive AI is exclusively iOS. Renew focuses on Android. LetsEnhance and HitPaw are web-based, though HitPaw offers a desktop version for local processing—an advantage if you refuse to upload sensitive photos to the cloud.
The real differentiator is pricing. You should know exactly what you’re paying for. Many services hide fees until after you’ve invested time processing images. We are upfront about costs.
Photo Revive AI and Renew face criticism in user reviews for opaque pricing models and unexpected charges. Surprises are fine for birthdays, but not for your heritage.
Deep Dive: Why Our Approach Leads the Pack
We didn’t build a tool to “fix” photos. We built it to rekindle connections.
Our workflow follows three steps: Upload, AI Restoration, and Animate Memories. This streamlines the journey from a faded image to a cherished moment.
First, you upload the photo to our secure servers. Our algorithms then restore colors, remove blemishes, and sharpen details. This goes beyond basic editing. We revive the image’s original beauty.
The ‘Animate Memories’ feature breathes life into the restoration. You see loved ones move and smile. Our system “captures” the subject’s essence instead of creating a caricature.
The caveat? The platform works best with relatively well-preserved photos. Severely damaged images may require manual intervention, but the AI’s capabilities are often surprising.
The Identity Lock Advantage
What happens when the AI has to fill in missing details?
Standard upscaling produces generic, “smoothed-out” faces. We use an Identity Lock. This ensures the restored individual remains recognizably themselves.
Our system analyzes the underlying structure of the face, preserving the shape of the eyes, the set of the mouth, and the bone structure. Without this, you get a moving image that only bears a passing resemblance to your relative.
We prioritize authenticity over artificial perfection. Identity Lock guarantees a faithful restoration.
The ‘Nostalgic Hug’ Video Generator
Most face animators like Revive or Reface offer simple head tilts. They lack emotional resonance. They animate the face only, resulting in a detached effect.
Our technology considers the entire person.
We incorporate subtle body language and realistic expressions. This nuanced approach helps evoke joy and nostalgia. It offers something traditional animation tools can’t.
Reviewing the Competitors: When to Use Other Tools
Our system isn’t the only choice. The “best” app depends on your needs.
If you want instant gratification and don’t mind lower quality, mobile apps like Photo Revive AI or Renew work. The convenience of a smartphone tool is undeniable.
But understand the trade-offs. Mobile apps often lack the nuanced control of professional web services or desktop software like HitPaw. Mobile processing power is limited.
Mobile apps are also notorious for data collection. Read the fine print.
If you value affordability and speed, use a mobile app. If you are serious about preserving family history with archival quality, use a dedicated service.
Photo Revive AI: The iPhone Creator’s Choice
This is a solid option for the Apple ecosystem. It integrates advanced video engines like Pixverse to power mobile animations.
This is a major advantage for content creators. It also supports 13 different languages and includes a text-to-video feature for personalization.
LetsEnhance: For Batch Processing and ‘Authentic Mode’
LetsEnhance shines when you need to process large numbers of photos. The platform offers batch processing for extensive archives.
AI makes assumptions. It fills gaps based on training data and presents a version of the past that may not be accurate.
The biggest risk is historical revisionism. AI colorization guesses original colors based on probabilities, not historical evidence.
These guesses can perpetuate stereotypes. An AI might colorize skin tones based on regional biases. Users must maintain a critical eye and cross-reference with historical sources.
Data security is the second concern. Cloud-based tools raise privacy questions. Understand the privacy policies and security protocols of any tool you choose.
We use advanced models but provide tools for manual correction and verification. We offer secure storage to give you complete control.
How Colorization Models Determine Accuracy
AI colorization models learn relationships between grayscale tones and colors by analyzing vast datasets. They reverse-engineer colors based on chemical traces in the black and white image.
Specific chemical compounds in older film react differently to light wavelengths, leaving “signatures.” The AI compares these to its database.
This isn’t foolproof. The AI makes educated guesses. We prioritize historical realism by providing tools to manually adjust colors based on your own research.
Data Privacy: Who Owns Your Family Memories?
Free apps often monetize by selling user data. Your family memories could be used for targeted advertising.
Investigate the privacy policy before uploading. Beware of vague language giving the app broad rights over your images.
We prioritize secure, private processing. Your photos are used solely for restoration and are never shared. Our platform uses data encryption during upload and storage.
Workflow Comparison: Speed vs. Precision
Do you want speed or quality?
Apps like Revive prioritize a “fast and fun” experience. This inevitably leads to lower output quality.
BringBack AI is designed for high-precision results. Taking the time to adjust settings yields a superior final product.
Mobile apps also use heavy compression to save space, which degrades image quality. We use lossless compression to preserve detail. You choose to slow down to appreciate the finer details.
Verdict: Which Tool Should You Choose?
Don’t expect miracles from AI alone. The best results require effort.
Best for Beginners: Photo Revive AI. Minimal learning curve for quick animations.
Best for Realistic Animation: BringBack AI. We prioritize full-body movement and accurate facial expressions.
Best for Severely Damaged Photos: BringBack AI. Identity Lock ensures recognizable results even with heavy damage.
Best for Batch Processing: LetsEnhance. Their bulk processing is the most efficient for large archives.
Best for Sentimental Value: BringBack AI
Our system stands alone in creating realistic face animation by capturing personality, not just movement.
Best for Casual Social Sharing: Photo Revive AI (iPhone)
This is essentially a meme machine for old photos. Its interface is ideal for creating TikTok or Instagram content. If you want a quick viral video of a relative, use this.
Don’t expect museum quality. The focus is speed, simplicity, and bite-sized entertainment.
Best for Severe Damage Restoration: HitPaw Photo Enhancer
HitPaw is the go-to for salvaging photos with physical destruction.
Its strength lies in specialized AI models for water damage and severely faded photos. The desktop version processes sensitive photos locally, which is a major win for privacy.
Frequently Asked Questions
What’s new in BringBack AI v2.0?
Version 2.0 focuses on elevated realism. We refined facial reconstruction to minimize “smoothed-out” effects. We also improved colorization accuracy for more vibrant, historically grounded images.
How do I choose the right AI model for my photo?
Assess the condition. Is it faded, torn, or water-damaged? Our platform offers models tailored to specific issues. Experiment with settings. Using the wrong model can make the image worse.
January 2026 marks the end of resolution limits. Even pixelated snapshots—like great-grandparents wedding photos—can now scale for wall-sized canvas. We aren't just stretching pixels anymore; we’re predicting them.
Traditional resizing methods fail because they rely on simple math. Nearest-Neighbor creates blocks. Bilinear blurs. Bicubic is too soft. Modern predictive AI utilizes neural networks trained on millions of images to add the specific details a high-resolution version would have had.
Forget the 300 PPI "requirement." We consistently find that 150 PPI is indistinguishable to the human eye from normal viewing distances. This single technical shift allows for prints twice the size you previously dared.
Beyond Simple Resizing
Resizing merely changes the display size by stretching the existing pixel grid. True upscaling hinges on intelligent interpolation.
Machine learning algorithms recognize patterns and add new pixels based on the most likely representation of the original scene. It is reconstruction, not enlargement. If you are working with sparse data from old photographs, upscaling becomes an archeological task. Tools like our AI old photo restoration online free tool reconstruct these lost fragments.
AI Upscaling Tools: The 2026 Landscape
Not all tools are equal.
Magnific AI provides granular control via sliders like 'Creativity', 'HDR', and 'Resemblance'. 'Creativity' influences how much the AI "invents" from scratch. Korea AI offers a free alternative with 'AI Strength' and 'Upscaling Factor' adjustments, though users report results ranging from "decent" to "noticeably artificial."
If your goal is a physical print, prioritize 'Resemblance'. A slightly softer, authentic-looking print carries more emotional weight than a hyper-detailed, artificial one.
Avoiding the "AI Look"
The "AI look" manifests as overly sharpened edges and unnatural textures. It lacks subtlety.
The Daft Punk Interstella 5555 remaster is a cautionary tale. While the upscaling made visuals crisper, it sparked controversy for altering the original aesthetic and sacrificing historical accuracy. Use restraint. A print that retains its original character—like those mentioned in our old photo digital restoration guide for your family reunion—is always the superior choice.
DIY vs. Professional Services
DIY offers affordability. Topaz Gigapixel AI retails for approximately $99 and provides dedicated software for those willing to learn the technical curve. LetsEnhance allows for 4x upscaling, taking 1024×1024 images to 4096×4096.
Professional services offer guaranteed results. We designed the BringBack AI system to combine advanced algorithms with human expertise. This eliminates the learning curve and ensures the final result is technically sound. Experience matters; we’ve analyzed thousands of photos to determine which settings trigger "hallucinations" and which preserve memory.
Technical Execution: Preparation and Scanning
Clean input equals clean output. If you feed garbage into the AI, expect garbage out.
Physical Cleaning: Use a soft brush or microfiber cloth to remove dust.
Scan Quality: Capture data, not just a copy. Use a minimum of 600 DPI.
Disable "Sharpening": Turn off your scanner's default sharpening features. These algorithms create artifacts that AI will only amplify.
Find your scanner's "sweet spot." Maxing out resolution to 1200 DPI often introduces digital noise without adding real detail. For the best foundation, scan old photos for the best resolution by testing different settings.
The Engine: GANs vs. Diffusion Models
Modern upscalers use two primary architectures.
GANs (Generative Adversarial Networks): A "generator" creates images while a "discriminator" tries to spot fakes. This creates sharp, detailed textures but can introduce artifacts or "hallucinate" details that weren't there.
Diffusion Models: These start with noise and gradually remove it to reveal the image. This is computationally intensive but produces natural-looking results with fewer artifacts. Most high-quality upscalers have moved toward diffusion-based architectures for this reason.
The Print Myth: Why 150 PPI is Often Better
300 PPI is a legacy standard from a time of less advanced printing tech.
For a billboard, no one stands 12 inches away. The same logic applies to home decor. 150-200 PPI strikes the perfect balance for canvas. Don’t let a PPI obsession limit your print size.
The Ethics of Upscaling History
AI can lie about the past.
When AI fills in gaps, it can alter expressions or sharpen details in a way that skews the emotional tone of historical events. This is why historians are often upset over upscaling. Every decision to upscale must be guided by respect for accuracy.
Troubleshooting Common AI Artifacts
Over-sharpening: Look for halos around edges.
Fix: Reduce sharpness in the tool or apply a subtle Gaussian blur in post-processing.
Plastic Skin: AI often smooths skin texture too aggressively, erasing pores.
Fix: Blend the upscaled version with the original scan. Mask out the skin to reintroduce original grain.
Hallucinations: The AI turns a splotch into a flower or a button into an eye.
Fix: Use a different algorithm or manually paint over the error in Photoshop.
Color Shifts: Many upscalers introduce a blue or green tint.
Fix: Always compare the output to the original side-by-side and use color balance tools to restore the original palette.
Why We Built BringBack AI
Technical perfection isn't always the goal; connection is.
Professional tools like Topaz are powerful for landscapes or commercial shots. But they are often too complex for families trying to restore a single photo of a deceased loved one.
We focused on building a platform that handles restoration and colorization in one workflow. Our goal was to remove the engineering complexity. These photos are tangible links to the past; we treat them with that specific respect.
Frequently Asked Questions
Can you upscale a tiny thumbnail?
Yes, but temper expectations. You cannot reconstruct a building from a handful of pebbles. You will get sharper details, but don't expect a miracle.
Will it look fake?
It depends on the "AI Strength" settings. Careful prompting and restrained slider use are the best defenses against a plastic look.
Is AI better than a professional lab?
It is faster and cheaper. A human restorer has an artistic eye, but AI upscaling is more accessible. We built the BringBack AI platform to bridge this gap, using algorithms guided by human oversight.
Many of you reach out to us, wondering if it's truly possible to bring old photographs of loved ones back to life. The answer is a heartfelt yes, you can animate photos of deceased relatives. AI-powered technologies now make it possible to create digital avatars from still images, allowing faces to move, smile, and even seem to speak.
This incredible leap in technology offers a new way to connect with precious memories. Imagine seeing your grandmother’s laugh again, or your father’s knowing glance. For instance, Sun Kai, co-founder of Silicon Intelligence, created an AI avatar of his mother to help process grief, even holding weekly video calls with the digital likeness.
But this ability comes with important considerations. We believe that preserving these memories should always be done thoughtfully and with respect. Because we are dealing with something so personal, ethical questions, mental well-being, and legal rights are essential to discuss. You must ensure you approach this new frontier with care.
Can you animate photos of deceased relatives?
Yes, you absolutely can animate photos of deceased relatives. It ranges from simple facial movements to more complex, interactive digital avatars.
You can now see a loved one's smile again. It's no longer science fiction. Services such as MyHeritage's Deep Nostalgia™ use deep learning to animate faces in still photos. This allows you to see your relative seemingly come to life.
In some countries, this has become a full-blown industry. In China, numerous companies offer AI 'resurrection' services. This reflects a cultural tradition of confiding in the dead.
But the options don't stop there. The startup 2Wai, for example, has an app to create interactive digital avatars of deceased family members. Imagine having a conversation with a digital recreation of someone you miss.
How do we approach this at BringBack? We focus on creating a comforting experience. It should be a way to remember and honor your loved ones.
Of course, there are important ethical considerations here. Are you honoring their memory? Or creating something that could cause distress? It's vital to consider the feelings of all family members involved. And, with any service, understand the privacy implications.
Ready to take the next step in preserving your family’s history? You may also want to see how to create a live portrait from a still old photo 2026.
How modern AI recreates human movement
How modern AI recreates human movement.
Think of it as digital puppetry, but instead of strings, it's math. Deep learning algorithms analyze thousands of faces. It’s like the AI is building a massive, detailed map of every possible expression.
This "map" identifies key facial features: the corners of the mouth, the crinkle around the eyes, the tilt of the head. Then, AI applies motion transfer.
Motion transfer is where the magic happens. A pre-recorded movement – a smile, a nod, a blink – is overlaid onto the still photo. The AI adjusts this movement to fit the unique contours and features of the face in the picture. It’s not perfect. But it can be surprisingly convincing.
It's like taking the essence of a human expression and grafting it onto an old memory.
But here's a simplified view of the key steps:
AI scans the photo and identifies facial landmarks.
It selects a corresponding movement "driver" from its library.
The driver is then adapted and applied to the original image.
The big issue is realism. Current AI can struggle with extreme angles or poor-quality photos. This can result in a slightly unnatural or uncanny animation.
And it's important to remember the ethical considerations.
Is this "real," or is it a manipulation?
It is essential to keep this in mind when sharing or viewing these animations.
If you're thinking about gifting an animated photo, read our article on how to gift animated photos to parents for their anniversary.
Facial animation vs. interactive digital avatars
Facial animation isn't the same as having a conversation. One is a gentle revival; the other, a digital recreation.
The most common form of animating deceased relatives is through facial animation. MyHeritage's Deep Nostalgia™ is a prime example. These tools take a still photograph and add subtle movements. Eyes blink. A smile plays across the lips. It's a glimpse of life, but it’s a silent movie.
Interactive digital avatars take it a step further. Consider the work of 2Wai. Their app creates avatars capable of holding conversations. This allows for something that feels closer to interaction.
But the difference is stark. Facial animation offers a comforting illusion. Interactive avatars aim for a more immersive experience.
Which is right for you? It depends on what you seek. Do you want a gentle reminder? Or do you want something closer to a digital reunion?
The ethical considerations change, too. A simple animation feels less intrusive than an avatar that speaks.
Here’s a simple comparison:
Deep Nostalgia™: Subtle facial movements; a brief, visual experience.
2Wai: Interactive avatars capable of conversation; a potentially longer, more immersive experience.
And, remember, you can see how to create a video of you hugging loved ones with our other available articles.
At BringBack, we understand these nuances. We strive to offer options that respect your memories.
Accuracy and lifelike qualities of today's AI
Accuracy in AI animation walks a tightrope. The closer the animation gets to reality, the more jarring any imperfection becomes.
This is known as the "uncanny valley": that unsettling feeling when something almost looks human, but not quite. And it's a real risk when animating deceased relatives.
But technology is improving. What used to look like a cartoonish caricature can now achieve surprising visual fidelity. Still, even the best AI can stumble.
The crucial thing is to manage expectations. Don't expect a perfect recreation. Think of it more as a touching impression. A reminder.
Consider also emerging legislation. New York, for instance, defines a “synthetic performer” as a digitally created asset using generative AI or software algorithms intended to create the impression of a human performer not recognizable as any identifiable natural person.
Here's what to keep in mind:
Photo Quality: The better the original photo, the better the animation.
AI Limitations: Current AI struggles with profile views or obscured faces.
Personal Preference: Some people find even slight animation comforting; others find it disturbing.
The larger issue is intent. Are you hoping to perfectly recreate a lost loved one? Or simply wanting a brief, emotional connection?
Your answer will guide your choice. And inform your expectations.
We built BringBack to create a comforting, respectful experience. Our approach is to offer subtle animations. It should bring a smile without venturing into the uncanny valley.
If you are interested in restoring photos to a former time, you can also read about how to colorize black and white photos for genealogy research.
Now, before you proceed, let's talk about the ethics.
What you need to start the process
To start, you need a source photo with decent resolution. The better the source photo, the better the animation's outcome.
Blurry photos yield blurry results. And photos with faces obscured by shadows or extreme angles? Those are a no-go.
For simple facial animations, a clear, well-lit headshot is enough. But what if you want to create a more interactive avatar? That's where it gets trickier.
You'll need more than just a photo. Audio samples of the deceased relative speaking can add a layer of realism. Old home movies or voice recordings can be invaluable.
But it's not just about having the data. It's about the quality of the data. Fuzzy audio will produce a fuzzy-sounding avatar. The more clear and distinct the source audio is the more human-like the avatar sounds.
Consider this:
High-Resolution Photo: Aim for at least 300 DPI (dots per inch).
Multiple Angles (for Avatars): Several photos from different angles can help create a more convincing 3D model.
The catch? Gathering this data can be emotionally taxing. Sifting through old recordings may bring up difficult memories.
Take your time. And be kind to yourself.
Our team at BringBack knows this process can be sensitive. We've designed our platform to be as user-friendly and respectful as possible. We believe in honoring memories.
Now that you've gathered your materials, let's delve into the ethical considerations.
Choosing the right photo for high-quality results
Choosing the right photo is paramount; you can't expect miracles from a blurry snapshot. The quality of the animation directly hinges on the clarity of the original image.
A clear image with distinct facial features will always yield the best results. That’s just a fact. Forget those tiny, pixelated photos pulled from old social media accounts. They simply won’t do.
What should you look for?
Sharp Focus: The face should be in focus, not blurry.
Good Lighting: Avoid photos with harsh shadows or overexposure.
Full Facial View: The face should be mostly visible, not obscured by hats, hands, or extreme angles.
Damaged photos? Don't despair. Our photo restoration tools at BringBack can often rescue seemingly lost causes. We can repair tears, remove blemishes, and even sharpen blurry details to prepare the image for animation. We've seen photos brought back from the brink, allowing families to see loved ones in stunning clarity once more. It's a beautiful thing.
If your only option is a damaged or low-resolution image, BringBack can help. Because every memory deserves a chance to shine.
Now, let's discuss the ethics of animating deceased relatives, a crucial consideration.
Ideal lighting and resolution standards
Ideal lighting and resolution are non-negotiable if you want animation that honors your loved one. A blurry, poorly lit photo will produce results that may cause more pain than joy.
So, what's ideal? Aim for photos that are front-facing, where the subject looks directly at the camera. This angle gives AI the most data to work with, resulting in smoother and more natural animations. Avoid profile shots or images where the face is partially obscured. Those rarely work well.
Even lighting is equally important. Harsh shadows and overblown highlights distort facial features. Natural, diffused light is best. Think of a portrait taken on an overcast day. That's the kind of lighting you want.
Now, let's talk numbers. Resolution matters. For best results, your photo should have a minimum pixel density of 1000×1000 pixels. Lower than that, and the animation may appear grainy or pixelated. Ideally, you'll want to hit 300 DPI. But understand that DPI is only relevant when printing. The higher the pixel count, the more detail the AI can capture, and the more lifelike the animation will be.
Front-facing angle is the best.
Even lighting for accurate features.
Minimum pixel density of 1000×1000.
But, what if you only have a low-resolution photo? Don't give up completely. As we mentioned previously, we offer photo restoration tools.
However, even with restoration, there are limits. A severely pixelated image will only improve so much. It is important to manage your expectations.
Choosing the right photo is a pivotal first step. From there, you may also want to learn how to use AI photo animation to make old photos move and smile, to get the very best quality. Now, we'll move into the ethical considerations to keep in mind.
Data required for interactive AI ghosts
For interactive AI ghosts, a photo alone won’t cut it. You need data that captures the essence of the person: their voice, their mannerisms, how they expressed themselves.
This means delving into archives. Text logs (emails, letters, social media posts) help with personality mapping. The AI analyzes these to understand their communication style, common phrases, and even their sense of humor.
Then comes the voice. Audio recordings are crucial. Whether it's old voicemails, interviews, or even snippets from home videos, these provide the raw material for voice cloning.
What if you have no audio? That's where text-to-speech (TTS) comes in. TTS engines can generate a voice based on written text. But without original recordings, it will lack the unique intonations and quirks that made your loved one sound like them.
Text logs for communication style.
Audio recordings for voice cloning.
Videos for mannerisms.
The catch is that this requires meticulous curation. It’s not about throwing every piece of data at the AI. It’s about carefully selecting materials that best represent the person you want to recreate. Because some data may paint an incomplete or inaccurate picture.
At BringBack, we recognize the sensitivity of this process. Our approach is to guide you in selecting and preparing this biographical data to ensure the most authentic and respectful representation possible. It's about bringing back their spirit, not creating a caricature.
Legal and privacy risks you should know
Legal and privacy risks are real and must be considered; just because the tech exists doesn't mean it's a free-for-all. Animating photos of deceased relatives opens a can of worms you should be aware of.
The biggest question: who owns the digital likeness of a deceased person? It's not as simple as you might think.
This dives into intellectual property rights. But it also involves what's known as the "right of publicity".
The right of publicity gives individuals control over the commercial use of their name, image, and likeness. But what happens when that individual is no longer around to exercise that control?
Laws vary widely by jurisdiction, with some states extending the right of publicity after death, while others don't.
This can create a legal minefield.
Ethical considerations are front and center.
The legal complexities surrounding digital resurrection involve both intellectual property and the right of publicity for the deceased, as Simkins reports.
Then there's data privacy. What happens to the personal data (photos, audio recordings, etc.) used to create these animations or avatars? Is it stored securely? How is it used? Is it shared with third parties? And what are your rights regarding that data?
These are crucial questions to ask before entrusting your precious memories to any service. We built our platform with strong data encryption and strict privacy protocols because you deserve peace of mind. We believe your memories are sacred, and we treat them that way.
Before you animate a photo, consider: who should give permission? Is it the spouse, children, or other family members? You might want to discuss this with your family. It could cause some disagreement.
Now that you know the legal and privacy risks, let's talk about the potential impact on mental health.
Who owns the rights to a digital likeness?
The problem is, that even in death, a person's identity has value. Post-mortem "right of publicity" dictates who controls the commercial use of a deceased person's name, image, and likeness.
And it gets messy.
These likeness rights don’t automatically transfer to the closest relative. It’s often the deceased person's estate that controls these rights. Meaning, decisions about how their image is used – even in AI recreations – require the estate's permission.
But here's where it gets tricky:
Laws regarding post-mortem publicity rights vary wildly.
Some states (like California and New York) have strong protections.
Others offer little to no protection after death.
This patchwork of laws means that creating an AI avatar of your great-uncle Jim might be perfectly legal in one state but a major violation in another. It comes down to consent.
If you're thinking of creating an AI version of a deceased relative, start by consulting an attorney familiar with intellectual property law in the relevant jurisdiction. They can help you navigate the legal landscape and ensure you're not infringing on anyone's rights.
If the deceased had a will, it should specify who controls their estate. If not, state law will determine the line of succession. Either way, obtaining permission from the deceased person's estate is a non-negotiable first step.
Ignoring this step could lead to legal challenges down the road. Remember, respect for the deceased and their legacy should always come first.
While we at BringBack cannot provide legal advice, we strongly encourage you to seek legal counsel before proceeding with any AI animation project. Ethical considerations must be balanced with legal compliance, as we navigate the complexities of digital immortality.
Now that we have discussed who owns the rights to a digital likeness, let's talk about the potential impact on mental health.
New York's laws on synthetic performers
New York is cracking down on unauthorized AI likenesses. The state has enacted laws requiring disclosure of AI-generated performers in advertising.
This means if you see an ad featuring a "person" who is actually a digital creation, the ad must tell you. It aims to protect both consumers and the rights of real performers.
But it doesn't stop there. New York law also requires consent for using deceased individuals' likenesses. This is part of an effort to prevent the unauthorized digital resurrection of celebrities or anyone else.
What exactly does this mean for you? If you're planning to use an AI to animate photos of deceased relatives for commercial purposes, you need to tread carefully.
Here's the breakdown:
A “synthetic performer” is defined as a digitally created asset using generative AI or software algorithms.
It's intended to create the impression of a human performer not recognizable as any identifiable natural person.
Disclosure is required in advertising.
The catch? These laws are still relatively new, and their full implications are yet to be seen. But the message is clear: unauthorized digital resurrections are not welcome in New York.
The bigger question is how these laws will evolve. We will also see if this has mental health impacts.
Mental health risks and emotional well-being
Animating deceased relatives can open a Pandora's Box of emotions. The use of AI 'ghosts' may pose mental health risks, potentially disrupting the natural grieving process.
This isn't about a simple photo album. This is about creating something that seems alive. And that can blur the lines between memory and reality.
The potential exists for emotional dependency on AI avatars, which could hinder long-term recovery from loss.
It’s easy to see how someone might become overly attached to a digital recreation of a loved one.
Here's why this is a concern:
It can hinder acceptance.
It may prolong grief.
It can create unrealistic expectations.
The goal should be to honor memories, not replace relationships. And there's a subtle but important difference.
But here's the hard truth: not everyone is emotionally equipped to handle this technology. Those struggling with grief or prone to depression may be particularly vulnerable. It could lead to confusion, stress, or even psychosis.
If you're considering animating a photo of a deceased relative, ask yourself: am I doing this for the right reasons? Am I prepared for the emotional fallout? And am I willing to seek professional help if needed?
We believe in creating tools that bring comfort and joy. But we also recognize the potential for harm. If you're feeling overwhelmed, please reach out to a mental health professional. You don't have to go through this alone.
And, if you’re feeling overwhelmed, you may wish to try creating a video of you hugging loved ones. A tangible expression of emotion in animation.
What are the alternatives to animating photos?
There are alternatives that can help you honor their memory. Consider restoring old photos. We can repair damage and bring faded images back to life.
Sometimes, simply seeing a clear, crisp image of a loved one is enough. You don't need animation to feel connected. It's a powerful way to reconnect with the past.
Then there's creating a memorial video. Compile photos, home movies, and audio recordings into a heartfelt tribute. It’s a tangible way to share their story with future generations.
And don't underestimate the power of storytelling. Share memories and anecdotes with family and friends. Keep their spirit alive through words.
Here's a quick comparison:
Option
Description
Emotional Impact
Photo Restoration
Repairing damaged or faded photos to their original glory
Can evoke strong feelings of nostalgia and connection
Memorial Video
Compiling photos, videos, and audio into a tribute
Allows for a comprehensive and emotional celebration of life
Storytelling
Sharing memories and anecdotes with loved ones
Fosters a sense of community and keeps memories alive through personal connections
AI Photo Animation
Adds facial movement to an otherwise still photo
It could create the illusion of a re-lived memory, however it may cause mental distress
Each option offers a unique way to honor your loved ones. But the key is to choose the one that feels right for you. And remember, at BringBack, our goal is to provide options that are respectful, meaningful, and emotionally safe.
Check out how to use AI photo animation to make old photos move and smile to see some more options.
Conclusion: Finding a balance
The ability to animate photos of deceased relatives is a powerful tool. The best approach is one of balance. Weigh the potential benefits against the potential risks.
Remember to keep the emotional and ethical considerations front and center. Ensure you have the necessary permissions. And be mindful of the impact on your own mental health.
But don't let these concerns scare you away completely. Used thoughtfully, AI animation can be a beautiful way to honor and remember loved ones. It offers a chance to reconnect with the past.
Here's what you should do next:
Gather your photos and other materials.
Research the legal and privacy implications in your area.
Talk to your family about your plans.
Seek professional help if you're struggling with grief.
It's all about finding a balance that works for you. It can be a powerful way to honor their legacy.
At BringBack, we're here to help you every step of the way. We want to make sure your memories are treated with respect and care.
Impact of digital resurrections on mental health
The interaction of AI with grief requires caution. Animating photos of deceased relatives can bring unexpected emotional turmoil.
It’s not as simple as pressing a button and feeling instant joy. The human mind is complex, and grief, in particular, is a delicate process.
This technology can, indeed, offer comfort. A fleeting glimpse of a loved one's smile can be a precious moment. But there is a line that you shouldn't cross.
However, the risks are real. Prolonged interaction with AI-generated simulations can disrupt the natural grieving process. It could lead to confusion, stress, or even psychosis.
Understanding the natural progression of mourning is vital when considering how AI tools might affect the five stages of grief, as Harvard Health explains.
The danger lies in becoming overly reliant on the simulation. Some may find themselves retreating into a digital echo chamber.
It can prevent you from fully processing your loss.
You run the risk of getting stuck in denial.
You will struggle to find acceptance.
We built BringBack to be a comforting tool. But we want you to know the limits of our technology and encourage professional counseling if needed.
We believe in honoring memories. But we never want to replace real-life connections or hinder the journey toward healing. If you're grappling with complex feelings, consider reaching out to a qualified therapist.
Now, we'll explore what you need to start the process.
Risks of emotional dependency and confusion
Risks of emotional dependency and confusion. Experts warn that emotional dependency on AI avatars can indeed stall the recovery process. It is easy to get confused with what is real and what isn't.
Some mental health professionals suggest that prolonged engagement with digital simulations might hinder long-term bereavement. The virtual presence, while comforting initially, could prevent the necessary emotional processing that comes with loss. It’s not about forgetting; it’s about adapting to a new reality without the physical presence of the loved one.
It is vital to know the limitations. Consider this.
The difference between digital simulation and true presence blurs.
This can lead to confusion and distress.
There is a risk of idealizing the digital version.
There are some warning signs to watch out for. Increasing isolation from real-life relationships, spending excessive time interacting with the avatar, or feeling more connected to the digital version than to living family members are all red flags. And if you find yourself relying on the avatar to avoid dealing with your emotions, it's time to seek professional help.
We encourage finding a balance between honoring memories and maintaining mental well-being. It's about using technology as a tool for remembrance, not as a crutch to avoid the pain of loss.
Now, let's delve into what you need to start the process of animating photos, keeping these cautions in mind.
Using technology as a healthy tribute
Using technology as a healthy tribute is possible. Look at Sun Kai, co-founder of Silicon Intelligence, who holds weekly video calls with a digital avatar of his deceased mother. It's a modern way to keep her memory alive. For him, it’s a source of comfort, not a replacement for grief.
These experiences highlight AI's potential as a tool for remembrance. It allows for continued connection in a new way. But it only works if approached with care and a strong sense of self-awareness.
AI can support coping with grief.
It can create unique experiences to honor memory.
But, be aware of the mental health risks.
This isn't about pretending the person is still here. It’s about finding a new way to interact with their memory. We strive to create experiences that are respectful and bring joy to the lives of families.
Now, before you start, it is important to know the legal and privacy risks.
Steps to animate a photo safely
Animating photos safely starts with the right photo animation tool; you get what you pay for. Not all tools treat your precious memories (or your privacy) with the respect they deserve.
First, research photo animation tools. Look for services that clearly state their privacy policies.
BringBack, for example, employs end-to-end encryption. This ensures your photos are protected from prying eyes.
Here’s how to check:
Read the Terms of Service: See if they retain rights to your images. (They shouldn't).
Look for Encryption: Make sure they use secure protocols. (HTTPS, SSL).
Check Reviews: See what other users say about their experience. (Trustpilot, Sitejabber).
Next, upload your chosen photo. Choose a tool that provides options for subtle animation. Avoid tools offering overly dramatic or unrealistic movements, as these can venture into the uncanny valley. Then, adjust the animation settings. Most platforms let you control the intensity and speed of the animation. Err on the side of caution.
Now, review the animated photo. Take a moment to assess how it makes you feel. Does it bring you joy, or does it evoke sadness or discomfort?
And finally, download and store the animated photo securely. Consider backing it up in multiple locations, such as a local hard drive and a cloud storage service. Just be sure to password-protect your backups.
Free tools might seem tempting, but they often come with hidden costs. Data privacy is a common concern; many free services monetize user data, potentially exposing your sensitive family memories. And some services retain rights to use the photos.
We built our platform to be user-friendly but also secure.
Our encryption methods are end-to-end.
We also offer simple tools to restore images.
Our team wants you to feel comfortable. It’s about more than a user interface.
Restoring the original image quality
If you want the best animation, don't skip the restoration step. A little prep work goes a long way to achieving a more pleasing result.
Before animating, you may want to colorize black and white photos to give the final video a more lifelike appearance. Restoring the original colors breathes life back into those memories.
Consider these benefits:
Enhanced clarity in facial features.
More accurate skin tones during animation.
Reduced risk of the uncanny valley effect.
We built our platform with image restoration in mind, but we've noticed many people skip this step, leading to suboptimal results. Our advice? Take the extra time. It's worth it.
Comparing costs of top platforms
Pricing varies wildly. It goes from free options to bespoke avatar creation running thousands of dollars.
MyHeritage, for example, offers Deep Nostalgia™ as part of a larger subscription. Users report hidden fees, however. And the base package might not be enough. Additional features cost extra.
On the other end of the spectrum, custom interactive avatars can cost a pretty penny. These are often priced based on complexity and level of interaction. Think professional service, not a simple app. But the result can be remarkably lifelike.
Consider this breakdown:
Free Trials: Some platforms offer free trials; a chance to test the waters.
Subscription Fees: Typically range from $10 to $50 per month, depending on features.
Custom Avatar Creation: Could range from $1,000 to $10,000 or more.
The catch? The "free" options are often limited in functionality or come with watermarks. And cheaper subscriptions limit the number of photos you can animate.
We built BringBack to offer a balance. Our pricing is transparent.
Next Step: Delve into the legal and privacy risks you should know.
Ethical alternatives for honoring ancestors
There are options beyond digital resurrection. Not everyone feels comfortable with AI simulations of deceased loved ones. You can honor their memory in ways that feel more authentic and less… unsettling.
Consider traditional genealogy research. Digging into your family's past, tracing your lineage, and uncovering long-lost stories can be deeply rewarding. Ancestry.com reports that 83% of users feel a stronger connection to their family history after researching their roots (that's a powerful bond). It’s about understanding their lives.
Or, create a digital scrapbook. Compile photos, letters, and other mementos into a beautiful online tribute. Add captions, stories, and anecdotes to bring the memories to life. Think of it as a curated museum of your family's history, accessible to everyone. It is like building a time machine for your ancestors.
Another option is a video tribute. Gather family members and friends to share stories and memories on camera. Edit these into a touching montage.
Here’s a brief comparison:
Genealogy: Researching family history to discover ancestors and lineage.
Digital Scrapbook: Compiling photos, letters, and mementos into an online tribute.
Video Tribute: Gathering loved ones to share stories and memories on camera.
But the biggest issue is deciding to do it or not. Our team at BringBack understands that not everyone wants a digital avatar. We believe in honoring memories in a way that feels right for you. Don't feel pressured to jump on the AI bandwagon if it doesn't align with your values. Respect their values.
Next, before you animate a photo, consider the legal and privacy risks.
Frequently asked questions about AI afterlife tech
Some are skeptical of this technology. We get asked some version of the same questions every week.
Is animating photos of deceased relatives disrespectful? It depends on your intentions and the feelings of your family. If you're aiming to honor their memory and bring comfort, it can be a beautiful tribute. But it’s disrespectful to proceed without consent from close family. And if your goal is to replace the person or create something sensational, it will come across as inappropriate.
What about data security? This is more than valid. It is paramount. Read the fine print before uploading any photos. You want to ensure that the service you’re using has robust security measures in place to protect your sensitive data. And that they don't retain ownership of your images (we certainly don't).
Look for encryption.
Read the privacy policy.
Understand how your data is stored and used.
Can I animate a video instead of a photo? Yes, some services offer video animation. However, the results can be more unpredictable. A still photo provides a fixed reference point. The AI has a harder time with the motion. If you’re using a video, ensure it’s high quality and features clear facial expressions. This reduces the risk of an uncanny result. It is better to start slow.
What if I don't like the result? Most platforms allow you to adjust the animation settings or even cancel the process altogether. If you're unhappy with the result, don't feel pressured to keep it. Trust your instincts. And consider trying a different photo or a different service. At BringBack, we offer various options for subtle animation. And, you can always request a refund if you're not satisfied.