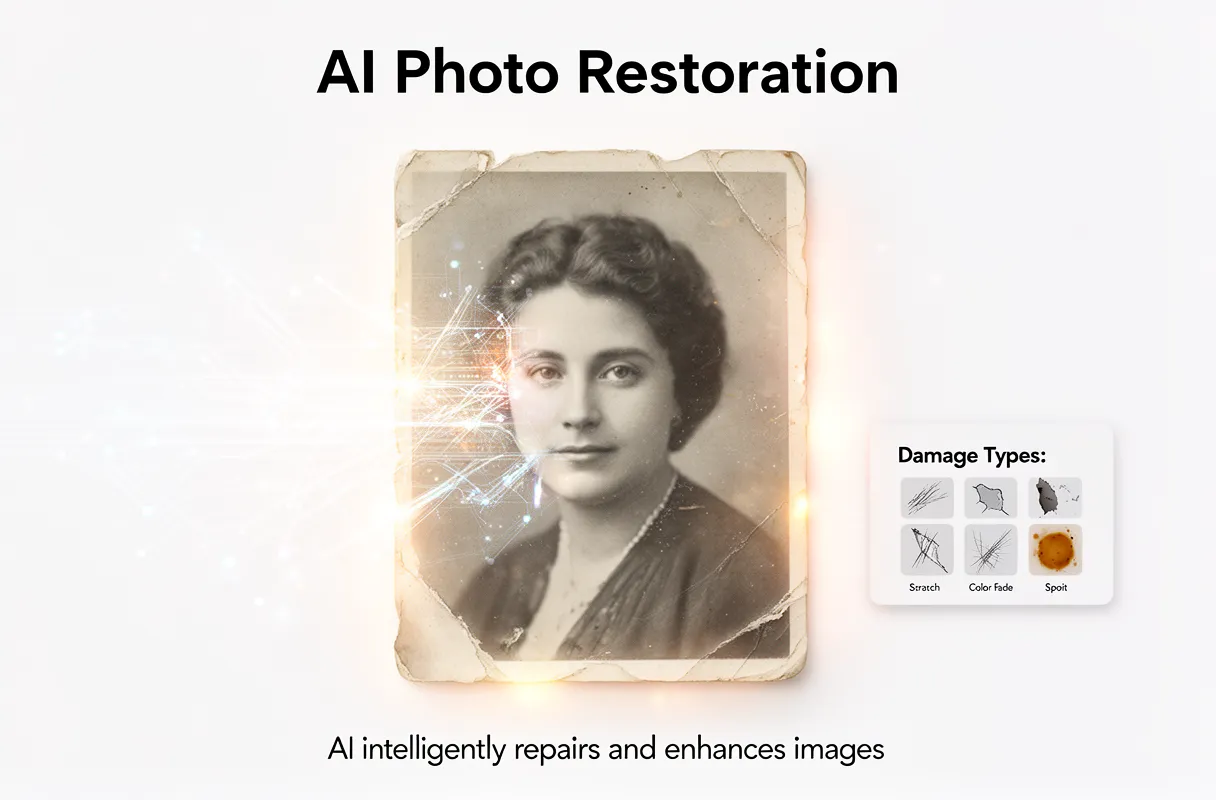
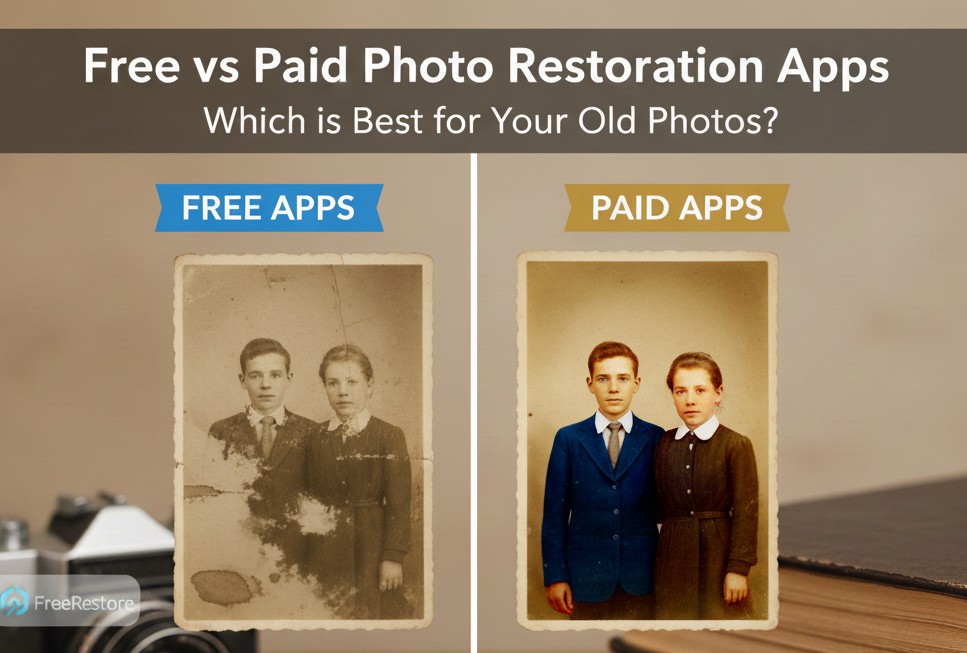
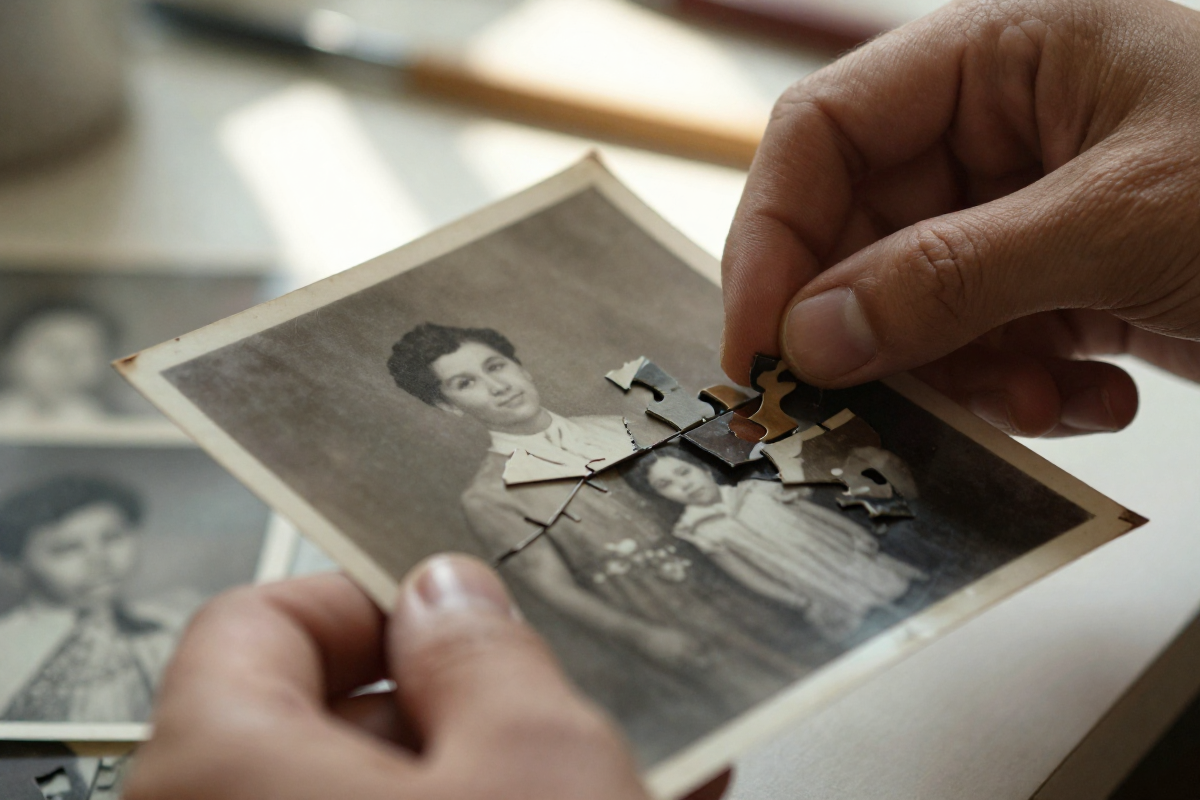
AI photo restoration is a digital process that uses deep learning algorithms to repair and enhance damaged images. This AI photo restoration technology aims to automatically remove scratches, fading, and discoloration, effectively tackling damaged photo restoration by intelligently reconstructing missing or imperfect visual data. The underlying photo restoration algorithm processes flaws like blur and tears, bringing old images back to life.
Key Characteristics:
Automated Repair: AI algorithms identify and correct various image imperfections.
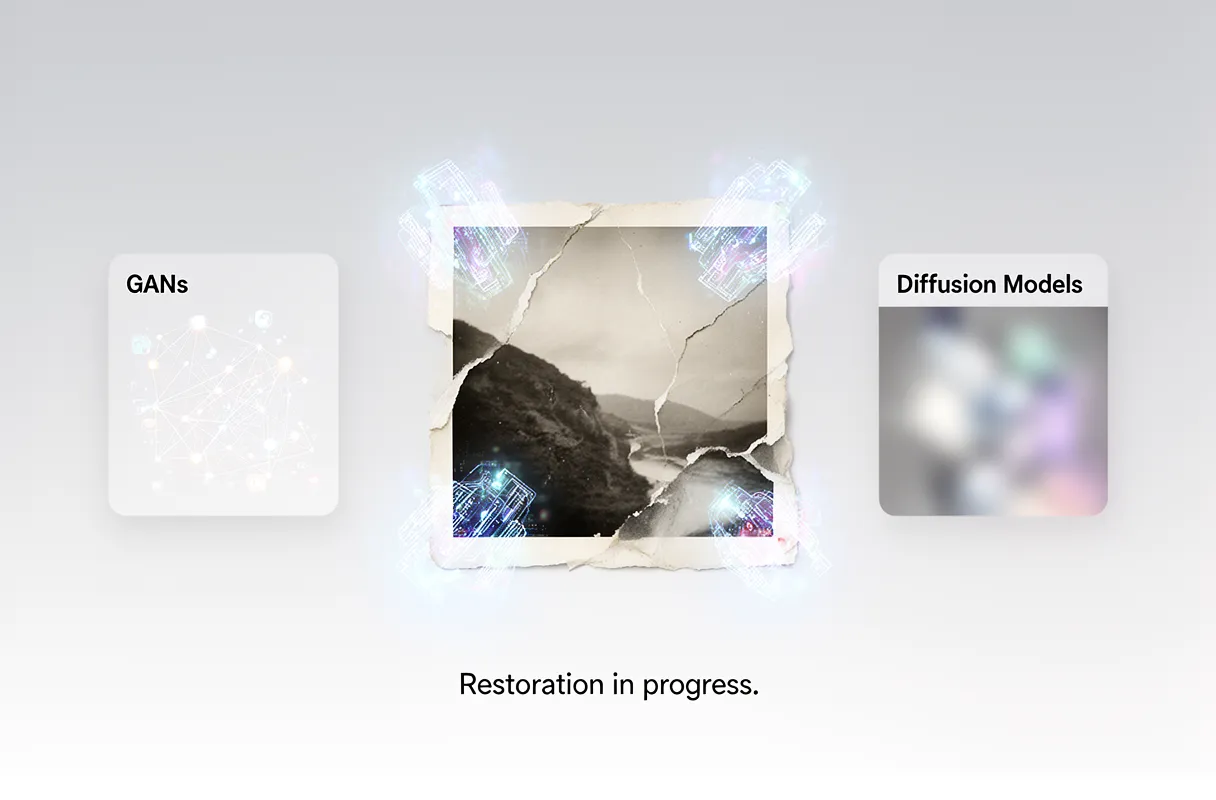
Deep Learning Core: Uses Generative Adversarial Networks (GANs) and diffusion models to reconstruct details.
Time Efficiency: Transforms manual tasks that took hours into seconds or minutes.
Flaw Coverage: Addresses scratches, fading, blur, tears, and color absence.
Seeing cherished family photos fade, torn, or covered in scratches feels like losing a piece of history. These images hold priceless memories, moments that connect us to our past. Yet, the physical damage often makes them difficult to truly appreciate or share, leaving a feeling of irreversible loss.
This guide helps you understand how an AI photo restoration algorithm actually works to recover those images. By the end, you will grasp the underlying technology for damaged photo restoration and remove scratches from your own photos, without resorting to expensive, time-consuming manual efforts.
What is AI Photo Restoration and Scratch Removal?
AI photo restoration is the process where AI photo restoration algorithms automatically fix and improve damaged photos. These intelligent systems use deep learning to mend imperfections like scratches, fading, and color loss, bringing cherished memories back to life.
These algorithms are designed to tackle a range of image degradation. They work by analyzing the existing pixel data and intelligently reconstructing what's missing or damaged. This means old, cherished photographs can be revived without the need for extensive manual editing.
AI excels at repairing various types of photo damage, including:
Scratches and tears
Fading and discoloration
Dust and spot marks
Blurriness and lack of sharpness
Absence of color in black-and-white photos
The fundamental shift is from time-consuming, manual techniques to automated processes. Where once a single photo might take hours to restore, AI tools can now fix many images in minutes. For a deeper dive into the fundamental concepts of AI photo restoration, explore our comprehensive guide on the power of AI in reviving memories. This technology fundamentally changes how we preserve our visual history, making it more accessible than ever.
The Evolution of Digital Image Repair
The journey of digital image repair traces back to early computer graphics. Initially, fixing damaged photos meant painstaking manual work. Experts used software like Adobe Photoshop, meticulously cloning pixels, retouching blemishes, and painstakingly recoloring faded areas. This process was incredibly time-intensive, often taking hours or even days for a single photograph.
This manual approach dominated for years. Then, the emergence of machine learning began to shift the paradigm. Algorithms started to learn patterns from vast datasets of images. This laid the groundwork for automated repair. The historical timeline of AI photo restoration truly accelerated with the advancements in deep learning and increased computational power.
The true revolution arrived with AI-driven techniques. These intelligent systems can now analyze an image, identify damage like scratches, tears, and fading, and intelligently reconstruct missing information. This represents a fundamental shift from traditional photo restoration, drastically reducing processing time from days to mere minutes per image. This evolution makes preserving our precious memories more accessible than ever before.
How AI Algorithms Reconstruct Damaged Photos?
AI algorithms reconstruct damaged photos by intelligently filling in missing or corrupted pixel data. This process relies heavily on deep learning techniques, primarily Generative Adversarial Networks (GANs) and Diffusion Models.
GANs work by pitting two neural networks against each other: a generator, which creates new image data, and a discriminator, which tries to distinguish between real and generated data. Through this adversarial process, the generator learns to create highly realistic pixels that blend seamlessly with the original image content. For complex regeneration, multiple GAN frameworks can be sequentially integrated, alongside inpainting techniques often based on OpenCV for partial image restoration after initial scratch patching. This approach is detailed in research on sequential GAN frameworks.
Diffusion Models, on the other hand, reconstruct missing information by iteratively refining noisy images. They start with a degraded image, add noise, and then learn to reverse this process, gradually removing noise to reveal a clean, reconstructed version.
Here's a look at how these core technologies compare:
Feature
GANs for Image Restoration
Diffusion Models for Photo Repair
Mechanism
Adversarial training (generator vs. discriminator) to create realistic pixels.
Iterative denoising process, learning to reverse noise addition to reveal clean data.
Strengths
Can produce sharp, detailed results; good for generating novel content and texture.
Excellent at generating high-fidelity and diverse outputs; often more stable training.
Weaknesses
Can be prone to training instability and "mode collapse" (limited output variety).
Can be computationally intensive and slower for inference due to iterative steps.
Primary Use
Filling large missing areas, creating realistic textures, and enhancing detail.
High-quality image synthesis, background generation, and advanced restoration tasks.
An image typically takes 3 to 5 minutes to process with AI restoration tools; smaller images or those with fewer faces process faster. This is similar to how a skilled artist might carefully reconstruct a torn canvas, imagining the missing brushstrokes based on the surrounding details and their understanding of the overall artwork. Understanding how AI can mend various forms of damage helps us appreciate the sophistication of these reconstruction methods.
Specific Techniques for Scratch Elimination
Scratch removal algorithms adapt to various scratch types by first identifying their characteristics. Fine scratches, often mere surface abrasions, require delicate texture reconstruction. Deeper, more prominent scratches demand more aggressive artifact removal and content-aware filling. Algorithms analyze color shifts and textural disruptions to classify the damage.
To tackle these imperfections, sophisticated techniques are employed. Scratch distribution extraction helps pinpoint all affected areas. Then, Gaussian blur maps are generated to isolate the scratch regions from genuine image content. This map guides the AI in knowing where to apply repair and how intensely. The AI effectively "paints over" the scratch, blending new pixel data with the surrounding image's color and texture.
Evaluating these methods relies on quantitative performance metrics. Scores like PSNR (Peak Signal-to-Noise Ratio), SSIM (Structural Similarity Index Measure), and FID (Fréchet Inception Distance) help measure the quality of the restoration. Higher PSNR and SSIM indicate better fidelity, while lower FID suggests the restored image is more statistically similar to real images.
Advanced tools ensure lossless restoration capabilities, meaning your original photo's resolution isn't compromised. Many services also offer practical user limits, such as free processing for images up to 3000x3000px and under 10MB. This allows for extensive testing without immediate cost.
Practical Applications and Ethical Considerations of AI Restoration
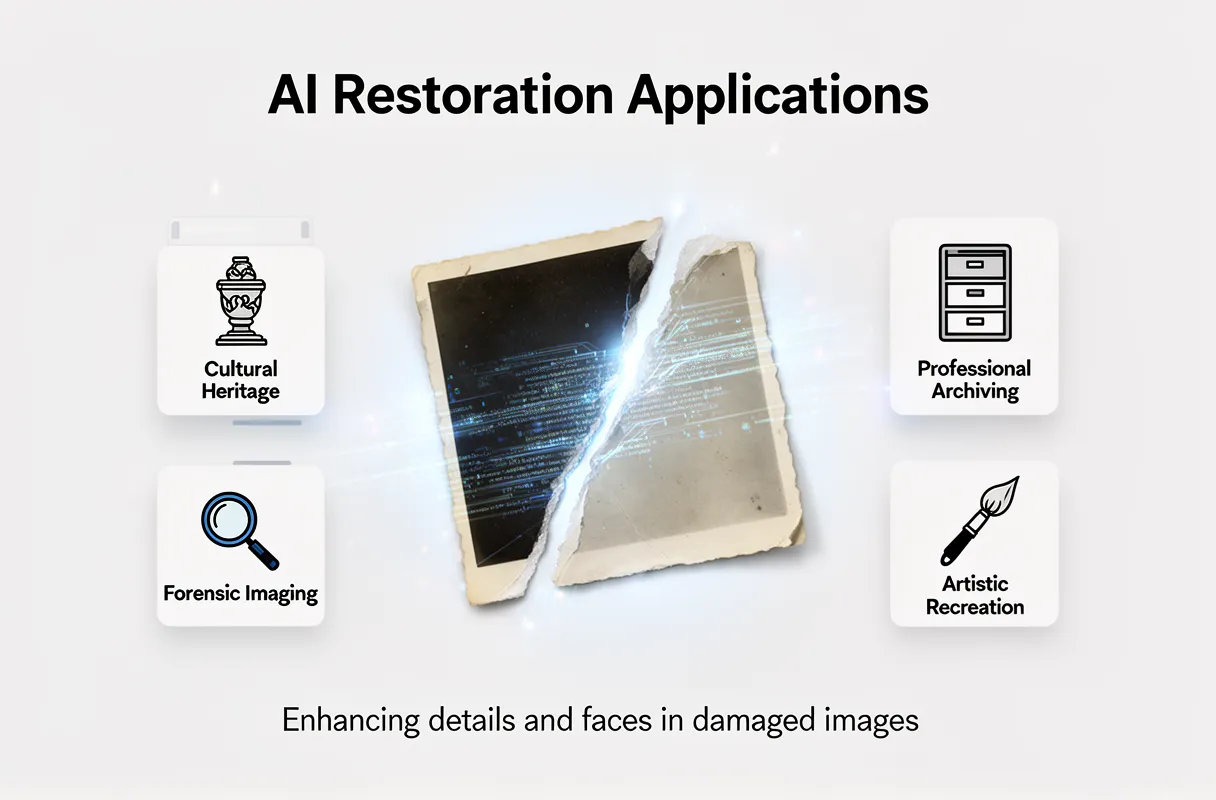
AI photo restoration tools extend far beyond personal keepsakes, offering significant value across various fields. These technologies enhance details, improve color fidelity, and sharpen fuzzy areas, making them indispensable for professionals.
Cultural Heritage Preservation: Museums and archives use AI to restore faded documents, historical photographs, and artwork, making precious artifacts accessible for study and public viewing.
Forensic Imaging: Law enforcement agencies employ AI to clarify damaged or low-quality evidence images, potentially revealing crucial details like faces or license plates that would otherwise be lost.
Professional Archiving: Businesses and institutions can use AI to digitize and restore vast collections of old records, ensuring long-term preservation and easy retrieval.
Artistic Recreation: Artists can leverage AI to reimagine historical images, blending old and new aesthetics for contemporary creative projects.
Beyond general restoration, AI excels at targeted enhancements, particularly for human faces. This capability can revive the expressiveness in a child's smile or the wisdom in an elder's eyes, adding a profound emotional layer to the restored image.
However, this power comes with ethical responsibilities. The ability to alter and enhance images raises concerns about accuracy and potential bias. We must consider the implications of these tools as we move forward.
Using AI for Your Damaged Photos
Scanning your precious physical photos at a 90-degree angle is the first vital step for superior AI restoration. Ensure clear focus and good lighting, avoiding shine, and orient them correctly for the best results.
Next, upload your scanned, damaged image directly to the BringBack AI tool. Our sophisticated AI instantly analyzes the specific damage – whether it’s cracks, fading, or discoloration – and applies precise, targeted repairs within seconds.
Finally, review your revitalized, high-resolution restored photo or even an animated video. You can then easily download your cherished memories and share them with family and friends. Ready to bring your old photos back to life? Start your revive your treasured memories today.
For your peace of mind, many AI services, including ours, implement strict data safety guarantees. Your results stay in your own account until you choose to delete them, and they are never used to train general-purpose AI models, safeguarding your personal history.
Navigating the Ethical Landscape and Future of AI Restoration
AI photo restoration tools face complex ethical questions. The risk is subtle alteration of features and the imposition of modern beauty standards. This often stems from biased datasets, particularly from 'WEIRD' countries. A 2010 analysis found that 96% of research subjects in top psychology journals came from Western, Educated, Industrialized, Rich, and Democratic societies. This data bias means AI might unintentionally erase historical and cultural accuracy in its restorations.
The future of AI photo restoration promises even greater capabilities. We are seeing research in real-time processing for instant results and handling more extreme damage, like severe tears and fading.
Expert Opinion: "The next frontier is AI that understands context, not just pixels. It needs to grasp intent and historical nuance to restore authentically."
This ongoing research aims to push the boundaries of what's possible, making AI photo scratch removal and general restoration more powerful and nuanced.
The Quick Answer: For standard $4 \times 6$ or $5 \times 7$ photo prints, 600 DPI is the sweet spot for archiving and restoration, while 300 DPI is plenty for 1:1 digital viewing and social sharing. Scanning photo prints at 1200 DPI almost never reveals extra detail—it simply digitizes the paper texture, dust, and physical grain at $4\times$ the file size and scan time. High resolutions ($2400–4800\text{ DPI}$) are reserved strictly for 35mm film negatives, slides, and tiny wallet prints.
The Experiment: 300 vs. 600 vs. 1200 DPI on a Standard 4×6 Print
To eliminate the guesswork, we ran an empirical benchmark on a standard vintage color glossy photograph ($4 \times 6\text{ inches}$, circa 1984) using an Epson Perfection flatbed scanner in 24-bit RGB mode. Here is how the resolution levels compare in real storage, speed, and optical performance:
Scan Setting
Pixel Dimensions
Resolution
Uncompressed TIFF
Scan Time
200% Facial Crop Quality
300 DPI
$1200 \times 1800\text{ px}$
2.16 MP
~6.5 MB
11 seconds
Sharp at 100%. Slight pixel stepping visible when cropped tightly around the eyes.
600 DPI
$2400 \times 3600\text{ px}$
8.64 MP
~26.0 MB
24 seconds
Optimal. Clean facial contours, full photographic continuous tone, zero visible digital pixelation.
1200 DPI
$4800 \times 7200\text{ px}$
34.56 MP
~104.0 MB
1 minute 42 seconds
No extra image data. Reveals microscopic paper fibers, silver halide clumping, and dust specs.
Real-world benchmark: Scanning a single glossy 4×6 print at 24-bit color on flatbed hardware.
What the 200% Face Crop Actually Reveals
When you zoom $200\%$ into a subject’s eye or smile across all three scans, the physical limitation of commercial photo prints becomes clear:
At 300 DPI: The image reproduces the physical print at full quality on screens up to 1080p. However, if you crop into a small portion of a group photo, you will quickly hit digital pixelation.
At 600 DPI: You capture all the optical sharpness the original camera lens and chemical emulsion were capable of rendering onto paper. This provides enough raw pixel data to print an $8 \times 12$ enlargement or crop a single face cleanly.
At 1200 DPI: You do not gain finer iris details or eyelashes. Instead, you are magnifying the microscopic physical substrate—the texture of the resin-coated paper, tiny air pockets in the gloss coat, and stray lint.
The Law of Print Resolution: A flatbed scanner cannot extract detail that does not exist in the chemical emulsion of the print. Most vintage commercial prints have a resolving limit roughly equivalent to $300\text{ to }400\text{ optical DPI}$.
The Definitive DPI Decision Table (By Media & Condition)
Use this reference table to set your scanner software based on media format, original size, and physical condition:
Media Type
Recommended DPI
Max Useful DPI
Target File Format
Why This Resolution?
Standard Prints ($4\times6$, $5\times7$, $8\times10$)
300 – 600 DPI
600 DPI
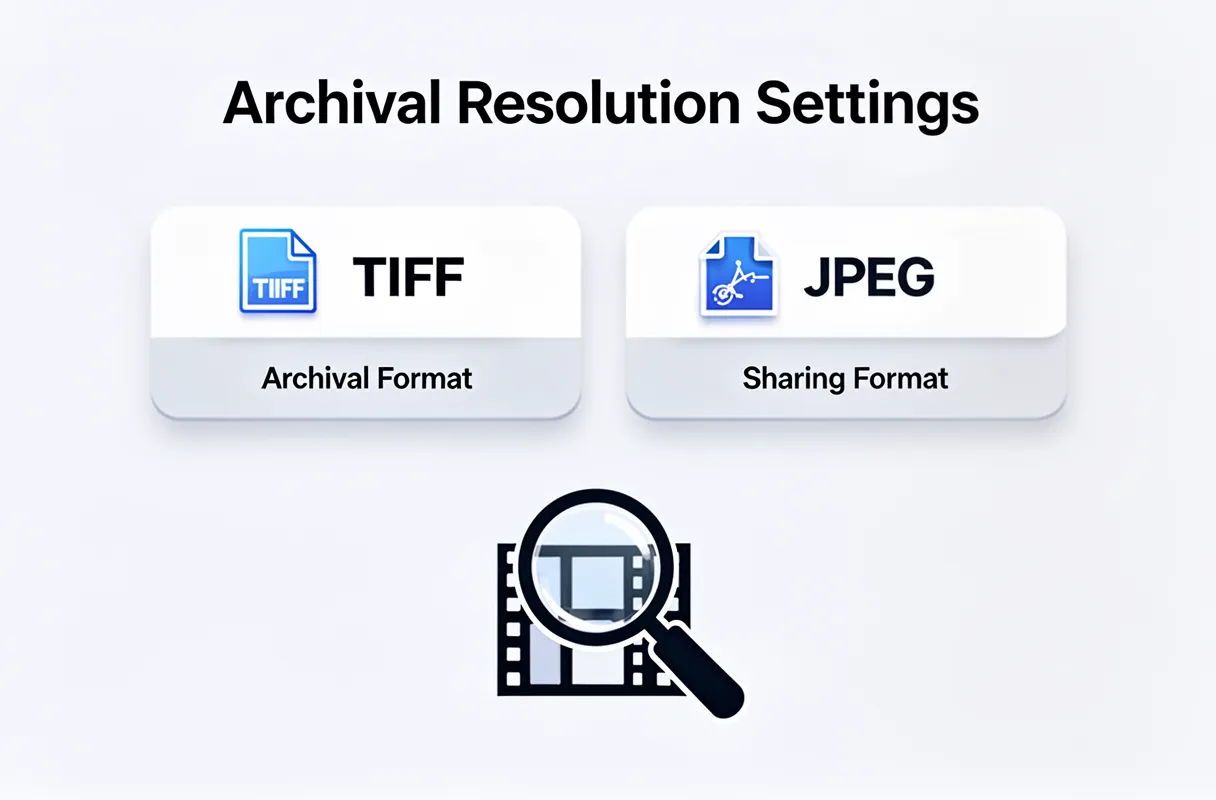
TIFF (Master) / JPG (Sharing)
600 DPI captures $100\%$ of emulsion data and allows $2\times$ enlargement without digital degradation.
Miniature & Wallet Prints ($< 2.5\times3.5\text{ in}$)
1200 DPI
1200 DPI
TIFF (24-bit)
Small physical surface area requires higher pixel density to yield an image large enough for modern 4K screens.
Damaged, Torn, or Scratched Prints
600 DPI
600 DPI
Uncompressed TIFF
Gives restoration tools and retouchers enough clean pixel boundaries without digitizing false paper-grain noise.
Faded Black & White Prints
600 DPI (Scan in Color)
600 DPI
16-bit Gray or 24-bit RGB TIFF
Scanning in color mode preserves subtle tonal data across yellowed or silvered paper layers for recovery.
35mm Mounted Slides ($24\times36\text{ mm}$)
2400 – 3200 DPI
4800 DPI
TIFF (48-bit color)
Film transmissive grain is microscopic. 2400 DPI yields a crisp $\sim 8\text{ MP}$ image ($2200 \times 3300\text{ px}$).
35mm Color / B&W Negatives
3200 – 4800 DPI
4800 DPI
TIFF (with Film Inversion)
Negative film holds the richest dynamic range; higher DPI preserves subtle highlights and deep shadow detail.
Medium Format Film ($120 / 220$)
1600 – 2400 DPI
3200 DPI
TIFF (48-bit color)
The larger negative surface area ($\approx 6\times6\text{ cm}$) produces massive $50\text{–}100\text{ MP}$ files even at moderate DPI.
Why 1200 DPI Will Not “Fix” a Damaged or Faded Photo
One of the most common digitization mistakes is increasing the scan resolution in an attempt to sharpen a blurry, faded, or torn print. Higher DPI does not equal higher clarity:
DPI records the symptom, not the cure: When you scan a scratched photo at 1200 DPI, you do not restore lost information underneath the scratch. You simply produce an ultra-sharp, high-resolution rendering of the scratch itself.
Blown highlights stay blown: UV fading breaks down chemical dye layers permanently. A scanner cannot re-synthesize faded cyan, magenta, or yellow dye simply by collecting more pixels from the blank white surface.
Noise hinders AI and manual restoration: Pushing a flatbed scanner to 1200 or 2400 DPI on standard paper creates optical grain noise. When fed into modern restoration software or manual Photoshop workflows, that artificial noise pattern makes smooth skin blending and tear-removal substantially harder.
The 3-Step Practical Workflow for Archiving Prints
Follow this simplified routine to balance speed, storage space, and preservation quality:
Step 1: Clean and Prepare
Wipe your scanner glass with an optical microfiber cloth and lens cleaner. Use an air puffer or soft camel-hair brush to remove loose debris from your print—never use liquid cleaners directly on vintage emulsion.
Step 2: Scan at 600 DPI (TIFF)
Lock your scanner settings to 600 DPI, 24-bit RGB Color, and turn off all auto-sharpening or aggressive contrast filters. Save the output as an uncompressed .tif to preserve an authentic digital negative.
Step 3: Restore Post-Scan
Once you have a clean 600 DPI source scan, export a high-quality JPG or PNG copy and import it into a dedicated restoration tool (such as BringBack AI, which accepts JPG, PNG or WebP files up to 10 MB, or professional photo editing software) to rebuild faded contrast, repair cracks, and de-blur features.
Frequently Asked Questions
If storage is cheap, why not scan everything at 1200 DPI just in case?
Scanning at 1200 DPI increases scan time from ~20 seconds per photo to nearly 2 minutes. For a collection of 300 photos, that shifts your project time from 1.5 hours to over 10 hours of active scanning, generating over 30 GB of data that contains zero extra photographic information.
Why should black and white photos be scanned in 24-bit color?
Black and white prints age unevenly. Yellowing, silver mirroring, and moisture stains occur primarily across the color spectrum. Scanning in 24-bit color captures the separate R, G, and B channels, allowing you or an automated tool to isolate and subtract yellow staining using the clean blue or green channels.
When is 1200 DPI actually required for prints?
Only when the physical print is smaller than $2.5 \times 3.5\text{ inches}$ (such as passport photos, locket pictures, or tiny school portraits) and you intend to print or display it at full screen size. In those cases, the higher DPI compensates for the tiny physical surface area.
To honor precious memories with animated photos of deceased loved ones, you must choose best AI tools to animate still photo of deceased person 2026 and carefully prepare the source image. This process often takes as little as 30 seconds per animation and requires minimal technical effort.
What You Need:
A clear, high-resolution digital photo of the individual.
Reliable internet access.
Access to a premium photo to animation AI service like BringBack.
Many attempts to animate cherished old photos end in disappointment, producing stiff, unnatural movements. This often lands squarely in the uncanny valley. Generic free tools simply lack the algorithms needed to capture subtle micro-expressions, transforming precious memories into unsettling distortions instead of vibrant tributes. You deserve better.
By the end of this guide, you will create truly respectful, natural-looking animated memories. Preserve the essence of your loved ones for future generations.
Why "Free" AI Photo Animators Often Fail Emotional Moments
Even the most cherished old photos end in disappointment, producing stiff, unnatural movements. This often lands squarely in the uncanny valley. Generic free tools simply lack the algorithms needed to capture subtle micro-expressions, transforming precious memories into unsettling distortions instead of vibrant tributes. You deserve better.
AI photo animation relies on Deep Learning and Generative Adversarial Networks (GANs), trained on extensive video data of human faces. This advanced technology enables the nuanced movements that bring a photograph to life. Free tools, however, typically use simpler, less sophisticated models. They often fail to grasp the subtle shifts in gaze, the gentle curve of a smile, or the slight flutter of eyelids. This results in animations that feel robotic, detached, and frankly, a bit unsettling, especially when trying to capture the warmth of a loved one. It’s a critical distinction: AI photo generation creates new images, but AI photo animation breathes life into existing ones.
The limitations of these basic free animators become painfully obvious when attempting to animate photos meant to evoke deep emotion. You'll often see jerky head turns or unnaturally wide smiles that miss the mark entirely. This is a far cry from the delicate, lifelike animations needed for true remembrance. You're looking for a respectful tribute, not a digital puppet show.
This is why understanding the technology behind animation is key. The foundational elements of this technology, such as deep learning and GANs, are complex and require significant computational power and refined training data to yield convincing results. Free services simply do not invest in this level of sophistication for their users.
Selecting the Right AI Tool for Animating Deceased Photos in 2026
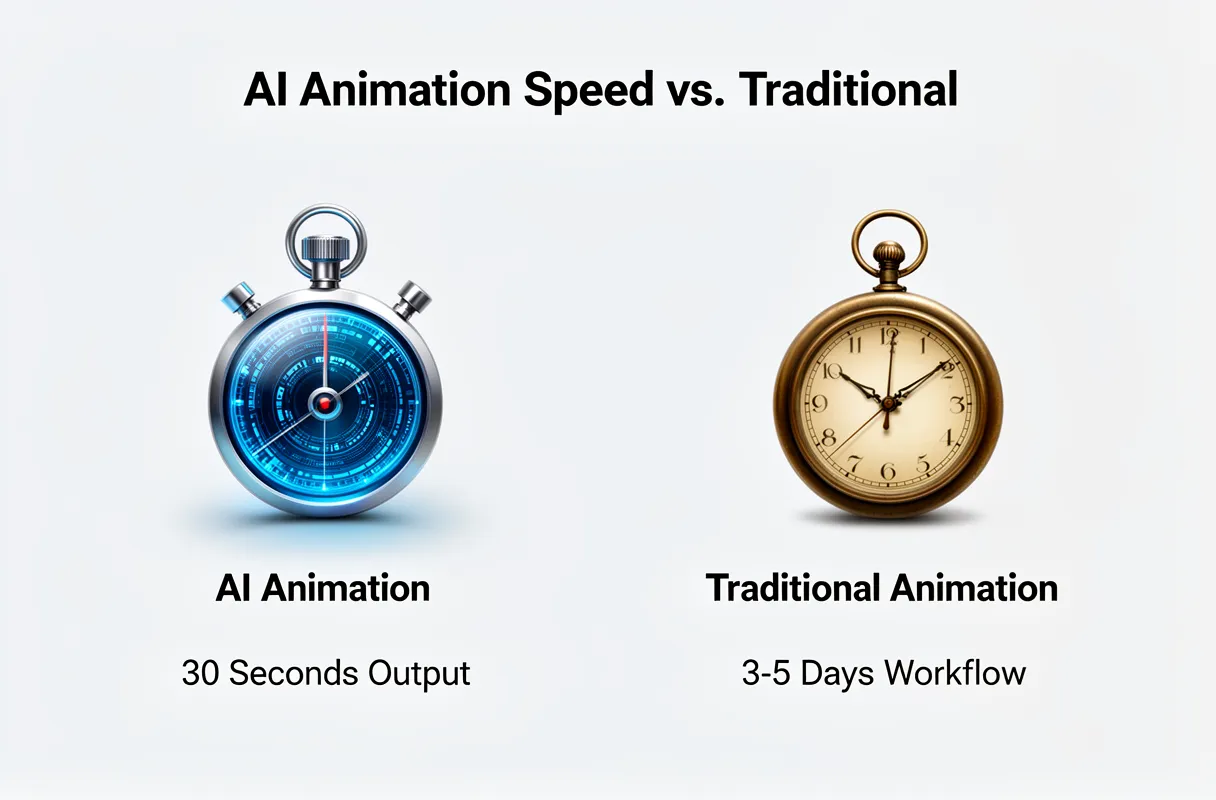
Choosing the right AI tool for animating cherished photos of loved ones is a deeply personal process. You need a solution that respects the memory, not just an algorithm to mimic life. The global AI video market surged to over $10 billion in 2025, a testament to its growing capabilities, yet not all tools are created equal, especially when dealing with sensitive moments. AI animation workflows can transform an image into video output in as little as 30 seconds, a stark contrast to traditional photo animation workflows that typically take 3-5 days and cost $50-$500 per asset.
Here are the critical factors to consider when selecting an AI photo animation tool in 2026:
Emotional Nuance and Realism: Look for tools that prioritize subtle, lifelike micro-expressions over exaggerated movements. The goal is to evoke a gentle sense of presence, not to create a jarring, artificial impression.
Ethical Data Handling & Privacy: Your loved one's photos are irreplaceable. Understand the tool's data retention policies and how your images are secured. Transparency is paramount.
Ease of Use vs. Control: Do you prefer a one-click solution, or do you want fine-grained control over the animation process? Some platforms offer presets, while others allow for detailed adjustments.
Cost Model: Consider whether a one-time payment, subscription, or credit-based system best suits your needs. For infrequent use or to avoid ongoing charges, a model with credits that never expire offers peace of mind.
Understanding the core technology behind AI photo animation is crucial for selecting the right tool. The effectiveness hinges on sophisticated Deep Learning and Generative Adversarial Networks (GANs) trained on vast datasets of human facial movements, a level of complexity typically beyond free offerings.
Key Considerations and a Comparative Overview of Tools
Choosing the right tool for animating deceased loved ones' photos requires careful thought, balancing technological capability with emotional sensitivity. We've seen many users initially drawn to free options, only to find the results jarring or unnerving.
The core considerations when selecting an AI photo animation tool in 2026 often boil down to a few critical areas:
Output Quality & Subtlety: Does the animation capture a lifelike twinkle, or does it lean towards an unsettling, robotic flicker? Look for tools that prioritize nuanced, gentle movements over exaggerated lip-syncing or head-bobbing.
Ethical Approach & Data Privacy: How does the service handle your precious memories? Ensuring robust data privacy policies and clarity on photo retention is paramount.
Cost Model: Are you looking at a recurring subscription that might add up, or a straightforward one-time fee? For sentimental projects, predictable costs are often preferred.
Ease of Use vs. Control: Some tools offer a highly automated experience, while others allow for more granular adjustments. The ideal balance depends on your technical comfort and desired outcome.
To help you navigate these choices, we've compiled a comparison of popular AI photo animators in 2026:
Feature
Picto.Video
MyHeritage Deep Nostalgia™
Create AI Clips
OnReplay
AnimateOldPhotos.org
LIA
BringBack
Price Model
Credits/Subscription
Subscription
Subscription/Credits
Subscription
Free (limited) / Paid
Subscription
One-time Payment / Credits Never Expire
Animation Style/Quality
Variable; can be exaggerated
Subtle, focused on eye/mouth movement
Often animated characters/effects
Realistic, subtle movements
Basic animation, often less refined
Realistic, can be impressive
Subtle, natural, respectful animations
Multi-Photo Support
Yes
Yes
Yes
Yes
No (typically one at a time)
Yes
Yes
Data Privacy/Retention
Varies; review policies
Varies; review policies
Varies; review policies
Varies; review policies
Varies; review policies
Varies; review policies
Results stay in your account until you delete them; not used to train general-purpose AI models
Accessibility
Web-based
Web-based
Web-based
Web-based
Web-based
Web-based
User-friendly, intuitive interface
Best Use Case
Social media content, short clips
Bringing historical photos to life
Creative video content, animated personas
Restoring motion to old family footage
Quick, simple animations
Advanced animation effects
Preserving cherished memories with dignity and realism
When evaluating comparing AI photo animators 2026, remember that while many tools offer impressive technology, the most fitting option for memorializing a loved one prioritizes naturalism and respect above all else. Our platform is built with this understanding, offering a cost-effective, no-subscription way to bring your most precious memories back to life.
Step-by-Step Guide: Animating Deceased Photos with BringBack
Bringing a cherished photograph to life doesn't require complex software or days of work. With our platform, you can animate deceased photos in just a few simple steps.
Digitize Your Photo: Scan your precious image using your smartphone or a scanner to create a high-quality digital copy.
Restore, Then Upload to BringBack: If your photo is damaged, run it through our restoration tool first (1 credit) to repair scratches and fading, then upload the restored copy to the animation tool.
Animate and Download: Choose one of nine motion presets, such as Gentle Smile, preview the gentle five-second animation (10 credits), and download your animated video.
Our aim is to make this process intuitive and deeply personal. We understand the emotional significance of these memories, which is why we focus on subtle, respectful animation that honors your loved ones. For a deeper dive into the nuances of making old photos move and smile naturally, consider advanced techniques like natural photo animation methods.
This approach ensures that each animated photo feels authentic, capturing the essence of the person you remember. It's a magical way to reconnect with the past and share those moments with future generations.
Preparing Your Photo for Optimal Animation
To capture the magic of animating your cherished memories, the quality of the original photo is paramount. We've found that starting with the best possible photo selection for AI animation is the first, most impactful step.
When choosing a photo, look for these key elements:
Clear Lighting: Soft, even lighting works best. Avoid harsh shadows or blown-out highlights that obscure facial details. Natural daylight from a window is often ideal.
Forward or Slight Angle: Faces looking directly at the camera or with a gentle, slight turn are easiest for AI to interpret. Extreme profiles can sometimes be challenging.
High Resolution: The sharper and more detailed the original, the better the animated result. Avoid cropped or pixelated images.
Unobscured Features: Ensure the eyes, nose, and mouth are clearly visible. Glasses can sometimes cause glare that interferes with the animation process.
Digitizing these precious images is the next crucial step. For older physical photos, we recommend a two-pronged approach depending on your resources.
High-Quality Scanning: If you have a scanner, use a high DPI setting (at least 600 DPI). Lay the photo flat and avoid glare by adjusting the lighting or using a matte finish if possible. Scan the photo in a lossless format like TIFF for maximum detail.
Phone Scanning Apps: Many modern smartphone apps are surprisingly capable. They use your camera to capture the photo and often offer features to automatically crop, straighten, and enhance the image. Look for apps that explicitly mention high-resolution scanning and allow manual adjustments for lighting and perspective. This is a fantastic way to digitize old photos for animation quickly and effectively.
Remember, the goal is to create a clean, digital copy that retains as much original detail as possible. This lays the groundwork for the AI to perform its restorative and animating magic, bringing your memories back to life with gentle, lifelike movements.
The BringBack Animation Process
Bringing your cherished photographs back to life is remarkably simple with our process. You'll scan your old photo to create a clean digital copy, upload it to the BringBack AI, and then review your animated memory.
Here’s how BringBack how it works:
Scan Your Precious Photo: After preparing your image, the first step is to get it into our system. Use your phone's camera or a scanning app to create the highest quality digital version you can. Aim for clarity and good lighting.
Upload the Photo to BringBack: Once you have your clean digital file, simply upload the scanned photo to our platform. If it has scratches, tears, or fading, run it through the restoration tool first (1 credit) to repair imperfections. Restoration is a separate step, so take the restored copy into the animation tool and choose one of nine motion presets, such as Gentle Smile or Warm Gaze (10 credits).
Review and Download Your Animated Memory: Within moments, you’ll see the results: a five-second clip with a gentle, lifelike animation. You can then review animated video BringBack has created before you download the animated clip, ready to share or cherish. If you’d like a different motion, generating again with another preset uses credits again.
We focus on subtle, respectful movements. Our goal is to evoke the feeling of life without creating anything uncanny. This ensures your animated memories feel authentic and deeply personal.
It's a magical process, designed to be intuitive for everyone.
Ensuring Natural Results and Ethical Sharing of Animated Memories
To ensure your animated memories feel authentic and are shared respectfully, focus on subtle animation and clear ethical guidelines. A quick way to troubleshoot common animation issues like flickering or distorted features is to try a slightly different angle of the original photo or choose a subtler preset such as Gentle Smile or Soft Nod. For ethical sharing, always prioritize consensus and respect for the individual depicted.
Troubleshooting AI Animation:
Subtle Adjustments: If a feature appears distorted, try a subtler preset such as Gentle Smile or Soft Nod.
Photo Selection: If one photo yields unnatural movement, select an alternative photograph with clearer features and lighting.
Choose a Gentler Preset: BringBack doesn't use intensity sliders; instead, pick a calmer preset such as Gentle Smile or Soft Nod and aim for gentle, lifelike motion rather than exaggerated expressions.
Ethical Sharing:
Family Consensus: Always obtain agreement from close family members before animating photos of deceased loved ones.
Cultural Sensitivity: Be mindful of cultural norms and traditions surrounding remembrance and memorialization.
Emotional Readiness: Consider the emotional impact on viewers, especially if sharing widely.
Animated photographs can powerfully preserve memories, offering comfort and helping individuals process emotions, much like traditional photos. the power of photographs play a significant role in this. When sharing these revived moments, remember that dynamic content generates 400% more engagement than static images.
When dealing with the sensitive topic of animating photos of deceased relatives, it’s important to tread with care and respect. For detailed information on the ethical considerations of animating photos of deceased relatives, refer to our comprehensive guide. Our approach focuses on gentle, respectful animation that honors the memory.
It's about capturing the essence of a moment, not creating a digital puppetry. Our goal with BringBack is to offer a way to reconnect with cherished memories in a deeply personal and meaningful way, ensuring that each animated piece feels true to the spirit of the original photograph.
Troubleshooting Unnatural Animations and Best Practices for Sharing
Sometimes, even with the best tools, animations can look a bit off. If your animated photos appear unnatural or fall into the 'uncanny valley,' don't worry; there are simple fixes.
Common Animation Issues and Fixes:
Distorted Features: Eyes too wide, mouth unnaturally stretched. Try a different source photo with clearer features, or look for tools that offer more control over facial expressions.
Unnatural Movement: Jerky transitions or limbs moving independently. This often happens when the AI misinterprets the 3D space of the photo. Re-scanning the photo at a higher resolution can sometimes help.
Flickering or Artifacts: Pixels or strange visual noise appearing. This can be a sign of a low-quality scan or AI processing errors. A higher-quality scan or a different processing setting might clear this up.
'Uncanny Valley' Effect: The animation is close, but just not quite right, creating an unsettling feeling. Focus on tools that prioritize subtle, gentle animations. Sometimes, less is more. If a specific photo consistently produces this, it might be best to use an alternative or simply enjoy the restored still image.
Ethical Sharing of Animated Memories:
When animating photos, especially of those who are no longer with us, sensitivity is key. Good AI photo animation aims for natural, subtle expressions rather than generating 'deepfakes.'
Family Consensus is Paramount: Before animating images of deceased relatives, ensure all close family members are in agreement. This avoids causing distress.
Respect Cultural Norms: Be mindful of how different cultures perceive the animation of memories.
Manage Emotional Impact: Animated memories can evoke strong feelings. Be prepared for both joy and sadness.
Creating a cohesive memorial video from multiple animated clips is a beautiful way to share a loved one's story. Consider using editing software like Adobe Premiere Pro or Final Cut Pro to blend clips smoothly. Focus on gentle transitions and background music that complements the mood.
When sharing, remember most people find solace in preserving memories through photos, and dynamic content generates 400% more engagement than static images.
Social Media: Tag relevant family members and use appropriate hashtags like #memorialvideo or #cherishedmemories.
Memorial Websites: Many platforms are designed for sharing life stories; these animated clips can add a unique dimension.
Digital Photo Frames: A touching way to keep a loved one’s animated memory present in your home.
We built BringBack to help you reconnect with these precious moments in a way that feels authentic and respectful. Our approach is designed to capture the essence of a memory, not to create something artificial.
To rescue your old 35mm slides, you must meticulously clean them, choose an appropriate scanning method—from a smartphone setup to a dedicated slide scanner—and then use software for digital capture, often followed by AI-powered restoration. This process can take a few hours to a full weekend depending on your collection size, and is moderately difficult initially.
What You Need:
Your collection of 35mm slides (Kodachrome, Ektachrome).
A computer (Windows or macOS).
Your chosen scanning hardware (dedicated 35mm scanner like Plustek OpticFilm 8300i, a flatbed scanner with transparency adapter, or a smartphone with a uniform light source).
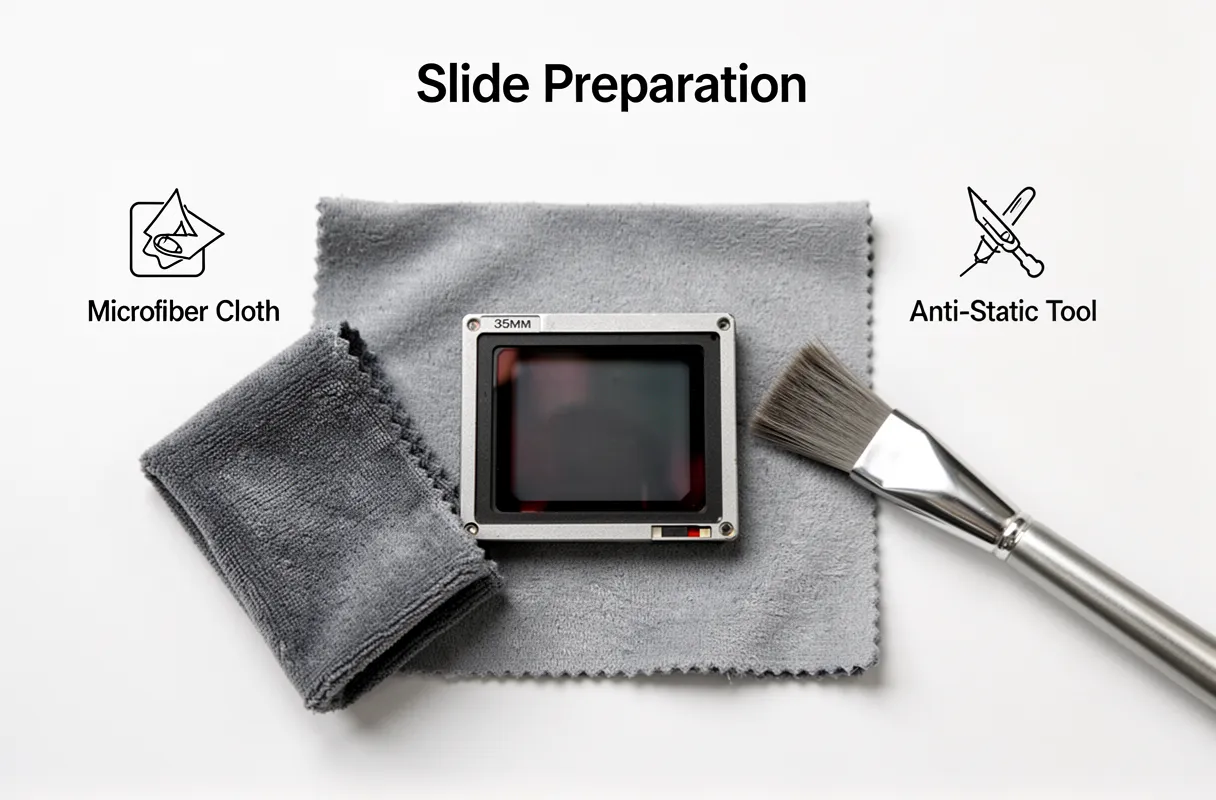
Cleaning supplies (microfiber cloth, anti-static brush like Kinetronics Tiger Cloth or PEC-PADs).
Scanning software (SilverFast, VueScan, or a dedicated app).
Access to BringBack AI for restoration.
That shoebox of 1970s Kodachrome and Ektachrome slides sitting in the attic isn't getting any younger. Most professional services mean a 3-week wait and can be surprisingly expensive. DIY offers instant gratification, letting you capture quality ranging from a good 2000-3000 DPI up to 7200 DPI for professional archival prints.
By the end of this guide, you will have a high-fidelity digital collection of your precious memories, ready for sharing, advanced restoration with our BringBack AI tool, and secure archival.
Prerequisites for Home Slide Digitization
Before you even think about touching those cherished slides, gather these essentials. Having them ready streamlines the entire digitization process.
Your 35mm Slides: Of course! Make sure they are easily accessible and organized by year or event if possible.
A Capable Computer: You'll need a machine that can handle image files and the scanning software. A modern laptop or desktop with at least 8GB of RAM and sufficient hard drive space is ideal.
Scanning Hardware: This is your core tool. Choose between a flatbed scanner with a slide adapter, a dedicated film scanner, or even a smartphone scanning app (though quality varies wildly).
Basic Cleaning Supplies: A few key items will keep your slides pristine before they hit the scanner. Think microfiber cloths and a gentle blower brush. (More on specific cleaning next time!)
External Storage (Optional but Recommended): A dedicated external hard drive or cloud storage service ensures your digital memories are backed up and safe.
And remember, the magic happens when preparation meets patience.
Safe Cleaning Methods for Vintage 35mm Slides
Cleaning vintage 35mm slides before digitizing them demands a gentle touch to avoid damaging these precious memories. Proper cleaning ensures dust and grime don't translate into digital artifacts.
The safest and most effective method for cleaning 35mm slides involves dry dusting with specialized tools. Start by using a gentle blower brush to dislodge loose particles. For stubborn smudges, a microfiber cloth or specialized slide cleaning paper is essential.
Never use common household cleaning agents or even 70% isopropyl alcohol on older film types like Kodachrome or Ektachrome. These can cause irreversible color transfer on slides that are 60-70 years old. Always opt for photographic-specific cleaning solutions if absolutely necessary, but dry methods are preferred.
Consider using anti-static tools to prevent dust from re-settling. Products like the Kinetronics Tiger Cloth or PEC-PADs are designed to clean without leaving residue and actively repel dust.
It's critical to clean each slide immediately before scanning. Dust and oils from fingerprints can easily transfer and become permanent digital blemishes if not addressed just prior to digitization.
For more detailed guidance on the safest practices, consult resources that detail slide cleaning techniques. This step, while seemingly minor, significantly impacts the final clarity of your digitized images.
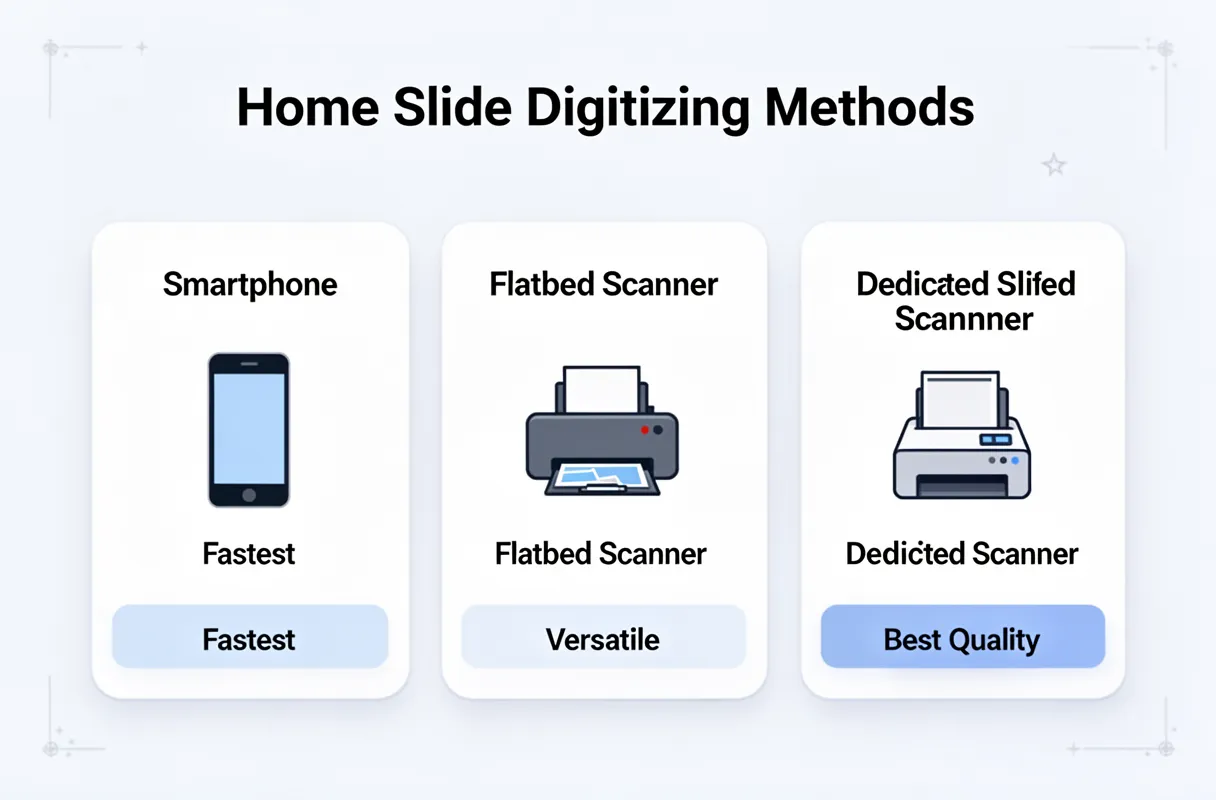
Comparison of Home Scanning Methods
When you're ready to turn those dusty slides into digital memories, you've got a few paths to choose from, each with its own trade-offs. Understanding these options helps you pick the best slide to digital converter for your specific needs and budget.
The speed, quality, and cost vary wildly between the most common home scanning methods.
Method
Speed
Image Quality
Cost
Best For
Smartphone Apps
Fastest (seconds per slide)
Highly Variable (dependent on app/light)
Free – $50
Quick previews, sharing casual memories, very tight budgets
Flatbed Scanners
Slow to Moderate (minutes per slide)
Good (up to 2400-4800 DPI)
$100 – $500
Mixed media, occasional slides, general photo digitization
Dedicated Slide Scanners
Moderate to Slow (minutes per slide)
Excellent (up to 7200 DPI, higher MP)
$200 – $1000+
Preserving maximum detail, archival quality, large collections
A smartphone app paired with a light source can give you a result in seconds, making it the fastest option for a quick peek. However, this speed often comes at the expense of detail.
Flatbed scanners offer a decent middle ground, capable of producing good quality scans suitable for most viewing needs. They are versatile, handling photos and documents alongside slides.
For those prioritizing the absolute best image fidelity, dedicated 35mm slide scanners are the top choice. Devices like the Plustek OpticFilm 8300i, for instance, can achieve 7200 DPI, rendering incredible detail compared to lower-end 'scan n go' models that might only manage 14-22 MP. This level of resolution is essential for archival purposes or if you plan to significantly enlarge your digitized images.
While dedicated scanners are pricier, often starting around $200 and going up to $1000 or more for professional models, the output quality is often worth the investment for preserving cherished family history. Our approach at BringBack prioritizes capturing that maximum detail, understanding that these images represent irreplaceable legacies.
Scanning Slides with Phone Apps and Light Boxes
Scanning slides with your phone can be a quick way to digitize your memories, but getting good results requires a bit of setup. We've found that a stable tripod, a consistent light source like a tablet or dedicated light box, and a way to keep the film perfectly flat are key.
You'll need to rig your phone to capture the slide precisely. A DIY slide holder made from cardboard or a 3D printed jig works wonders. This keeps the fragile film from curling and ensures the entire image is in focus.
The light source needs to be uniform. Placing your slide over a bright tablet screen displaying a white image can work in a pinch. For better, more even light, a dedicated LED light box is ideal. The goal is to avoid any hot spots or uneven illumination that would mar your scan.
Shooting in RAW format, if your phone allows, gives you the most flexibility later in post-processing. You'll want to capture the image with just enough light, ensuring you don't blow out highlights or crush shadows. We’ve seen many attempts that look washed out or too dark simply because the exposure wasn't dialed in correctly.
Post-processing is where the magic happens. Apps like Adobe Lightroom Mobile or even built-in photo editors allow you to crop, adjust exposure, and correct color casts. Think of it as your digital darkroom, allowing you to bring those cherished images back to life.
How to Use Dedicated 35mm Slide Scanners
Dedicated 35mm slide scanners offer a significant leap in quality for your 35mm slide conversion projects. Unlike smartphone methods, these devices are built specifically for the task, yielding superior detail and color accuracy. Devices like the Plustek OpticFilm series or the PowerSlideX Plus provide a more professional workflow, especially when tackling large collections.
Loading slides into these scanners is generally straightforward, designed for efficient batch processing. Most models utilize a tray or a feeder mechanism. You'll typically align your slides within the designated tray, ensuring the emulsion side (the duller side) faces the correct direction as per the scanner's instructions.
For high-volume scanning, such as hundreds of slides, the key is consistent loading. Take your time to ensure each slide sits correctly in the tray. A misaligned slide can cause scanning errors or even damage the film. This meticulous approach upfront saves considerable time during post-processing.
Once loaded, the scanner and its accompanying software, like SilverFast or the manufacturer's utility, take over. They handle the digitization process, often allowing for batch settings to be applied across all images. This automation is where dedicated scanners truly shine, turning a tedious task into a manageable process. Remember, the Plustek OpticFilm 8300i is a prime example, offering 7200 DPI for exceptional detail, a far cry from the limited resolution of some basic scanners.
Steps for Efficient High Volume Batch Scanning
To process hundreds, even thousands, of slides efficiently, a methodical approach is key. It's not about speed alone, but about a streamlined workflow that minimizes errors and maximizes throughput.
1. Organize Your Slides
First, gather all your slides and sort them logically. This could be by year, event, or even by family member. Having them in order from the start saves immense time later when you’re trying to locate specific images.
2. Batch Pre-Cleaning
Do not try to clean each slide individually right before scanning. Instead, take them in small batches – say, 10 to 20 at a time. Use a blower brush or canned air to remove loose dust and debris. This prevents dust from spreading and contaminating your scanning surface or the scanner itself.
3. Leverage Software Presets
Once you've loaded your slides into the scanner's tray, your scanning software (like SilverFast or VueScan, which we'll cover more deeply later) is your best friend. Create and save presets for common slide types and desired resolutions. This automates tasks like auto-cropping, auto-color correction, and basic dust removal, significantly speeding up the process.
4. Initial Verification Run
Before letting the software run wild on hundreds of slides, scan the first five to ten slides with extra attention. Check for common issues like focus problems, color casts, or unexpected artifacts. If these initial scans look good, you can be confident in letting the batch process continue. If not, adjust your presets and rescan. This small step prevents you from having to re-scan hundreds of images later.
Configuring Software for Archival Resolution
Configuring your scanning software is where you truly set the stage for archival quality. It’s not just about hitting "scan"; it's about telling the software precisely how to capture every nuance.
3. Setting the Resolution: DPI Matters
For archival purposes, you’ll want to capture the maximum detail your slides offer. This means setting the right Dots Per Inch (DPI).
2000-3000 DPI: This range is generally sufficient for most archival needs, providing excellent detail for digital viewing and standard print sizes.
7200 DPI: You’ll want to push to this higher resolution if you plan on making very large professional prints or if you know the original slide has exceptional detail you want to preserve for future, unforeseen uses. Higher DPI means larger file sizes, so plan your storage accordingly.
4. Choosing the Right File Format
The file format you select dictates how you can use and edit your scans long-term.
TIFF (.tif) or DNG (.dng): These are lossless formats. Think of them as the uncompressed master recordings of your photos.
TIFF: Widely compatible, great for editing, but files can be quite large.
DNG (Digital Negative): Adobe's open-source raw format. It's also lossless, often smaller than TIFF, and contains all the metadata. Many professional editors work natively with DNG.
JPEG (.jpg): This is a lossy format. While it’s great for quick sharing online or saving space, you sacrifice image data with every save.
Use JPEGs for: Immediate sharing with family or previews.
Avoid JPEGs for: Your primary archival copy if you ever plan to do significant editing.
We always recommend saving your master archival copies as TIFF or DNG files. You can always create JPEGs from these later.
5. Software Presets and Configuration
When using scanning software like SilverFast or VueScan, you'll encounter numerous settings. Don't be intimidated.
Scan Driver Settings: This is where you’ll set the DPI and file format.
Color & Tone Controls: Many programs offer auto-correction features. While convenient, for archival scans, we prefer to have fine-grained manual control over color balance and exposure. This ensures we capture the original intent of the photographer.
Dust and Scratch Removal: Be cautious with these. While tempting, overly aggressive settings can sometimes remove genuine detail or create artificial artifacts. Start with a low setting or even turn it off and rely on post-processing if needed. We often find that cleaning the slides physically before scanning yields better results than relying solely on software correction.
And that’s how you get your software set up to capture the magic of your memories for years to come.
Troubleshooting Common Image Quality Issues
8. Troubleshooting Common Image Quality Issues
When scanning, you might run into a few snags, but don't worry. We've seen these before, and the fixes are usually straightforward.
The key to a great scan is a clean source and appropriate settings.
Common Issues and Their Fixes
Problem
Cause
Solution
Color Casts
Inaccurate color balance during scanning.
Use software auto-leveling features. Most scanning software has an "Auto Levels," "Auto Color," or "Auto White Balance" function. This is a good starting point. If that's not enough, manually adjust white balance using a neutral gray area in the image.
Blurriness
Out of focus, or the slide/photo isn't flat.
Check the scanner's focus. Ensure the film holder or scanner bed is clean and the media is seated correctly. For slides, verify they are perfectly flat within their mounts; sometimes a slightly warped slide causes focus issues.
Digital Artifacts
Dust on the scanner's glass or sensor.
Clean the scanner's glass and sensor. Use a lint-free cloth and an approved glass cleaner. Even a tiny speck can create noticeable lines or dots. Perform a test scan on a blank white document to check for debris before scanning your precious originals.
Graininess
High ISO film or aggressive sharpening.
This is often inherent to the original film. While some software can attempt to reduce grain, overdoing it can make the image look plasticky. We recommend a light touch, or accept that a bit of film grain adds to its character.
Loss of Detail
Scanning at too low a resolution.
Increase your DPI setting. For archival purposes, we recommend 2000-3000 DPI for prints up to 8×10 inches. If you plan on making large professional prints, consider 7200 DPI. Always save in TIFF or DNG format for maximum editing flexibility.
Sometimes, the issue isn't with the scanner at all, but with the physical condition of the slide or photo itself. Things like scratches or minor damage are best addressed during the scanning process if possible, but extensive restoration often requires more advanced tools.
Restoring Faded Slides with BringBack AI
Faded colors and minor imperfections on old slides don't mean the memory is lost. BringBack AI offers a straightforward way to bring those cherished images back to life.
Simply upload your scanned, faded slide to our platform. Our advanced AI then gets to work, meticulously analyzing the image for color degradation and damage. It applies precise, targeted repairs to restore vibrancy and clarity in mere seconds.
You can then preview your revitalized photo or even see it transformed into a short animated video. Download your high-resolution, restored memories and start sharing them with family and friends, reliving those precious moments. This makes digitizing old slides a truly rewarding process.
Organizing and Naming Digitized Slide Collections
Keeping your digitized slides organized and easily searchable means more than just having them on a hard drive. A good system ensures you can find that specific memory from decades ago in moments, rather than digging through thousands of files.
Folder Structure: The Foundation of Order
A logical folder hierarchy is your first line of defense against digital clutter. We’ve found a simple Year-Event structure works best for most family archives.
Year: Start with the broadest category – the year the photos were taken.
Event: Within each year, create subfolders for specific events or themes. Think "Summer Vacation," "Christmas 1988," or "High School Graduation." This makes browsing intuitive.
This simple approach ensures that when you're looking for photos from, say, your childhood, you can quickly jump to the correct decade and then pinpoint the specific occasion.
Naming Convention: Making Each File Findable
Beyond folders, the filename itself is a powerful tool. A consistent naming convention transforms a jumble of digital files into an accessible archive.
A solid convention includes the Year, a brief Description, and a Sequential Number.
Example:1974_Summer_Vacation_001.jpg
1974: The year is always first, making chronological sorting automatic.
Summer_Vacation: A descriptive phrase tells you what the photos are about at a glance. Use underscores to separate words; spaces can sometimes cause issues with older software.
001: A three-digit sequential number ensures uniqueness within that event and makes sure files stay in order, even if you add more later.
This systematic approach means you’ll never have to open 50 blurry photos just to find the one of Aunt Carol at the beach. You'll know exactly where to look.
Data Backup Strategies for Digital Archives
Digital files, unlike their physical counterparts, are surprisingly fragile. A dropped hard drive, a corrupted download, or even a simple file system error can wipe out precious memories in an instant. Because of this, a solid backup strategy isn't just good practice; it's essential for safeguarding your digital legacy.
The widely adopted 3-2-1 backup rule provides a simple yet powerful framework to ensure your digitized archives are safe. This strategy means you’ll have three copies of your data, stored on two different types of media, with one copy kept offsite.
Here's why this layered approach works:
Three Copies: Having multiple copies significantly reduces the risk of total data loss. If one or even two copies become inaccessible, you still have a fallback.
Two Different Media Types: Storing data on disparate media (e.g., an external hard drive and cloud storage) protects against failures specific to one technology. For instance, a fire might destroy your external drive, but your cloud backup remains intact.
One Offsite Copy: This is the critical safeguard against localized disasters like fire, theft, or flood. Keeping a copy in the cloud or at a different physical location means your memories are safe even if your home is affected.
Digital files are remarkably easy to lose if not managed correctly. Without a robust backup plan, your painstakingly digitized slides and photos could vanish with a single technical glitch.
The bottom line: Treat your digital memories like gold. Protect them with redundancy.
Many of you reach out to us, wondering if it's truly possible to bring old photographs of loved ones back to life. The answer is a heartfelt yes, you can animate photos of deceased relatives. AI-powered technologies now make it possible to create digital avatars from still images, allowing faces to move, smile, and even seem to speak.
This incredible leap in technology offers a new way to connect with precious memories. Imagine seeing your grandmother’s laugh again, or your father’s knowing glance. For instance, Sun Kai, co-founder of Silicon Intelligence, created an AI avatar of his mother to help process grief, even holding weekly video calls with the digital likeness.
But this ability comes with important considerations. We believe that preserving these memories should always be done thoughtfully and with respect. Because we are dealing with something so personal, ethical questions, mental well-being, and legal rights are essential to discuss. You must ensure you approach this new frontier with care.
Can you animate photos of deceased relatives?
Yes, you absolutely can animate photos of deceased relatives. It ranges from simple facial movements to more complex, interactive digital avatars.
You can now see a loved one's smile again. It's no longer science fiction. Services such as MyHeritage's Deep Nostalgia™ use deep learning to animate faces in still photos. This allows you to see your relative seemingly come to life.
In some countries, this has become a full-blown industry. In China, numerous companies offer AI 'resurrection' services. This reflects a cultural tradition of confiding in the dead.
But the options don't stop there. The startup 2Wai, for example, has an app to create interactive digital avatars of deceased family members. Imagine having a conversation with a digital recreation of someone you miss.
How do we approach this at BringBack? We focus on creating a comforting experience. It should be a way to remember and honor your loved ones.
Of course, there are important ethical considerations here. Are you honoring their memory? Or creating something that could cause distress? It's vital to consider the feelings of all family members involved. And, with any service, understand the privacy implications.
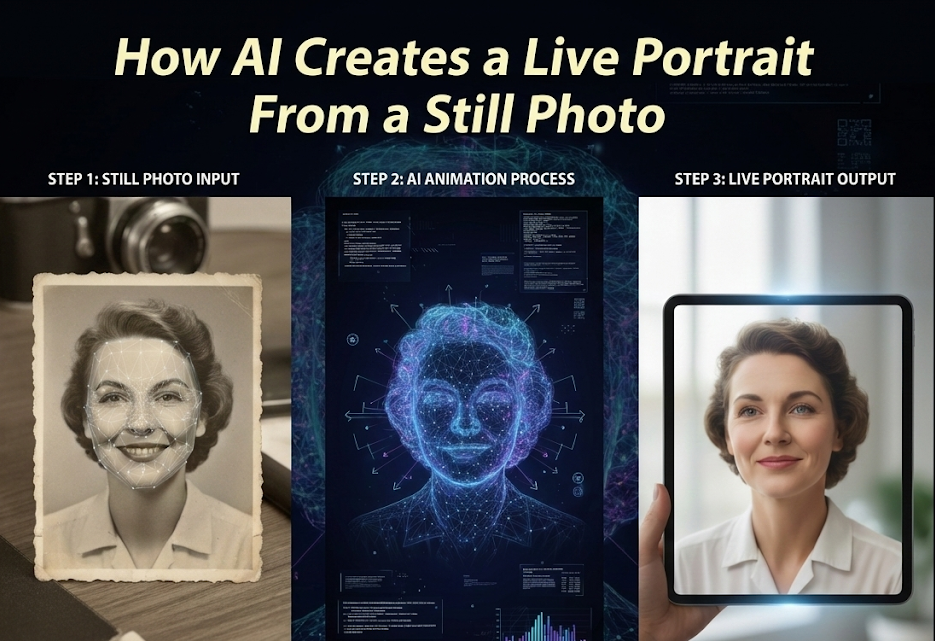
Ready to take the next step in preserving your family’s history? You may also want to see how to create a live portrait from a still old photo 2026.
How modern AI recreates human movement
How modern AI recreates human movement.
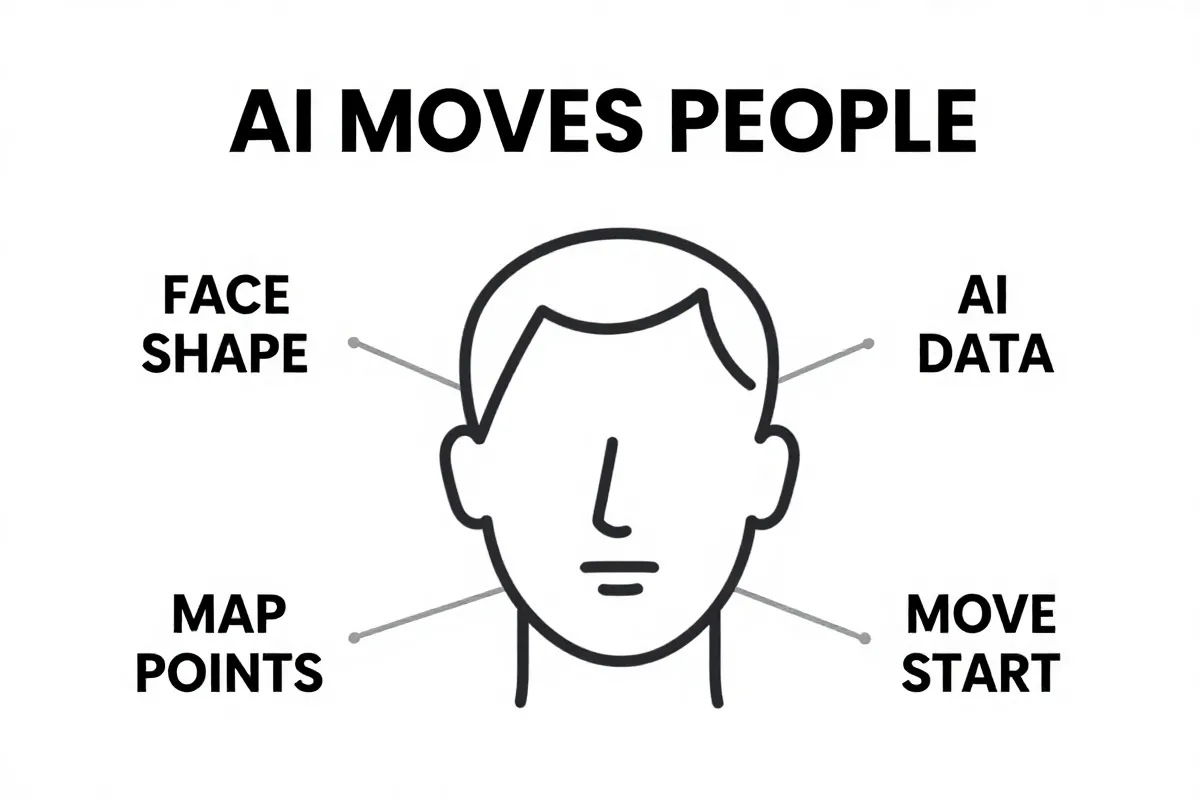
Think of it as digital puppetry, but instead of strings, it's math. Deep learning algorithms analyze thousands of faces. It’s like the AI is building a massive, detailed map of every possible expression.
This "map" identifies key facial features: the corners of the mouth, the crinkle around the eyes, the tilt of the head. Then, AI applies motion transfer.
Motion transfer is where the magic happens. A pre-recorded movement – a smile, a nod, a blink – is overlaid onto the still photo. The AI adjusts this movement to fit the unique contours and features of the face in the picture. It’s not perfect. But it can be surprisingly convincing.
It's like taking the essence of a human expression and grafting it onto an old memory.
But here's a simplified view of the key steps:
AI scans the photo and identifies facial landmarks.
It selects a corresponding movement "driver" from its library.
The driver is then adapted and applied to the original image.
The big issue is realism. Current AI can struggle with extreme angles or poor-quality photos. This can result in a slightly unnatural or uncanny animation.
And it's important to remember the ethical considerations.
Is this "real," or is it a manipulation?
It is essential to keep this in mind when sharing or viewing these animations.
If you're thinking about gifting an animated photo, read our article on how to gift animated photos to parents for their anniversary.
Facial animation vs. interactive digital avatars
Facial animation isn't the same as having a conversation. One is a gentle revival; the other, a digital recreation.
The most common form of animating deceased relatives is through facial animation. MyHeritage's Deep Nostalgia™ is a prime example. These tools take a still photograph and add subtle movements. Eyes blink. A smile plays across the lips. It's a glimpse of life, but it’s a silent movie.
Interactive digital avatars take it a step further. Consider the work of 2Wai. Their app creates avatars capable of holding conversations. This allows for something that feels closer to interaction.
But the difference is stark. Facial animation offers a comforting illusion. Interactive avatars aim for a more immersive experience.
Which is right for you? It depends on what you seek. Do you want a gentle reminder? Or do you want something closer to a digital reunion?
The ethical considerations change, too. A simple animation feels less intrusive than an avatar that speaks.
Here’s a simple comparison:
Deep Nostalgia™: Subtle facial movements; a brief, visual experience.
2Wai: Interactive avatars capable of conversation; a potentially longer, more immersive experience.
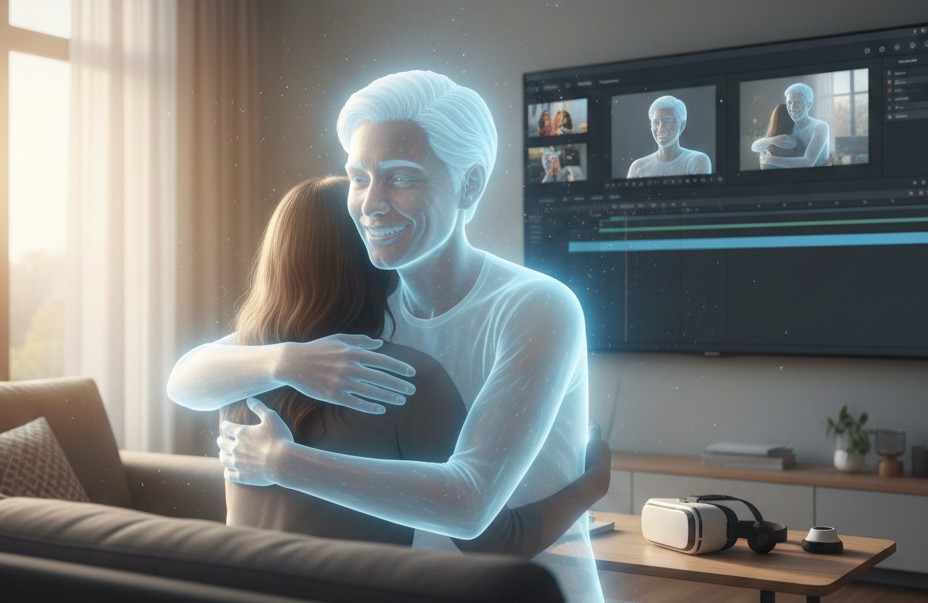
And, remember, you can see how to create a video of you hugging loved ones with our other available articles.
At BringBack, we understand these nuances. We strive to offer options that respect your memories.
Accuracy and lifelike qualities of today's AI
Accuracy in AI animation walks a tightrope. The closer the animation gets to reality, the more jarring any imperfection becomes.
This is known as the "uncanny valley": that unsettling feeling when something almost looks human, but not quite. And it's a real risk when animating deceased relatives.
But technology is improving. What used to look like a cartoonish caricature can now achieve surprising visual fidelity. Still, even the best AI can stumble.
The crucial thing is to manage expectations. Don't expect a perfect recreation. Think of it more as a touching impression. A reminder.
Consider also emerging legislation. New York, for instance, defines a “synthetic performer” as a digitally created asset using generative AI or software algorithms intended to create the impression of a human performer not recognizable as any identifiable natural person.
Here's what to keep in mind:
Photo Quality: The better the original photo, the better the animation.
AI Limitations: Current AI struggles with profile views or obscured faces.
Personal Preference: Some people find even slight animation comforting; others find it disturbing.
The larger issue is intent. Are you hoping to perfectly recreate a lost loved one? Or simply wanting a brief, emotional connection?
Your answer will guide your choice. And inform your expectations.
We built BringBack to create a comforting, respectful experience. Our approach is to offer subtle animations. It should bring a smile without venturing into the uncanny valley.
If you are interested in restoring photos to a former time, you can also read about how to colorize black and white photos for genealogy research.
Now, before you proceed, let's talk about the ethics.
What you need to start the process
To start, you need a source photo with decent resolution. The better the source photo, the better the animation's outcome.
Blurry photos yield blurry results. And photos with faces obscured by shadows or extreme angles? Those are a no-go.
For simple facial animations, a clear, well-lit headshot is enough. But what if you want to create a more interactive avatar? That's where it gets trickier.
You'll need more than just a photo. Audio samples of the deceased relative speaking can add a layer of realism. Old home movies or voice recordings can be invaluable.
But it's not just about having the data. It's about the quality of the data. Fuzzy audio will produce a fuzzy-sounding avatar. The more clear and distinct the source audio is the more human-like the avatar sounds.
Consider this:
High-Resolution Photo: Aim for at least 300 DPI (dots per inch).
Multiple Angles (for Avatars): Several photos from different angles can help create a more convincing 3D model.
The catch? Gathering this data can be emotionally taxing. Sifting through old recordings may bring up difficult memories.
Take your time. And be kind to yourself.
Our team at BringBack knows this process can be sensitive. We've designed our platform to be as user-friendly and respectful as possible. We believe in honoring memories.
Now that you've gathered your materials, let's delve into the ethical considerations.
Choosing the right photo for high-quality results
Choosing the right photo is paramount; you can't expect miracles from a blurry snapshot. The quality of the animation directly hinges on the clarity of the original image.
A clear image with distinct facial features will always yield the best results. That’s just a fact. Forget those tiny, pixelated photos pulled from old social media accounts. They simply won’t do.
What should you look for?
Sharp Focus: The face should be in focus, not blurry.
Good Lighting: Avoid photos with harsh shadows or overexposure.
Full Facial View: The face should be mostly visible, not obscured by hats, hands, or extreme angles.
Damaged photos? Don't despair. Our photo restoration tools at BringBack can often rescue seemingly lost causes. We can repair tears, remove blemishes, and even sharpen blurry details to prepare the image for animation. We've seen photos brought back from the brink, allowing families to see loved ones in stunning clarity once more. It's a beautiful thing.
If your only option is a damaged or low-resolution image, BringBack can help. Because every memory deserves a chance to shine.
Now, let's discuss the ethics of animating deceased relatives, a crucial consideration.
Ideal lighting and resolution standards
Ideal lighting and resolution are non-negotiable if you want animation that honors your loved one. A blurry, poorly lit photo will produce results that may cause more pain than joy.
So, what's ideal? Aim for photos that are front-facing, where the subject looks directly at the camera. This angle gives AI the most data to work with, resulting in smoother and more natural animations. Avoid profile shots or images where the face is partially obscured. Those rarely work well.
Even lighting is equally important. Harsh shadows and overblown highlights distort facial features. Natural, diffused light is best. Think of a portrait taken on an overcast day. That's the kind of lighting you want.
Now, let's talk numbers. Resolution matters. For best results, your photo should have a minimum pixel density of 1000×1000 pixels. Lower than that, and the animation may appear grainy or pixelated. Ideally, you'll want to hit 300 DPI. But understand that DPI is only relevant when printing. The higher the pixel count, the more detail the AI can capture, and the more lifelike the animation will be.
Front-facing angle is the best.
Even lighting for accurate features.
Minimum pixel density of 1000×1000.
But, what if you only have a low-resolution photo? Don't give up completely. As we mentioned previously, we offer photo restoration tools.
However, even with restoration, there are limits. A severely pixelated image will only improve so much. It is important to manage your expectations.
Choosing the right photo is a pivotal first step. From there, you may also want to learn how to use AI photo animation to make old photos move and smile, to get the very best quality. Now, we'll move into the ethical considerations to keep in mind.
Data required for interactive AI ghosts
For interactive AI ghosts, a photo alone won’t cut it. You need data that captures the essence of the person: their voice, their mannerisms, how they expressed themselves.
This means delving into archives. Text logs (emails, letters, social media posts) help with personality mapping. The AI analyzes these to understand their communication style, common phrases, and even their sense of humor.
Then comes the voice. Audio recordings are crucial. Whether it's old voicemails, interviews, or even snippets from home videos, these provide the raw material for voice cloning.
What if you have no audio? That's where text-to-speech (TTS) comes in. TTS engines can generate a voice based on written text. But without original recordings, it will lack the unique intonations and quirks that made your loved one sound like them.
Text logs for communication style.
Audio recordings for voice cloning.
Videos for mannerisms.
The catch is that this requires meticulous curation. It’s not about throwing every piece of data at the AI. It’s about carefully selecting materials that best represent the person you want to recreate. Because some data may paint an incomplete or inaccurate picture.
At BringBack, we recognize the sensitivity of this process. We don't build interactive avatars: our animations are short, silent clips created from a single photo, so you never need to hand over this kind of biographical data. It's about bringing back their spirit, not creating a caricature.
Legal and privacy risks you should know
Legal and privacy risks are real and must be considered; just because the tech exists doesn't mean it's a free-for-all. Animating photos of deceased relatives opens a can of worms you should be aware of.
The biggest question: who owns the digital likeness of a deceased person? It's not as simple as you might think.
This dives into intellectual property rights. But it also involves what's known as the "right of publicity".
The right of publicity gives individuals control over the commercial use of their name, image, and likeness. But what happens when that individual is no longer around to exercise that control?
Laws vary widely by jurisdiction, with some states extending the right of publicity after death, while others don't.
This can create a legal minefield.
Ethical considerations are front and center.
The legal complexities surrounding digital resurrection involve both intellectual property and the right of publicity for the deceased, as Simkins reports.
Then there's data privacy. What happens to the personal data (photos, audio recordings, etc.) used to create these animations or avatars? Is it stored securely? How is it used? Is it shared with third parties? And what are your rights regarding that data?
These are crucial questions to ask before entrusting your precious memories to any service. We built our platform with privacy in mind: your photos are sent over HTTPS and stored in encrypted cloud storage, because you deserve peace of mind. We believe your memories are sacred, and we treat them that way.
Before you animate a photo, consider: who should give permission? Is it the spouse, children, or other family members? You might want to discuss this with your family. It could cause some disagreement.
Now that you know the legal and privacy risks, let's talk about the potential impact on mental health.
Who owns the rights to a digital likeness?
The problem is, that even in death, a person's identity has value. Post-mortem "right of publicity" dictates who controls the commercial use of a deceased person's name, image, and likeness.
And it gets messy.
These likeness rights don’t automatically transfer to the closest relative. It’s often the deceased person's estate that controls these rights. Meaning, decisions about how their image is used – even in AI recreations – require the estate's permission.
But here's where it gets tricky:
Laws regarding post-mortem publicity rights vary wildly.
Some states (like California and New York) have strong protections.
Others offer little to no protection after death.
This patchwork of laws means that creating an AI avatar of your great-uncle Jim might be perfectly legal in one state but a major violation in another. It comes down to consent.
If you're thinking of creating an AI version of a deceased relative, start by consulting an attorney familiar with intellectual property law in the relevant jurisdiction. They can help you navigate the legal landscape and ensure you're not infringing on anyone's rights.
If the deceased had a will, it should specify who controls their estate. If not, state law will determine the line of succession. Either way, obtaining permission from the deceased person's estate is a non-negotiable first step.
Ignoring this step could lead to legal challenges down the road. Remember, respect for the deceased and their legacy should always come first.
While we at BringBack cannot provide legal advice, we strongly encourage you to seek legal counsel before proceeding with any AI animation project. Ethical considerations must be balanced with legal compliance, as we navigate the complexities of digital immortality.
Now that we have discussed who owns the rights to a digital likeness, let's talk about the potential impact on mental health.
New York's laws on synthetic performers
New York is cracking down on unauthorized AI likenesses. The state has enacted laws requiring disclosure of AI-generated performers in advertising.
This means if you see an ad featuring a "person" who is actually a digital creation, the ad must tell you. It aims to protect both consumers and the rights of real performers.
But it doesn't stop there. New York law also requires consent for using deceased individuals' likenesses. This is part of an effort to prevent the unauthorized digital resurrection of celebrities or anyone else.
What exactly does this mean for you? If you're planning to use an AI to animate photos of deceased relatives for commercial purposes, you need to tread carefully.
Here's the breakdown:
A “synthetic performer” is defined as a digitally created asset using generative AI or software algorithms.
It's intended to create the impression of a human performer not recognizable as any identifiable natural person.
Disclosure is required in advertising.
The catch? These laws are still relatively new, and their full implications are yet to be seen. But the message is clear: unauthorized digital resurrections are not welcome in New York.
The bigger question is how these laws will evolve. We will also see if this has mental health impacts.
Mental health risks and emotional well-being
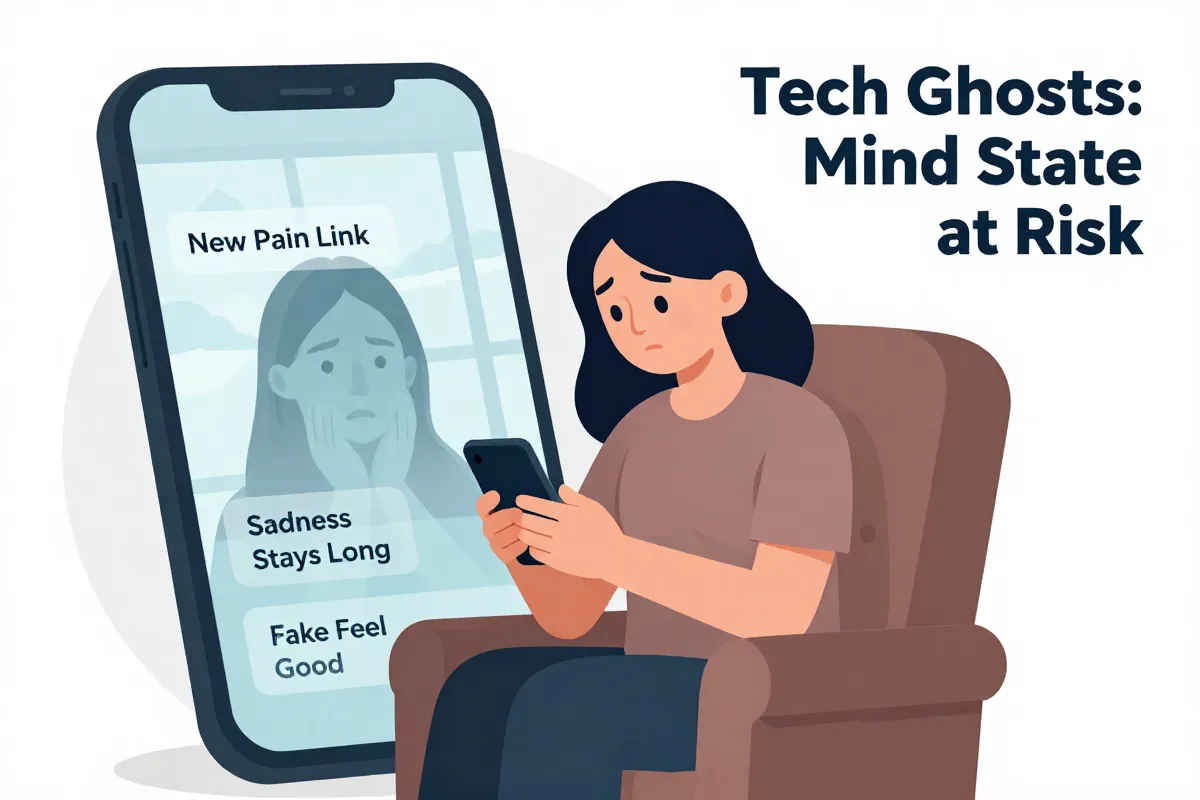
Animating deceased relatives can open a Pandora's Box of emotions. The use of AI 'ghosts' may pose mental health risks, potentially disrupting the natural grieving process.
This isn't about a simple photo album. This is about creating something that seems alive. And that can blur the lines between memory and reality.
The potential exists for emotional dependency on AI avatars, which could hinder long-term recovery from loss.
It’s easy to see how someone might become overly attached to a digital recreation of a loved one.
Here's why this is a concern:
It can hinder acceptance.
It may prolong grief.
It can create unrealistic expectations.
The goal should be to honor memories, not replace relationships. And there's a subtle but important difference.
But here's the hard truth: not everyone is emotionally equipped to handle this technology. Those struggling with grief or prone to depression may be particularly vulnerable. It could lead to confusion, stress, or even psychosis.
If you're considering animating a photo of a deceased relative, ask yourself: am I doing this for the right reasons? Am I prepared for the emotional fallout? And am I willing to seek professional help if needed?
We believe in creating tools that bring comfort and joy. But we also recognize the potential for harm. If you're feeling overwhelmed, please reach out to a mental health professional. You don't have to go through this alone.
And, if you’re feeling overwhelmed, you may wish to try creating a video of you hugging loved ones. A tangible expression of emotion in animation.
What are the alternatives to animating photos?
There are alternatives that can help you honor their memory. Consider restoring old photos. We can repair damage and bring faded images back to life.
Sometimes, simply seeing a clear, crisp image of a loved one is enough. You don't need animation to feel connected. It's a powerful way to reconnect with the past.
Then there's creating a memorial video. Compile photos, home movies, and audio recordings into a heartfelt tribute. It’s a tangible way to share their story with future generations.
And don't underestimate the power of storytelling. Share memories and anecdotes with family and friends. Keep their spirit alive through words.
Here's a quick comparison:
Option
Description
Emotional Impact
Photo Restoration
Repairing damaged or faded photos to their original glory
Can evoke strong feelings of nostalgia and connection
Memorial Video
Compiling photos, videos, and audio into a tribute
Allows for a comprehensive and emotional celebration of life
Storytelling
Sharing memories and anecdotes with loved ones
Fosters a sense of community and keeps memories alive through personal connections
AI Photo Animation
Adds facial movement to an otherwise still photo
It could create the illusion of a re-lived memory, however it may cause mental distress
Each option offers a unique way to honor your loved ones. But the key is to choose the one that feels right for you. And remember, at BringBack, our goal is to provide options that are respectful, meaningful, and emotionally safe.
Check out how to use AI photo animation to make old photos move and smile to see some more options.
Conclusion: Finding a balance
The ability to animate photos of deceased relatives is a powerful tool. The best approach is one of balance. Weigh the potential benefits against the potential risks.
Remember to keep the emotional and ethical considerations front and center. Ensure you have the necessary permissions. And be mindful of the impact on your own mental health.
But don't let these concerns scare you away completely. Used thoughtfully, AI animation can be a beautiful way to honor and remember loved ones. It offers a chance to reconnect with the past.
Here's what you should do next:
Gather your photos and other materials.
Research the legal and privacy implications in your area.
Talk to your family about your plans.
Seek professional help if you're struggling with grief.
It's all about finding a balance that works for you. It can be a powerful way to honor their legacy.
At BringBack, we're here to help you every step of the way. We want to make sure your memories are treated with respect and care.
Impact of digital resurrections on mental health
The interaction of AI with grief requires caution. Animating photos of deceased relatives can bring unexpected emotional turmoil.
It’s not as simple as pressing a button and feeling instant joy. The human mind is complex, and grief, in particular, is a delicate process.
This technology can, indeed, offer comfort. A fleeting glimpse of a loved one's smile can be a precious moment. But there is a line that you shouldn't cross.
However, the risks are real. Prolonged interaction with AI-generated simulations can disrupt the natural grieving process. It could lead to confusion, stress, or even psychosis.
Understanding the natural progression of mourning is vital when considering how AI tools might affect the five stages of grief, as Harvard Health explains.
The danger lies in becoming overly reliant on the simulation. Some may find themselves retreating into a digital echo chamber.
It can prevent you from fully processing your loss.
You run the risk of getting stuck in denial.
You will struggle to find acceptance.
We built BringBack to be a comforting tool. But we want you to know the limits of our technology and encourage professional counseling if needed.
We believe in honoring memories. But we never want to replace real-life connections or hinder the journey toward healing. If you're grappling with complex feelings, consider reaching out to a qualified therapist.
Now, we'll explore what you need to start the process.
Risks of emotional dependency and confusion
Risks of emotional dependency and confusion. Experts warn that emotional dependency on AI avatars can indeed stall the recovery process. It is easy to get confused with what is real and what isn't.
Some mental health professionals suggest that prolonged engagement with digital simulations might hinder long-term bereavement. The virtual presence, while comforting initially, could prevent the necessary emotional processing that comes with loss. It’s not about forgetting; it’s about adapting to a new reality without the physical presence of the loved one.
It is vital to know the limitations. Consider this.
The difference between digital simulation and true presence blurs.
This can lead to confusion and distress.
There is a risk of idealizing the digital version.
There are some warning signs to watch out for. Increasing isolation from real-life relationships, spending excessive time interacting with the avatar, or feeling more connected to the digital version than to living family members are all red flags. And if you find yourself relying on the avatar to avoid dealing with your emotions, it's time to seek professional help.
We encourage finding a balance between honoring memories and maintaining mental well-being. It's about using technology as a tool for remembrance, not as a crutch to avoid the pain of loss.
Now, let's delve into what you need to start the process of animating photos, keeping these cautions in mind.
Using technology as a healthy tribute
Using technology as a healthy tribute is possible. Look at Sun Kai, co-founder of Silicon Intelligence, who holds weekly video calls with a digital avatar of his deceased mother. It's a modern way to keep her memory alive. For him, it’s a source of comfort, not a replacement for grief.
These experiences highlight AI's potential as a tool for remembrance. It allows for continued connection in a new way. But it only works if approached with care and a strong sense of self-awareness.
AI can support coping with grief.
It can create unique experiences to honor memory.
But, be aware of the mental health risks.
This isn't about pretending the person is still here. It’s about finding a new way to interact with their memory. We strive to create experiences that are respectful and bring joy to the lives of families.
Now, before you start, it is important to know the legal and privacy risks.
Steps to animate a photo safely
Animating photos safely starts with the right photo animation tool; you get what you pay for. Not all tools treat your precious memories (or your privacy) with the respect they deserve.
First, research photo animation tools. Look for services that clearly state their privacy policies.
BringBack, for example, keeps your results private in your own account until you delete them and never uses them to train general-purpose AI models.
Here’s how to check:
Read the Terms of Service: See if they retain rights to your images. (They shouldn't).
Look for Encryption: Make sure they use secure protocols. (HTTPS, SSL).
Check Reviews: See what other users say about their experience. (Trustpilot, Sitejabber).
Next, upload your chosen photo. Choose a tool that provides options for subtle animation. Avoid tools offering overly dramatic or unrealistic movements, as these can venture into the uncanny valley. Then, adjust the animation settings. Most platforms let you control the intensity and speed of the animation. Err on the side of caution.
Now, review the animated photo. Take a moment to assess how it makes you feel. Does it bring you joy, or does it evoke sadness or discomfort?
And finally, download and store the animated photo securely. Consider backing it up in multiple locations, such as a local hard drive and a cloud storage service. Just be sure to password-protect your backups.
Free tools might seem tempting, but they often come with hidden costs. Data privacy is a common concern; many free services monetize user data, potentially exposing your sensitive family memories. And some services retain rights to use the photos.
We built our platform to be user-friendly but also secure.
Your results stay in your own account until you choose to delete them.
We also offer simple tools to restore images.
Our team wants you to feel comfortable. It’s about more than a user interface.
Restoring the original image quality
If you want the best animation, don't skip the restoration step. A little prep work goes a long way to achieving a more pleasing result.
Before animating, you may want to colorize black and white photos to give the final video a more lifelike appearance. Restoring the original colors breathes life back into those memories.
Consider these benefits:
Enhanced clarity in facial features.
More accurate skin tones during animation.
Reduced risk of the uncanny valley effect.
We built our platform with image restoration in mind, but we've noticed many people skip this step, leading to suboptimal results. Our advice? Take the extra time. It's worth it.
Comparing costs of top platforms
Pricing varies wildly. It goes from free options to bespoke avatar creation running thousands of dollars.
MyHeritage, for example, offers Deep Nostalgia™ as part of a larger subscription. Users report hidden fees, however. And the base package might not be enough. Additional features cost extra.
On the other end of the spectrum, custom interactive avatars can cost a pretty penny. These are often priced based on complexity and level of interaction. Think professional service, not a simple app. But the result can be remarkably lifelike.
Consider this breakdown:
Free Trials: Some platforms offer free trials; a chance to test the waters.
Subscription Fees: Typically range from $10 to $50 per month, depending on features.
Custom Avatar Creation: Could range from $1,000 to $10,000 or more.
The catch? The "free" options are often limited in functionality or come with watermarks. And cheaper subscriptions limit the number of photos you can animate.
We built BringBack to offer a balance. Our pricing is transparent.
Next Step: Delve into the legal and privacy risks you should know.
Ethical alternatives for honoring ancestors
There are options beyond digital resurrection. Not everyone feels comfortable with AI simulations of deceased loved ones. You can honor their memory in ways that feel more authentic and less… unsettling.
Consider traditional genealogy research. Digging into your family's past, tracing your lineage, and uncovering long-lost stories can be deeply rewarding. Ancestry.com reports that 83% of users feel a stronger connection to their family history after researching their roots (that's a powerful bond). It’s about understanding their lives.
Or, create a digital scrapbook. Compile photos, letters, and other mementos into a beautiful online tribute. Add captions, stories, and anecdotes to bring the memories to life. Think of it as a curated museum of your family's history, accessible to everyone. It is like building a time machine for your ancestors.
Another option is a video tribute. Gather family members and friends to share stories and memories on camera. Edit these into a touching montage.
Here’s a brief comparison:
Genealogy: Researching family history to discover ancestors and lineage.
Digital Scrapbook: Compiling photos, letters, and mementos into an online tribute.
Video Tribute: Gathering loved ones to share stories and memories on camera.
But the biggest issue is deciding to do it or not. Our team at BringBack understands that not everyone wants a digital avatar. We believe in honoring memories in a way that feels right for you. Don't feel pressured to jump on the AI bandwagon if it doesn't align with your values. Respect their values.
Next, before you animate a photo, consider the legal and privacy risks.
Frequently asked questions about AI afterlife tech
Some are skeptical of this technology. We get asked some version of the same questions every week.
Is animating photos of deceased relatives disrespectful? It depends on your intentions and the feelings of your family. If you're aiming to honor their memory and bring comfort, it can be a beautiful tribute. But it’s disrespectful to proceed without consent from close family. And if your goal is to replace the person or create something sensational, it will come across as inappropriate.
What about data security? This is more than valid. It is paramount. Read the fine print before uploading any photos. You want to ensure that the service you’re using has robust security measures in place to protect your sensitive data. And that they don't retain ownership of your images (we certainly don't).
Look for encryption.
Read the privacy policy.
Understand how your data is stored and used.
Can I animate a video instead of a photo? Yes, some services offer video animation. However, the results can be more unpredictable. A still photo provides a fixed reference point. The AI has a harder time with the motion. If you’re using a video, ensure it’s high quality and features clear facial expressions. This reduces the risk of an uncanny result. It is better to start slow.
What if I don't like the result? Most platforms allow you to adjust the animation settings or even cancel the process altogether. If you're unhappy with the result, don't feel pressured to keep it. Trust your instincts. And consider trying a different photo or a different service. At BringBack, we offer various options for subtle animation. And, if you're not satisfied, our 30-day refund guarantee has you covered.
A single smile from a lost loved one can change everything.
For decades, photographs were frozen moments. If you wanted to remember how your grandfather laughed or how your mother looked when she turned her head, you had to rely on fading memories or rare, grainy home movies.
Today, that limitation is gone.
Live Portrait technology—part of the rapidly growing $26 billion “Digital Legacy” industry—allows anyone to transform a static, damaged antique photo into a lifelike animation in seconds. This isn’t just about making a picture move; it is about reclaiming a sense of presence that time has stolen.
In this guide, we will cover exactly how to create these portraits, the psychology behind why they matter, and the step-by-step workflow to get professional results without needing expensive hardware or video editing skills.
What is a “Live Portrait”? (The Definition)
A Live Portrait is a synthetic video generated from a single still image. Unlike standard video editing (which requires raw footage), this technology uses Generative AI to predict and render movement where none existed.
The AI analyzes the geometry of the face in your photo—mapping the eyes, nose, mouth, and jawline—and then applies the movement of a “driver video” (a pre-recorded human acting out a smile or a nod) to your image.
The result: A 5 second high-definition video where your subject blinks, smiles, tilts their head, and looks directly at you.
Key Distinction: This is different from a “Deepfake.” Deepfakes typically swap faces (putting your face on a movie star). Live Portraits preserve the identity of the original photo but grant it the ability to move.
The Psychology: Why We Animate the Dead
Before diving into the “how,” it is critical to understand the “why.” This technology often triggers a powerful emotional response known in psychology as “The Uncanny Valley vs. The Comfort of Recognition.”
Research into Continuing Bonds Theory suggests that maintaining a connection with deceased loved ones is a healthy part of grieving. Static photos help, but human recognition is wired for motion. We recognize people by their micro-expressions—the way they squint when they smile or how they tilt their head when listening.
When AI successfully replicates these micro-movements, it bridges the gap between “remembering” and “experiencing.”
The Reaction: It is common for users to cry when seeing a Live Portrait for the first time.
The Advice: We recommend sharing these animations privately with family first, rather than posting publicly immediately, as the emotional impact can be intense.
Phase 1: Preparing Your Old Photo (Crucial Step)
The number one reason for a “bad” or “glitchy” animation is a poor source image. If you feed the AI a blurry scan, it will produce a blurry, warping video.
1. The “600 DPI” Scanning Rule
Most home printers scan at 200 DPI (Dots Per Inch) by default. This is fine for photocopying documents, but terrible for AI animation.
The Rule: You must scan your photo at 600 DPI minimum.
Why: AI needs pixel density to separate the “face” from the “background.” At low resolution, the AI might mistake a shadow on the wall for part of the hair, causing the wall to move when the head turns.
2. Crop for Focus
AI models are trained on square or vertical portraits.
Action: Crop your photo so the face takes up roughly 50-60% of the frame.
Avoid: Wide shots where the person is tiny in the distance. The AI cannot “invent” facial details that aren’t visible in the pixels.
3. Restore Before You Animate
This is the Pro Tip.
Old photos have scratches, tears, and fading. If you animate a photo with a scratch across the cheek, the scratch will move with the face, breaking the illusion.
Workflow: Always run your photo through a Restoration Tool (like BringBack.pro’s Restore feature) to clean the skin and sharpen the eyes before applying animation.
Phase 2: Choosing Your Tool
In 2026, there are three main tiers of tools available for creating Live Portraits.
Table: The Live Portrait Tool Landscape
Tool Tier
Best For
Pros
Cons
BringBack.pro (Indie)
Families & Beginners
Affordable (one-time credit packs from $4.99), built-in restoration, privacy-focused.
Focused on portraits, not full-body.
MyHeritage (Corporate)
Genealogy Research
Integrated with family trees, massive database.
Expensive annual subscriptions ($100+).
Runway / Sora (Pro)
Filmmakers
High control, cinematic resolution.
Extremely complex, steep learning curve.
Our Recommendation: For 90% of users who just want to animate a grandparent’s photo, BringBack.pro offers the best balance of price and simplicity. You don’t need a subscription, and it handles the “Restoration + Animation” pipeline in one place.
Phase 3: Step-by-Step Workflow (How to Do It)
Here is the exact process to create a studio-quality Live Portrait using BringBack.pro.
Step 1: Upload and Restore
Navigate to the dashboard and upload your scanned image.
Re-upload your restored photo to the “Animate” tool. You will be presented with a choice of nine motion presets, such as:
Gentle Smile: A slow, soft smile. Best for somber or respectful portraits.
Warm Gaze: A warm, affectionate look toward the viewer. Best for wedding photos or happy memories.
Smile + Look Around: The subject glances around as if taking in the room, with a natural smile.
Step 3: The “Identity Lock” Check
Once the video generates (usually 60-90 seconds), pause it and look at the eyes.
What to look for: Does the person still look like them?
Troubleshooting: If the face looks “generic,” the motion is too strong for that photo. Try a subtler preset (e.g., “Subtle Blink + Head Tilt” or “Soft Nod” instead of “Smile + Wave”). Keep in mind that each new generation uses credits again.
Step 4: Export and Share
Download the video as an MP4.
A family photo turned into live motion video
Sharing: MP4s are compatible with WhatsApp, iMessage, and Instagram Stories.
Physical Display: Many users now upload these MP4s to Digital Photo Frames (like Aura or Skylight), creating a “Harry Potter” style frame in their living room where the photo comes to life every few minutes.
Advanced Techniques: The “Reunion” Video
Beyond simple movement, advanced AI now allows for Multi-Person Interaction.
If you have a photo of your grandmother alone, and a photo of yourself, tools like BringBack can now synthesize a “Hug Video.”
Input: Photo A (Grandmother) + Photo B (You).
Process: The AI places both subjects in a shared 3D space.
Result: A video where you walk into the frame and hug her.
Note: This technology is cutting-edge. It works best when both photos have similar lighting and camera angles. It is the closest technology has ever come to a literal “reunion.”
Common Mistakes to Avoid
We analyze thousands of failed animations. Here is what causes them:
1. The “Profile View” Error
Live Portrait AI is trained primarily on front-facing faces. If you try to animate a photo where the person is looking 90 degrees to the side (side profile), the AI will try to twist their head to look at the camera, resulting in severe distortion.
Fix: Only select photos where the person is facing forward or at a slight 45-degree angle.
2. The “Busy Background” Glitch
If your subject has frizzy hair and is standing in front of a complex background (like a forest), the leaves might start moving with their hair.
Fix: Use a tool to “Remove Background” first, replace it with a solid color or blur, and then animate.
3. Over-Animation
Just because you can make great-grandpa sing a pop song doesn’t mean you should.
Ethics: We strongly advise against using lip-sync features for comedy on deceased relatives. It often feels disrespectful to surviving family members. Stick to natural, silent movements (smiling, blinking, looking) for the most meaningful impact.
Conclusion: A New Way to Remember
For the first time in history, death does not mean the end of movement.
While no technology can truly bring someone back, Live Portrait AI offers a digital echo—a way to see the spark in their eyes one more time. It transforms a dusty, forgotten album into a living archive.
Ready to try it?
You don’t need a high-end PC. You don’t need to learn video editing.
Go to BringBack.pro, upload your favorite photo, and see them smile again in under 60 seconds.
What if you could step inside an old photograph? What if, just for five seconds, the person you miss most could look up, recognize you, and hold you again?
Photos are beautiful, but they are frozen. They trap our loved ones in a single static moment.
If you’ve lost someone, you know the specific pain of that stillness. You forget how they moved. You forget the specific way they shifted their weight or how their face softened when they saw you.
We built the Nostalgic Hug (The Reunion Moment) at BringBack.pro to fix this.
How It Works: The Face consistency Technology Explained
You might be thinking: “I only have a blurry headshot of my grandfather. How can you make him hug me without it looking fake?”
This was the hardest engineering challenge we faced. To make this look real—and to avoid the “uncanny valley” effect—we moved beyond simple animation. We built a proprietary 3-Stage Generative Engine.
Here is the non-technical breakdown of the new Identity-Lock Logic that happens when you click “Generate”:
1. The “Solo” Scene Generation
First, the AI doesn’t just look at the face; it looks at the context. We run an initial pass to generate the “Person Alone” scene.
Reconstruction: We analyze the headshot—age, structure, clothing collar—and generate a biologically accurate full body.
The Setting: We place them in a warm, nostalgic setting, typically sitting on a vintage sofa in a sunlit room. This establishes the “before” moment—them waiting for you.
2. The Hug Portrait Synthesis
In the second pass, we inject you. The system runs the identity-lock logic again, this time mapping your current photo into the same physical space. It calculates the physics of the embrace to ensure:
Your arms wrap naturally around them.
Height differences are respected.
The lighting on your face matches the lighting in the room.
3. The “Reunion Moment” Video Model
Finally, our video model bridges the gap between those two states. It generates a 5-second Cinematic Transition. It handles the full movement: starting with your loved one sitting alone, seeing you enter the frame, the spark of recognition in their eyes, and ending in the perfect hug.
Step-by-Step: How to Generate AI Hug Video with your loved ones
You don’t need to be a tech wizard. If you can upload a file, you can bring this memory to life.
Step 1: Pre-process Your Photos (Optional but Recommended)
If your old photo is scratched, faded, or blurry, the AI struggles to lock onto the identity.
Recommendation: Use our Photo Restoration Tool first. It costs just 1 credit and ensures the face is crisp before animation.
Step 2: Upload the “Loved One” Photo
Go to the Nostalgic Hug Tool. Upload the photo of the person you want to hug.
Best Results: A clear, front-facing photo.
Don’t worry about the body: Remember, if you only have a bust/headshot, our engine will generate the rest of the body and clothing to match the era (e.g., 90s dad sweater, 70s suit).
Step 3: Upload “Your” Photo
Upload a current photo of yourself.
Ensure your face is clearly visible so the AI can map you correctly into the video. If you have your full body photo, prefer that.
Step 4: Generate & Wait
This is a complex process. It takes massive computing power to hallucinate a new reality. It usually takes 1-3 minutes to render the full 5-second clip.
Step 5: Download & Share
You will get a high-definition video file. Many of our users share this directly with family group chats or use it as a digital memorial.
4 Most Popular Ways to Use The Reunion Tool
Our community uses the Nostalgic Hug for more than just grief. Here are the most popular ways to use this technology:
The “Meeting the Grandchild” Video: Many of our users have parents who passed away before meeting their grandchildren. You can upload a photo of the late grandparent and a photo of the child to create a video of them meeting for the first time.
The Wedding Day Tribute: Brides and Grooms often use this to create a moving tribute clip of themselves hugging a late parent, playing it privately before the ceremony or projecting it during the reception.
The “Younger Self” Embrace: It isn’t always about loss. Some users upload a photo of their current self and a photo of themselves as a child. Seeing your adult self hug your inner child can be a powerful therapeutic experience.
The Digital Memorial: Instead of a static photo on a mantelpiece, families are using digital frames to play these 5-second loops, keeping the memory dynamic and alive in the home.
Pro Tips for Studio-Quality Results
To get the most out of your credits, follow these best practices:
Match the Lighting: If the photo of your loved one is taken indoors with soft light, try to upload a photo of yourself with similar lighting. It helps the AI blend the two figures seamlessly.
Avoid Group Photos: For the input files, crop the photos so they only show the single person you want to analyze. This prevents the AI from accidentally picking up the wrong face.
Use the Restoration Feature: We cannot stress this enough—using a restored, high-definition face input yields a video that looks 10x more realistic.
Are these photos “Fake”?
Technically? Yes. This video never happened.
Emotionally? It is one of the truest things you will see.
We received an email from a user named Sarah last week. She used this tool to generate a video of her late mother hugging her daughter (who was born after the mother passed).
She wrote:
“I know it’s AI. I know my mom never got to hold my baby. But watching this video… seeing her eyes light up the way I remember? It healed a part of me I didn’t know was broken.”
We aren’t trying to rewrite history. We are trying to recover the feeling of love that time stole away.
Pricing & Credits: Affordable Memories
We believe these memories should be accessible to everyone, not just those with big budgets.
Restoration Starter: US$4.99. Perfect for testing the waters with restorations.
Value Pack: US$9.99. This gives you 20 credits (enough for 1 High-Quality AI Hug Animations or 20 Restorations).
Usage Rights: You can use your results for personal, non-commercial purposes; contact support for commercial use.
Privacy & Safety: Your Memories Are Safe
We understand that uploading photos of deceased loved ones requires immense trust. We are an indie team, not a data-mining corporation.
Data Deletion: We are not in the business of hoarding data. Your source photos and generated videos are stored securely for you to download and stay in your account (My Media) until you delete them.
No Public Training: We do not use your private family photos to train public AI models. Your memories remain yours.
❓ Frequently Asked Questions
Q: Will it look weird or “glitchy”?
We prioritize safety over speed. If the AI detects that a generation looks “uncanny” or distorted, it usually attempts to correct it. However, because we are generating complex human contact, minor artifacts can happen. But 95% of our results are smooth, warm, and deeply comforting.
Q: Can I use a black and white photo?
Yes! Our system will automatically colorize the subject to match the modern environment, making them feel like they are here with you in the present day.
Q: Does it work with pets?
Currently, the Reunion Moment is optimized for human-to-human hugs to ensure the physics of the embrace are perfect. We are working on a pet version for the future!
🌟 Ready to Bridge the Gap?
You have the photos sitting in your camera roll. You have the memory sitting in your heart.
Don’t let them stay frozen. See them smile at you again.
Staring at a faded, torn family photo, desperately wishing you could bring it back to life.
You’ve scanned it, uploaded it, and maybe even tried a few “free” apps. You end up wrestling with clunky interfaces or getting results that look worse than the original.
That feeling of disappointment, seeing those precious faces still hidden behind years of damage, is soul-crushing.
Perhaps you’ve told yourself, “It’s too complicated,” or “I’d need expensive software and a design degree to fix this.”
But that’s simply not true.
You don’t need to be a tech wizard or spend a fortune to restore your most cherished memories. The real challenge isn’t the impossibility of the task. It’s the overwhelming choice between countless free and paid photo restoration options.
We built BringBack specifically to make this process intuitive, powerful, and genuinely satisfying. So you can easily restore and share your family’s incredible heritage.
What Does Your Photo Need?
Before picking a tool, let’s figure out what kind of photo rescue mission you’re on.
Take a good, hard look at your damaged photos. What kind of damage are you dealing with?
Minor scratches or dust? These are usually the easiest to fix.
Faded colors? Color correction can make a huge difference.
Severe tears, creases, or water damage? These require more advanced techniques.
The extent of the damage directly impacts the tool you’ll need.
Next, think about how many photos you want to restore.
Just a handful of precious memories?
Or a whole shoebox full of family history?
If you’re facing a mountain of photos, you’ll want a tool with batch processing to save time.
Let’s also be real about your budget.
Are you looking for a completely free solution?
Or are you willing to invest in a paid tool for superior results?
Remember, some paid options offer subscriptions or one-time licenses. For example, LetsEnhance costs $9 a month, while HitPaw offers plans starting at $5 per month.
Answering these questions will guide you to the perfect solution.
Free Photo Restoration Apps: A Beginner’s Toolkit
If you’re just starting out, several free photo restoration apps can help breathe life back into your old photos.
These are generally user-friendly and perfect for basic tasks. Here are some popular options:
Fotor (online): A web-based editor that’s great for quick fixes and enhancements.
Photopea: Another robust online editor that mimics Photoshop’s layout and features.
Hotpot AI (online): Uses AI to automatically enhance and restore photos online.
Adobe Photoshop Express: A simplified version of Photoshop for mobile devices.
Renew App: This app offers a completely free version with daily limits. I like that it lets you adjust the ‘AI Power’ settings for improved results.
These free tools are suitable for basic tasks like correcting faded colors, removing minor scratches, and cropping. Many even offer AI-powered features for colorization and blur reduction.
However, free tools have limitations.
Lack of precision: You might not have fine-grained control over every detail.
Watermarks or ads: Some apps add watermarks or bombard you with ads in the free version.
Limited pixel-level control: This is frustrating when you need to fix very specific imperfections.
Resource intensive: Some apps may be slow if they require a lot of processing power.
If you’re dealing with lightly damaged photos and want to dip your toes into photo restoration, free apps are a great place to start.
But if you need more power and precision, you’ll want to consider paid options. Ome more issue with free options is eaither you don’t use them commercially or they download with a watermark.
Paid Photo Restoration Software: Advanced Power
For those serious about reviving their cherished photos, paid software offers a significant leap in capabilities.
These tools provide advanced features, more control, and superior results, especially for heavily damaged photos.
Let’s explore some popular choices:
BringBack AI: Known for its advanced damage restoration and realistic photo aniamtion
Adobe Photoshop: The industry standard, offering unmatched versatility and power.
PhotoGlory: Designed specifically for photo restoration, with a user-friendly interface.
Topaz Labs A.I. Gigapixel: Uses AI to upscale images with incredible detail.
MyHeritage InColor: Specializes in colorizing black and white photos with impressive accuracy.
LetsEnhance: Uses AI to enhance image resolution and quality.
Claid.ai: An API for professionals needing to restore photos at scale.
What makes these paid options superior?
They use sophisticated algorithms and better-trained AI to repair damage more effectively, resulting in more accurate and natural-looking restorations. You also get granular control over every aspect of the process.
For instance, Bringback AI is made for the same which can rescue photos taken with older cameras. The noise reduction with BringBack AI is also incredible.
If you’re serious about preserving your family history and want the best possible results, paid photo restoration software is a worthwhile investment.
Feature Face-Off: Free vs. Paid
To help you make the right choice, here’s a comparison matrix highlighting the strengths and weaknesses of free and paid options.
Feature
Free Options
Paid Options
Scratch Removal
Good for minor scratches. You’ll be frustrated by anything major.
Excellent. Advanced algorithms precisely target and remove scratches.
Color Correction
Suitable for basic adjustments. Often lacks nuanced control.
Offers precise control over color. Recovers faded colors with stunning accuracy.
Blur Reduction
AI-powered blur reduction can be decent. Results are often inconsistent.
Superior blur reduction algorithms. Sharpen details and restore clarity effectively.
Tear Repair
Struggles with significant tears. Results can look artificial.
Excels at seamlessly repairing tears. Reconstructs missing areas with detail.
AI Upscaling
Some free tools offer basic AI upscaling. Don’t expect miracles.
Exceptional AI upscaling. Blow up photos while preserving detail. I am always impressed with Topaz Labs A.I. Gigapixel here.
Object Removal
Often clunky and imprecise.
Refined and seamless. Easily remove unwanted elements without a trace.
Batch Processing
Limited or unavailable in most free options.
A standard feature. Saves significant time when restoring large collections.
Watermarks
Often adds watermarks to your photo.
No watermarks. You get a clean, professional result.
Case Studies: Real-World Examples
Let’s see how these tools perform in real-world scenarios. Seeing before-and-after examples will make your choice crystal clear.
Case Study #1: Faded Color Photos from the 1950s
Imagine a you have photo of your grandparents from 1950s. The colors have faded, leaving a washed-out, lifeless image.
Old washed out photo of family from 1950s
Free App Approach: Might improve contrast slightly, but colors will likely remain dull. Expect to spend 30 minutes tinkering for a “meh” result.
Paid Software (e.g., Photoshop) Approach: You can precisely adjust color channels and restore vibrant hues. This might take an hour, but the results will be stunning.
Our BringBack Approach: Our AI color correction instantly revives faded colors, intelligently enhancing the image for a natural, vibrant result in seconds.
Beautifully restored and colorized family photo with BringBack AI
The Takeaway: For faded colors, paid software or a specialized AI tool offers superior results.
Case Study #2: Severely Cracked Glass Plate Photos
Old glass plate photos are fragile and often suffer from severe cracks.
Free App Approach: Free apps will struggle. They lack the precision for complex damage. You’ll spend hours trying to patch up cracks, and the result will likely look artificial.
Paid Software (e.g., PhotoGlory) Approach: PhotoGlory specializes in this. Its cloning tools allow for meticulous crack removal. Expect to spend several hours on a single image.
Our BringBack Approach: Our AI-powered repair tool intelligently reconstructs cracked areas, blending them seamlessly into the image and reducing manual labor to minutes.
The Takeaway: For cracked photos, specialized paid software or an advanced AI tool is essential.
Case Study #3: Photos with Water Damage and Mold
Water damage can wreak havoc, causing stains, warping, and loss of detail.
Old, badly water damaged photo example
Free App Approach: Virtually useless. They cannot handle the complexities of water damage.
Paid Software (e.g., Luminar Neo) Approach: Luminar Neo’s AI can remove stains and restore some detail, but manual adjustments are still required. This takes considerable time and expertise.
Our BringBack Approach: Our AI intelligently detects and removes water damage, restores lost detail, and brings back clarity with minimal effort.
From water damaged to fully Restored to image with BringBack AI
The Takeaway: For water damage, powerful AI tools offer the best chance of recovery.
These examples show that the right tool can make all the difference.
Mini-Tutorials: A Hands-On Comparison
Let’s walk through some common photo restoration tasks to highlight the differences in effort and outcome.
Scratch Removal: GIMP (Free) vs. Photoshop (Paid)
Photoshop (Paid):
Open your image and select the “Spot Healing Brush Tool.”
Simply click or drag over the scratch. Photoshop intelligently blends the surrounding pixels.
Use the “Clone Stamp Tool” for more complex scratches. The Experience: Photoshop’s tools are more intuitive and powerful. You can achieve professional-looking results in a fraction of the time.
Our BringBack Approach:
Upload the image.
Click “Restore Photo.” Our AI automatically detects and removes the scratches.
Download the restored image.
The Takeaway: Photoshop offers more precision. But for speed and simplicity, an AI-powered tool is the way to go.
Reducing Blur: Photopea (Free) vs. Topaz Sharpen AI (Paid)
Photopea (Free):
Open your photo and go to “Filter” > “Sharpen” > “Unsharp Mask.”
Experiment with the “Amount,” “Radius,” and “Threshold” sliders.
Be careful not to over-sharpen and introduce ugly digital artifacts.
The Experience: This can improve sharpness, but it requires a delicate touch. It’s easy to overdo it, and the results are often mediocre.
Topaz Sharpen AI (Paid):
Open your photo and select an AI mode (“Standard,” “Motion Blur,” etc.).
The AI analyzes the image and automatically adjusts the sharpening.
Refine the results if needed.
The Experience: This software is transformative. Its AI intelligently removes blur and restores details without introducing artifacts. The results are consistently impressive.
These tutorials show that while free tools can be useful for basic tasks, paid software offers more power, precision, and better results. We designed BringBack to provide a balance: powerful AI tools that are accessible to everyone.
User Experience: Usability, Support, and Frustrations
Choosing the right software isn’t just about features. It’s about how easy and enjoyable it is to use.
Usability and Learning Curve
Free software like GIMP can be powerful, but the interface is often clunky and overwhelming. Expect a steep learning curve.
Paid software like Photoshop offers a more polished experience, but the sheer number of features can still be daunting. Mastering it takes time.
I’ve spent hours wrestling with both. It’s easy to get lost in menus, and simple tasks can become surprisingly complex.
Online tools like Fotor and Photopea have a simpler interface, but they can be limited in functionality and bombard you with ads.
We designed the BringBack interface to be intuitive and user-friendly. The focus is on simplicity, so you can achieve impressive results without a steep learning curve.
Privacy Matters: The Security of Your Photos
When you upload your family photos, you’re entrusting a company with incredibly personal data. It’s vital to understand how they handle your images.
Data encryption is a must. Make sure the website uses HTTPS.
Check the tool’s storage and data retention policies. Where are your photos stored? How long are they kept? Are they automatically deleted?
I’ve seen some online tools with vague or nonexistent privacy policies. This is a major red flag.
At BringBack, we take your privacy seriously. Our policy is clear:
Your photos are encrypted both in transit and at rest.
Your results stay in your account (My Media) until you choose to delete them, and they are never used to train general-purpose AI models.
You can also manually delete your photos at any time.
We don’t sell your photos. Service providers that run BringBack (hosting, storage, AI processing and payments) handle data only as needed to provide the service. We built BringBack with privacy as a priority. Your family’s history is safe with us.
Which Tool is Right for You?
Deciding between free and paid tools depends on your needs and skill level.
Free tools are a good starting point for basic tasks like minor scratches or simple color correction, especially on a tight budget.
Paid software offers more power and precision. It’s ideal for heavily damaged photos and professional-quality results.
Here are some specific recommendations:
Best for Beginners with Minor Damage: Start with free apps like PhotoScape or Fotor.
Best for Serious Hobbyists: Consider paid software like BringBack AI or Luminar Neo.
Best for Professionals:Adobe Photoshop is the industry standard.
Best for AI-Powered Enhancements: BringBack AI leads here, you can also go for Topaz Labs A.I. and MyHeritage InColor which are worth the money.
We designed BringBack to be an easier alternative for most people. We’ve combined powerful AI with a simple interface to make photo restoration accessible to everyone, achieving impressive results without the complexity.
Cons: Risky, very expensive, and requires skilled conservators.
I’ve seen mixed results with outsourcing services. Communication can be challenging, and the quality doesn’t always match expectations.
Ultimately, the best approach depends on your budget, time, and desired level of quality.
Software like BringBack offers a balance. It provides a cost-effective, efficient solution that empowers you to restore your family’s history yourself.
Finding Christmas gifts for them can sometimes feel like climbing a mountain, right? You want to give something truly special, something that shows how much you care.
And you’ve probably told yourself, “I’ll find something amazing this year!” only to end up with a gift that, well, just doesn’t quite hit the mark. The struggle is real, but what if there was a way to give a gift that truly touches their hearts?
That’s where BringBack comes in. It’s the simple solution to a common problem: preserving cherished memories and creating meaningful gifts. Let’s keep those family stories alive!
Why Finding the Perfect Christmas Gift for Grandma & Grandpa Matters
The twinkling lights, the scent of pine, and the crackling fireplace. But most importantly, envision your grandparents’ faces lighting up with pure joy as they unwrap a gift that truly resonates. Doesn’t that sound amazing?
This is so special because it’s about so much more than just a present. It’s about creating an emotional connection and showing your love in a tangible way. It’s about those warm hugs, the shared laughter, and the lasting memories you’ll create together.
Think about it:
Thoughtful gifts become cherished keepsakes.
They tell a story.
They create smiles that last throughout the year.
This Christmas, let’s give grandparent gifts that do more than sit on a shelf. Let’s give meaningful Christmas gifts that strengthen bonds and create legacies.
Gift Ideas That Go Beyond the Usual: Making Memories That Last
Here’s a curated list of unique gifts and personalized gifts – perfect for showing your grandparents how much you care, without breaking the bank. These affordable gifts are all about creating lasting memories.
BringBack: Revive Precious Memories:
Why: BringBack allows you to restore and animate old photos. Imagine their faces when they see a faded memory come back to life! It’s a truly personalized gift that reconnects them with loved ones and the past.
Cozy Slippers:
Why: A thoughtful and functional gift that shows you care about their comfort. Cozy slippers offer warmth and a reminder of your love with every wear.
Portable Radio Speakers:
Why: Perfect for listening to their favorite radio stations, news, and trends. It’s a great way to keep them connected to the world and entertained.
Scented Candles:
Why: Create a relaxing atmosphere in their home. Scented candles can provide comfort and a sense of calm.
Personalized Photo Products:
Why: Boost the personal connection of your gift-giving with photo calendars or puzzles. These personalized gifts transform cherished photos into heartwarming treasures.
A Blender with Juicer and Fruit Press:
Why: Useful for making juices and smoothies. It’s a gift that promotes health and well-being.
LEGO Botanical Sets:
Why: These double as unique decor. It offers a creative outlet and a beautiful piece for their home.
Custom Wooden Puzzles:
Why: Transform family photos into heirloom-quality puzzles. This gift provides hours of fun and a keepsake they’ll treasure.
A Personalized Star Map:
Why: A sentimental gift that commemorates a special date or moment. It’s a beautiful reminder of their unique story.
For the Adventurous Grandparents: Gifts for Outdoor Fun!
Does your grandma or grandpa love spending time outside? If they adore nature, fresh air, and a little adventure, you’re in the right place to find some amazing outdoor gifts! Let’s help them make the most of their time in the sunshine and create even more unforgettable moments.
BringBack: Relive Adventures:
Why: Did they take amazing photos on their adventures? Bring those memories back to life with BringBack! Restoring and animating their cherished outdoor photos will rekindle the joy of those trips. It’s like giving them a time machine back to their favorite hiking trails or gardens.
Gardening Gifts:
Why: If they have a green thumb, consider gardening gifts! Think of a beautiful gardening set, comfortable gloves, or even a unique plant. These gifts encourage them to enjoy their outdoor spaces.
Hiking Gifts:
Why: For the hikers, how about some hiking gifts? A new pair of walking sticks, a high-quality water bottle, or a cozy blanket for those scenic overlooks would be a win. Help them explore with comfort and style!
Activity Gifts:
Why: Consider activity gifts that cater to their interests. Maybe they enjoy bird watching? Get them a bird feeder and a guide. If they love picnics, a stylish picnic basket would be perfect.
Personalized Outdoor Gifts:
Why: Make it extra special with personalized outdoor gifts! A custom engraved compass, a photo album filled with their favorite outdoor moments, or a personalized garden stone would make their hearts sing.
These outdoor gifts will not only bring smiles but will also encourage them to keep exploring, discovering, and enjoying the beautiful world around them.
For Tech-Savvy Grandparents (or Those Who Want To Be!): Making Technology User-Friendly 📱
Are your grandparents curious about technology, but maybe a little hesitant? No problem! These easy-to-use tech gifts will help them stay connected, entertained, and informed, all while building their confidence.
BringBack: Technology Meets Nostalgia:
Why: BringBack is technology that helps them rediscover their past. The simple process of restoring and animating their old photos is not intimidating at all. It’s a delightful experience that brings joy and sparks conversations.
Tablet for Seniors:
Why: A tablet for seniors is a fantastic way to stay connected. They can video chat with family, browse the internet, read books, and play games. Choose one with a large screen and a simple interface for ease of use.
Smart Home Gifts:
Why: Smart home gifts can make life much more convenient. Consider a voice-controlled smart speaker for music, news, and reminders, or a smart plug for turning lamps on and off with ease. These gadgets are designed to simplify their daily routines.
Tile Mate Bluetooth Tracker:
Why: Helps locate misplaced items like keys or a wallet. It offers peace of mind and reduces the stress of losing everyday essentials.
Don’t worry if they’re not tech experts! These gifts are designed to be user-friendly. Your grandparents will be amazed at how quickly they adapt and enjoy the benefits of modern technology.
Gift Experiences: Because Memories Are the Best Present 🎁
Looking for a Christmas gift that goes beyond the ordinary? Something that creates lasting joy and leaves a heartwarming imprint? Look no further than experience gifts! They’re all about creating unforgettable moments and building cherished memories.
BringBack: Where Memories Come Alive:
Why: While not an experience in the traditional sense, using BringBack to restore and animate old photos creates a unique, emotional experience. Imagine the shared laughter and stories as they rediscover their past. The experience of reliving those moments is a gift in itself!
Museum Tickets:
Why: Does your grandparent love history, art, or science? Museum tickets offer a delightful day out filled with exploration and discovery. It’s a fantastic way to stimulate their minds and share a cultural experience.
Show Tickets:
Why: Show tickets to a concert, play, or musical are perfect for the performing arts fan! It’s a chance to enjoy world-class entertainment and create a shared experience with a loved one.
Event Gifts:
Why: Consider event gifts that align with their interests. Perhaps a cooking class, a wine tasting, or a sporting event. These activities offer fun, engagement, and a chance to learn something new.
Memory Gifts:
Why: Memory gifts are all about creating shared moments! Plan a family outing, a weekend getaway, or even a simple afternoon tea. It’s about spending quality time together and making memories they’ll treasure forever.
Personalized Experience Vouchers:
Why: Customise the experience even more with personalized experience vouchers. A gift certificate for a massage, a spa day, or a fine dining experience is a luxurious way to show you care.
This Christmas, give the gift of joy, connection, and unforgettable moments! These experiences create lasting memories they will talk about for years to come.
Preserve the Past, Delight the Present: BringBack’s Gift to You!
Imagine the look on their faces when they unwrap a gift that breathes life back into their most precious family memories! With BringBack, that dream becomes a beautiful reality.
BringBack isn’t just a gift; it’s a time machine, a portal to the past, and a key to unlocking the stories behind those old, faded photos. It’s the perfect way to create truly personalized gifts this Christmas.
But the magic doesn’t stop there. BringBack lets you create animated photos that will leave them speechless! Imagine seeing a favorite photo come alive with subtle movements, bringing back all the feelings of a treasured moment.
BringBack transforms still images into moving memories.
Your grandparents can share the restored pictures with their family and friends.
It’s a digital gift they’ll treasure forever!
With BringBack, you’re not just giving a gift; you’re offering a piece of family history, a celebration of love, and a way to share family memories that will be cherished for generations to come. It’s the perfect digital gift!
How BringBack Works: Turn Precious Photos into Christmas Magic ✨
Ready to see how simple it is to use BringBack and create a Christmas gift that’ll make their eyes light up?
Here’s a simple step-by-step guide to get you started:
Step 1: Upload Your Photo:
Find that old, faded photo.
Head over to the BringBack website and upload it.
Don’t worry about the quality; our AI can handle it!
Step 2: Let the Magic Happen:
BringBack uses its incredible photo restoration process.
BringBack Pricing: Affordable Memories for Everyone!
Ready to preserve your family’s history without breaking the bank? We’ve made our photo animation cost and BringBack pricing super simple and affordable because we believe everyone deserves to experience the joy of revived memories.
Here’s our straightforward pricing:
Restoration Starter: $4.99 for 4 credits. Enough for 4 photo restorations, or 2 family portraits.
Value Pack: $9.99 for 20 credits. Enough for 20 restorations, or 2 photo animations (10 credits each).
Family Pack: $21.99 for 60 credits, including the Family Memory Book. Enough for a whole album, or up to 6 photo animations.
Important Details:
No subscriptions.
One-time payments.
Credits never expire!
With BringBack, you get incredible value! You’re not just purchasing a service; you’re investing in your family’s legacy. You’re giving the gift of connection, nostalgia, and joy.
Make This Christmas Unforgettable: Start Preserving Memories Now! 💖
This Christmas, don’t just give a gift; give a legacy. With BringBack, you have a unique and deeply meaningful gift for grandparents that they’ll treasure forever!
BringBack is more than just a photo restoration gift.
It’s a way to reconnect with your family’s past.
It’s a way to relive cherished moments.
Imagine the joy on your grandparents’ faces as they see a faded photo of their wedding day come back to life. Think of the stories that will be shared, the laughter that will echo through the room, and the bonds that will grow even stronger. That’s the power of BringBack!
BringBack is easy to use.
It’s affordable.
It’s a gift of love that keeps on giving.
Don’t let those precious memories fade away! Give your grandparents the gift of photo restoration and animation this Christmas. Give them BringBack. Create unforgettable moments and make this holiday season truly special.
Quick Answer: In 2026, professional photo restoration costs between $25 and $85 per photo for most damaged family pictures. Instant AI tools cost between $0 and $0.40 per image (or $9 to $15/month for unlimited plans) and excel at minor fading and dust. Complex manual reconstruction—such as rebuilding missing facial features, heavy water stains, or torn fragments—starts at $50 and ranges up to $150–$250+ at professional archival studios.
Damage Level
Typical Issues
AI Tool Cost
Freelancer Cost
Pro Studio Cost
Avg. Turnaround
Minor
Dust spots, light scratches, mild fading, red-eye
$0 – $2
$5 – $15
$20 – $35
Instant to 48 hrs
Moderate
Clear creases, corner folds, slight water spotting
$2 – $5
$15 – $35
$35 – $55
2 to 4 days
Severe
Tears across faces, mold, severe emulsion loss
Not recommended
$35 – $75
$55 – $95
3 to 7 days
Archival / Extreme
Shredded fragments, missing pieces, deep flood bleed
Not recommended
$75 – $120+
$95 – $250+
1 to 3 weeks
2026 Photo Restoration Pricing Benchmark (Aggregated across verified US & global restoration providers).
Interactive 2026 Photo Restoration Cost Estimator
Select your photo’s damage level, quantity, and preferred service model below to calculate an instant expected price range:
Estimated Total Cost$105 – $165~$35.00 – $55.00 per photo
Expected Turnaround2 to 4 Business Days
Recommendation: Moderate damage is best suited for dedicated studio artists or seasoned retouchers to avoid blurry AI hallucinations on facial features.
Real Prices From 10 Leading Restoration Services (Checked for 2026)
Unlike articles that use hypothetical numbers, we regularly audit published rates and service tiers across major online restoration providers, high-volume digitizers, and AI platforms. Here is what actual providers charge in 2026:
Provider
Service Model
Starting Price
Pricing Structure
Turnaround
MemoryCherish
Pro Studio (Hand-restored)
$38.00 / image
Flat-rate pricing; does not charge extra for heavier damage. Includes unlimited revisions.
3 – 5 days
Forever Studios
Pro Studio (US-based)
$35.00 / image
Flat $35 rate per photo. Digital proof included before physical archival prints.
One-time credit packs from $4.99 (4 credits); credits never expire; no subscription.
Instant (<60 sec)
Photomyne
Mobile AI Suite
~$9.99/mo or $49.99/yr
Subscription app for bulk mobile scanning, auto-scratch removal, and colorization.
Instant
Upwork / Fiverr Specialists
Freelance Digital Artists
$5.00 – $40.00 / image
Varies by freelancer rating and portfolio. Typically charged per image with 1–2 revisions.
24 – 72 hours
Local Archival Photo Labs
Brick-and-Mortar Custom Labs
$50.00 – $150.00 / hr
Often billed by the half-hour or flat rates from $65 to $120+ per historical heirloom print.
1 – 3 weeks
Damage Severity Breakdown: What You Pay & Why
Professional photo restoration rates are governed almost entirely by manual labor hours. When a photo arrives at a studio, a digital artist analyzes the damage at 300% to 600% magnification. Here is how damage severity dictates pricing across the market:
1. Minor Damage: $0 to $30
Damage Profile: Slight fading, yellowing from UV light exposure, small hairline scratches, scanner dust spots, and red-eye. All subjects, facial expressions, and clothing remain 100% visible and intact.
Estimated Studio Time: 15 to 30 minutes.
DIY / AI Viability: 100% viable. Free and budget AI restoration tools clean up uniform surface noise and fading in seconds without human intervention.
When to hire a pro: Only if the photo requires high-fidelity color profiling to match a physical archival print series.
2. Moderate Damage: $30 to $50
Damage Profile: Visible crease lines cutting through backgrounds or clothing, small missing corners, silvering on vintage black-and-white prints, or localized liquid spots that do not obscure primary facial anatomy.
Estimated Studio Time: 45 minutes to 1.5 hours.
DIY / AI Viability: Moderate. Automated tools can remove the crease, but will frequently smudge fine background textures or leave “plastic” skin artifacts.
When to hire a pro: When you want textured areas (like lace, hair strands, or tree bark) seamlessly painted back by hand rather than blurred out.
3. Severe Damage: $50 to $95
Damage Profile: Deep structural cracks across faces (cutting through eyes, noses, or lips), heavy water damage with emulsion bubbling, stuck-to-glass damage, or large surface gouges.
Estimated Studio Time: 2 to 4 hours.
DIY / AI Viability: Poor. Generic generative AI models will “guess” features by generating a generic face that no longer looks like your relative.
When to hire a pro: Crucial. Professional studios use historical reference images of the subject or family members to manually reconstruct real facial structure.
4. Archival Reconstruction & Extreme Repair: $95 to $250+
Damage Profile: Physical photos torn into several pieces, scorched edges from fires, extensive mold rot, or images where 30% or more of the print surface is entirely gone.
Estimated Studio Time: 4 to 8+ hours.
DIY / AI Viability: Not recommended.
Pricing Mechanism: Often billed as a custom quote or flat fee plus hourly rates ($65–$120/hour). Includes digital fragment stitching, perspective alignment, and manual repainting.
AI vs. Freelancer vs. Professional Studio: Service Matrix
Before spending money, determine which service tier matches your budget and restoration goals:
Factor
AI Tools (e.g., Remini)
Freelance Artist (Fiverr / Upwork)
Dedicated Studio (e.g., MemoryCherish)
Cost per Image
$0.00 – $1.00 (or subscription)
$10.00 – $45.00
$35.00 – $95.00+
Turnaround
Seconds to 2 minutes
24 to 72 hours
3 to 7 business days
Facial Authenticity
Moderate (Can introduce “synthetic” skin)
High (Dependent on retoucher skill)
Highest (Trained historical artists)
Severe Tears & Rebuilds
Fails or hallucinates details
Moderate to High
Full reconstructive capability
Revisions & Guarantee
None (Rerun the prompt)
1–2 revisions typically included
Unlimited revisions / money-back guarantees
Best Use Case
Albums with hundreds of faded photos
One-off creative edits on a budget
Irreplaceable family heirlooms & framed gifts
Add-On Costs and Hidden Fees to Watch Out For
When comparing quotes, confirm whether your price is an all-inclusive digital restoration or if extra fees apply for secondary services:
High-Resolution Scanning ($2.00 – $10.00 / print): If you mail physical prints to a service rather than uploading a scan, studios charge for manual flatbed scanning at 600–1200 DPI on color-calibrated hardware.
Full B&W Colorization (+$15.00 – $40.00 / photo): While automatic AI colorizers are free or cheap, accurate period-authentic manual colorization (matching uniform medals, eye color, and vintage fabric dyes) adds significant artist labor.
Rush Processing (25% to 50% surcharge): Same-day or 24-hour turnaround on complex studio orders typically incurs an expedited processing fee.
Archival Fine-Art Prints ($10.00 – $35.00 / copy): Digital files are delivered standard (via download link), but physical museum-grade Giclée or acid-free cotton rag prints cost extra.
Additional Subjects in Frame (+$5.00 – $15.00 / person): Some tiered retouching companies (like FixThePhoto) charge incremental rates if a photo has more than 2 or 3 people requiring intensive facial reconstruction.
“What Should I Choose?” 30-Second Decision Tree
Use this simple triage process to avoid overpaying:
Step 1: Is a person’s face missing, creased, or torn?
YES: Skip pure AI tools. Submit your photo to a Dedicated Professional Studio ($35–$60) or a vetted top-rated freelancer. Bring a separate reference photo showing the person’s face if possible.
NO: Proceed to Step 2.
Step 2: Are you restoring a single picture or an entire family album (20+ photos)?
20+ Photos: Human studio restoration on 50 photos would cost $1,500–$2,500+. Use an AI tool for the bulk collection ($10/month), and cherry-pick the top 2–3 most damaged heirloom photos for a human professional.
1–3 Photos: Proceed to Step 3.
Step 3: What is the end goal for the photo?
Social media, ancestry trees, or phone viewing: An AI tool or $10 freelancer provides plenty of resolution and clarity.
Large framed wall print, memorial tribute, or family gift: Invest in studio manual restoration ($35–$75) to guarantee sharp, uncompressed TIFF files without artificial smoothing.
Frequently Asked Questions
How much does it cost to restore a water-damaged photo?
Restoring a digital scan of a water-damaged photo typically costs between $40 and $85. Water damage often causes color staining, localized blurring, and peeling photo emulsion. Because these areas cannot be repaired with simple automated filters, an artist must manually re-blend textures and rebuild missing contrast areas.
Can AI restore a ripped or missing face accurately?
No. While modern AI models can create an aesthetically pleasing face, they cannot know what your actual relative looked like without reference data. AI generates a composite based on general training data, resulting in a face that looks like a stranger. Human artists use family reference photos to reconstruct genuine likenesses.
Is it cheaper to scan photos at home or mail them in?
Scanning at home is significantly cheaper and eliminates the risk of losing irreplaceable originals in transit. You can scan photos using a standard home flatbed scanner at 600 DPI (or 1200 DPI for small wallet-sized prints) and upload the digital files directly. If you do not own a scanner, modern smartphone apps (such as PhotoScan by Google) can capture glare-free digital copies at zero cost.
Do restoration services charge by the hour or per photo?
Online consumer services (like Forever Studios, MemoryCherish, and FixThePhoto) charge flat rates per photo, generally ranging from $25 to $60. Local historical preservationists and custom art restoration studios frequently charge hourly rates ranging from $50 to $150/hour for high-value archival items.