Tag: Family history

  • How to Restore Great-Grandparents’ Wedding Photos (Step-by-Step)

    How to Restore Great-Grandparents’ Wedding Photos (Step-by-Step)

    In a dusty box or a forgotten album, you have it. A photograph of your great-grandparents on their wedding day.

    It’s more than a picture. It’s the founding document of your family.

    It’s the beginning of a lineage, a story that leads directly to you. But the photo itself is fading. It might be torn, stained, creased, or so washed out that their joyful faces are becoming ghosts. You want to save it, to share it, to frame it. But how?

    For years, your only option was to find a professional restorer, pay a small fortune, and wait weeks for the result. That’s no longer the case.

    This guide will give you a step-by-step plan to restore your great-grandparents’ precious wedding photo yourself, right from your computer, in just a few minutes. We will cover everything from handling the delicate original to performing a digital heirloom photo restoration.

    Why Restoring an Old Wedding Photo is So Important

    Before we get to the “how,” let’s focus on the “why.” This isn’t just about a quick old wedding pictures repair. It’s about what you unlock when you do.

    • You Preserve a Legacy. A restored digital copy is a permanent version of this moment. It stops the clock on decay and ensures the memory is safe forever.
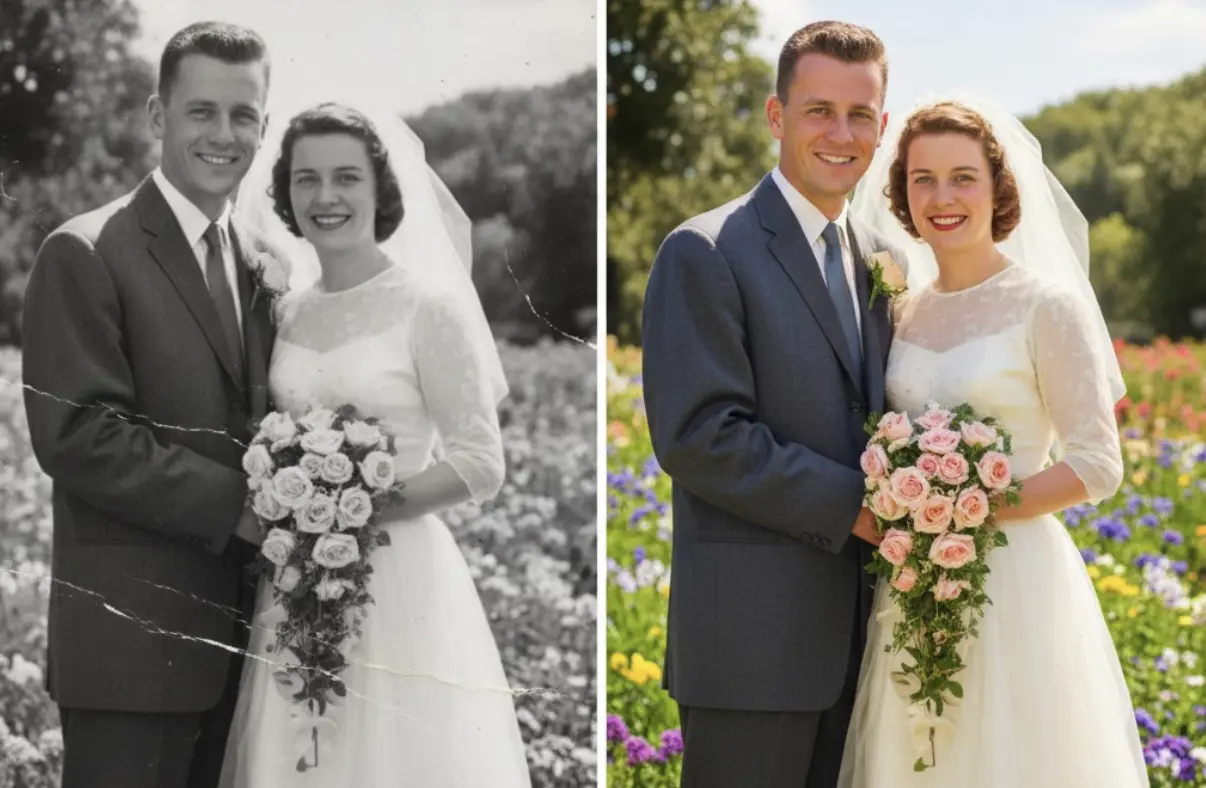
    • You Uncover Lost Details. Restoration can reveal incredible details hidden by damage. You might see the fine lace on your great-grandmother’s dress, the pattern on your great-grandfather’s tie, or even relatives in the background you never knew were there.
    • You Create a Bridge Between Generations. A clear, vibrant wedding photo is a powerful tool for storytelling. It allows you to show your children, “This is where our family began.”
    • You Create a Priceless Gift. A beautifully framed, restored wedding photo is one of the most meaningful gifts you can give for an anniversary, holiday, or family celebration.

    You’re not just fixing a damaged photo; you are reactivating a cornerstone of your family’s history.

    Step 1: Handle the Original Photo with Extreme Care

    Before we even get to the computer, we must respect the original artifact. This photo is likely old and fragile.

    • Wash and Dry Your Hands. Oils and dirt from your fingers can cause permanent damage. Better yet, wear clean cotton or nitrile gloves.
    • Work on a Clean, Flat Surface. Use a table or desk that is free of any clutter, food, or drinks.
    • Never Try to Fix the Original Yourself. Don’t use tape on tears or try to wipe away stains with water. These actions can cause irreversible damage. Our goal is to create a perfect digital copy to work from, leaving the original untouched and safe.

    Step 2: The Best Way to Digitize Your Wedding Photo

    To digitise your old photos, you need a high-quality digital file. This is the most critical step for a great result.

    Option A: Use a Flatbed Scanner (The Best Quality)

    If you have a home printer with a scanner, this is your best option.

    • Clean the Glass: Wipe the scanner bed with a microfiber cloth.
    • Set the Resolution: In your scanner’s software, choose the resolution. For a precious heirloom, use a high setting like 600 DPI (dots per inch). This captures the maximum amount of detail.
    • Choose the File Type: Save the scan as a PNG or TIFF file if possible. These file types are “lossless,” meaning they don’t lose quality like a JPEG can. If JPEG is your only option, choose the highest quality setting.

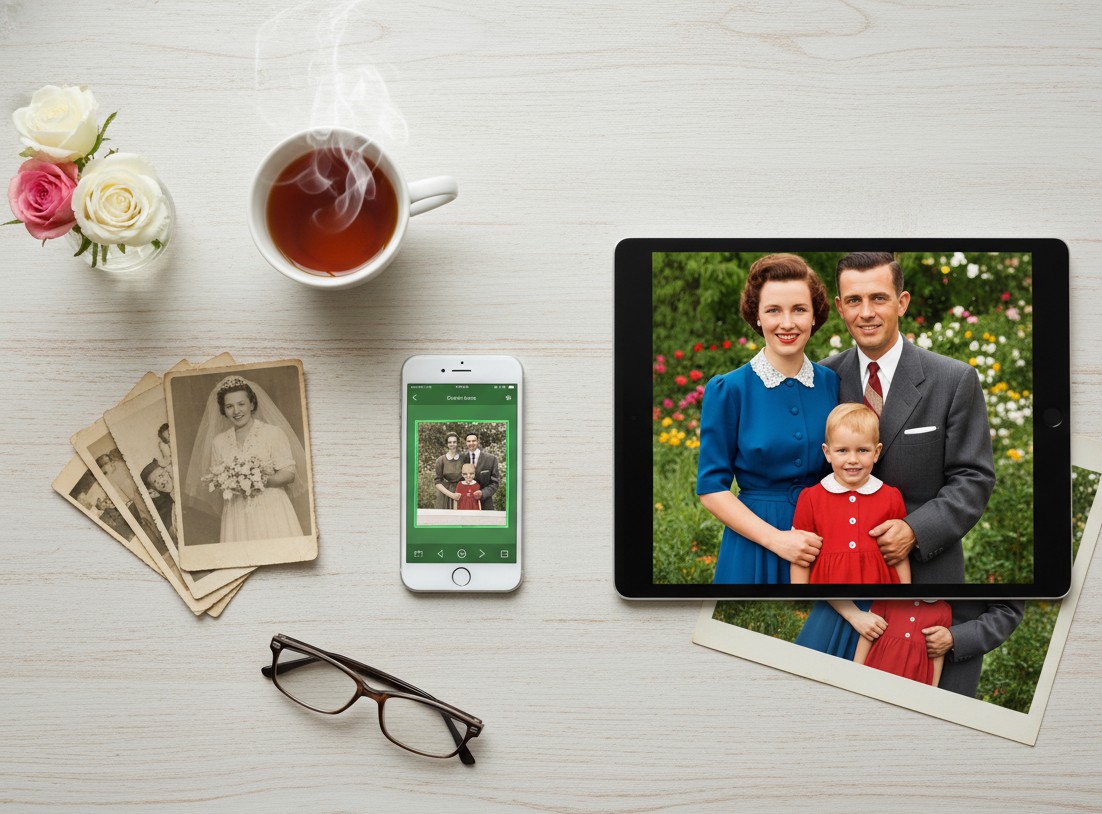
    Option B: Use Your Smartphone (Fast and Convenient)

    If you don’t have a scanner, your phone can do an excellent job.

    • Download a Scanning App: Do not just take a picture with your regular camera app. This will create glare and distortion. Use a free app like Google’s PhotoScan.
    • Find Good Light: Place the photo on a flat surface in a room with bright, indirect light. Avoid direct sunlight and overhead lights that cause a glare.
    • Follow the App’s Guide: PhotoScan will instruct you to move your phone to capture the image from several angles. It then stitches these together to create a single, sharp, glare-free digital image.

    You now have a safe, high-quality digital version of your photo, ready for the magic to begin.

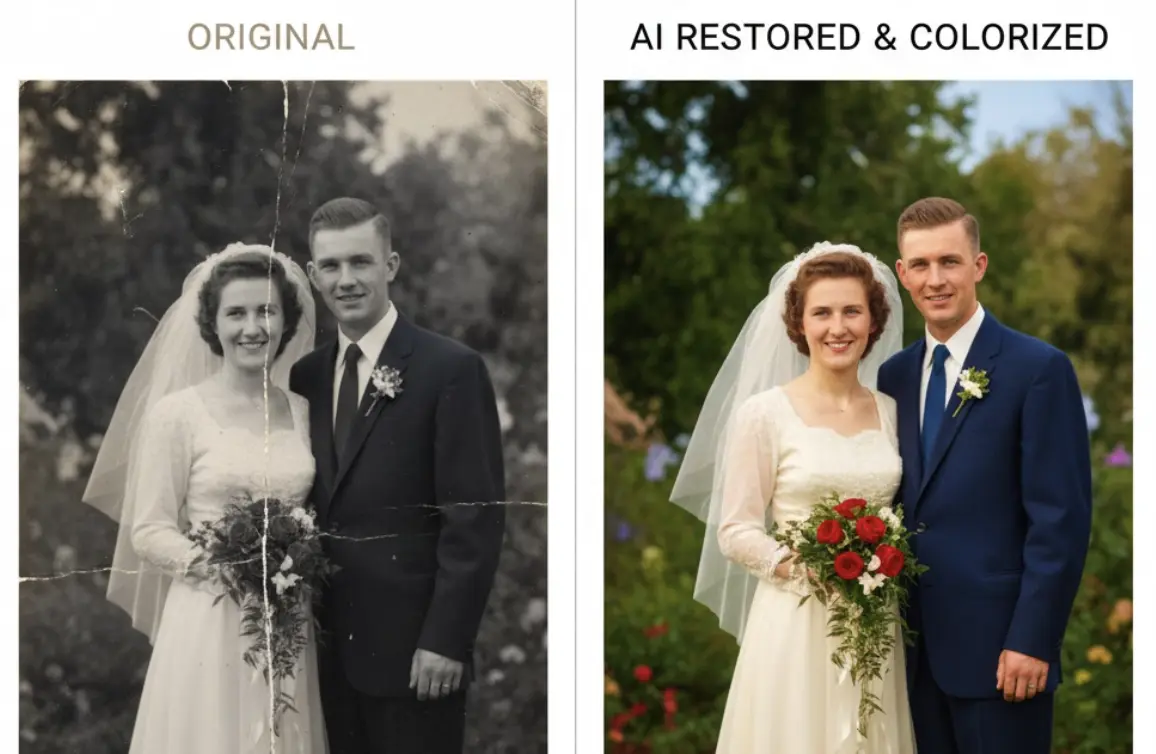
    Step 3: The AI Restoration Process (in Under a Minute)

    This is where we perform the damaged wedding photo fix. We will use an AI-powered tool called BringBack.pro because it is incredibly effective, fast, and built for this exact purpose.

    • Why an AI Tool? It’s been trained on millions of photos to recognize and fix common problems like scratches, tears, stains, and fading. It does in seconds what would take a human artist hours.

    Here’s the simple, step-by-step process:

    Old wedding photo restoration demo
    1. Navigate to BringBack.pro. Open the website in your web browser.
    2. Upload Your Scanned Photo. Choose “Old photo restoration” Drag and drop the digital file you just created onto the site.
    3. Click to Restore. The AI immediately analyzes the photo for damage. It intelligently reconstructs torn areas, erases stains and scratches, and corrects the fading and contrast.
    4. Download the Restored Masterpiece. In less than 30 seconds, the process is finished. You will be presented with a stunning “After” version. Download this new, high-resolution file to your computer.

    The difference will be dramatic. The yellow haze will be gone, the tear will have vanished, and the focus will be sharper, revealing your great-grandparents’ faces with newfound clarity.

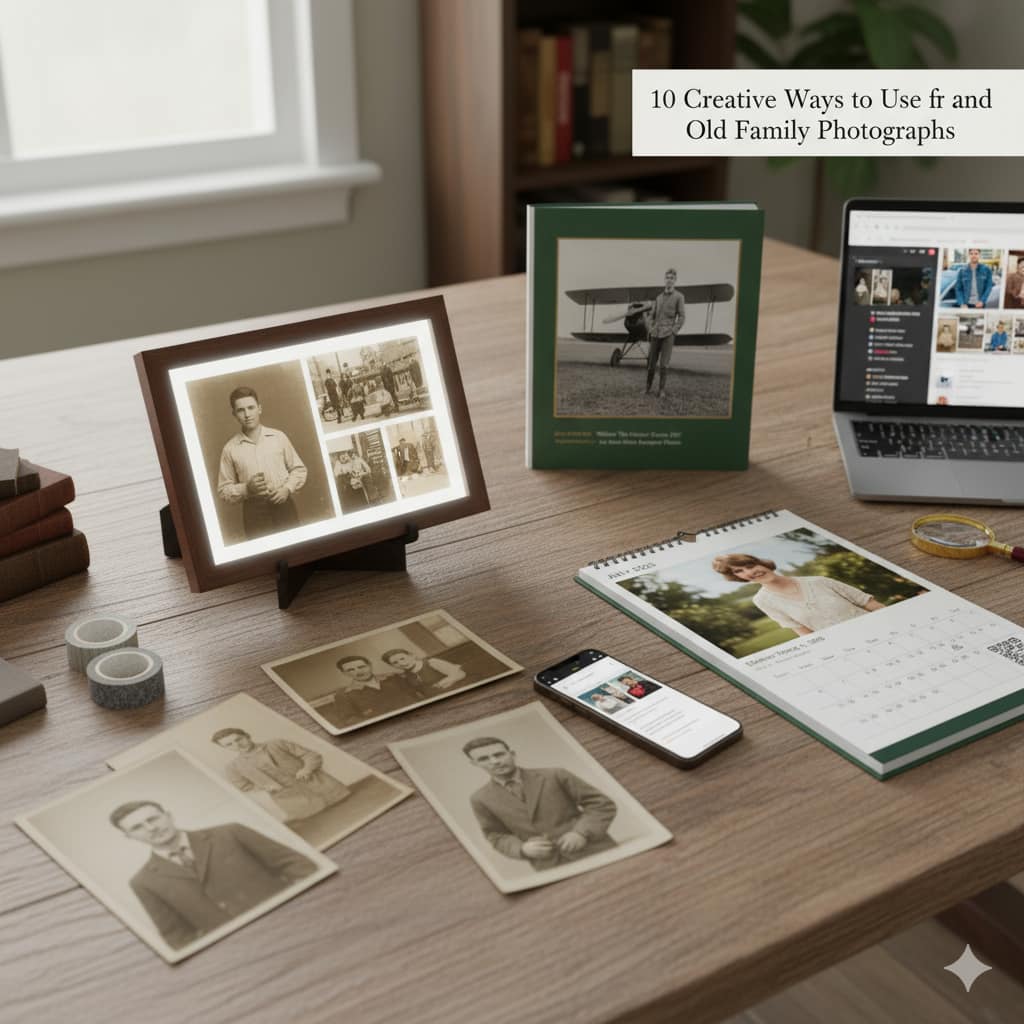
    Step 5: Frame and Share Your Restored History

    You’ve successfully completed the old wedding pictures repair. Now, don’t just leave this digital file on your computer.

    • Print and Frame It: Print your restored photo on high-quality matte or satin photo paper. A beautiful frame turns it into a piece of art for your home.
    • Create a “Then and Now” Display: Frame the restored photo next to a wedding photo from a more recent generation (your parents, or even your own). This creates a powerful visual story of your family’s journey.
    • Share it at a Family Gathering: Unveiling the restored photo at a family reunion, holiday, or anniversary celebration can be an incredibly emotional and unifying moment.
    • Give it as a Gift: Share copies with your parents, siblings, aunts, and uncles. It’s a gift that connects everyone to your shared heritage.

    Your Family’s Founding Moment, Reborn

    That fragile, faded photograph is a direct link to your family’s beginning. For too long, we’ve watched these precious heirlooms slowly fade away, thinking the damage was irreversible without spending a fortune.

    Technology has changed that.

    By following these simple steps, you can stop the decay. You can fix old wedding photos that you thought were lost to time. You can restore the clarity, the joy, and the emotion of that incredible day, ensuring that your great-grandparents’ story can be seen and shared for generations to come.

    Your family’s founding moment is waiting. It’s time to bring it back to life.

  • Perfect 50th Wedding Anniversary Gift: Restored & Animated Photo Albums

    Perfect 50th Wedding Anniversary Gift: Restored & Animated Photo Albums

    Fifty years. Half a century of shared moments, challenges, and triumphs. A golden wedding anniversary is a monumental milestone, and finding a gift that truly honors that journey feels almost impossible.

    What do you give the couple who has everything? Another piece of jewelry? A “golden” themed trinket? While thoughtful, these gifts celebrate the event, but not the fifty years of life that led up to it.

    You’re searching for unique 50th anniversary gift ideas. You want something that will make them laugh, cry, and remember. You want a golden anniversary present that is more than an object—it’s an experience.

    This guide will show you how to create that perfect gift: a restored and animated photo album that brings their entire life together back into living color.

    The Problem with Traditional Golden Anniversary Gifts

    Think about the standard gift list for a 50th anniversary.

    • Gold-dipped roses
    • Engraved photo frames
    • Personalized plates or clocks
    • A weekend getaway

    These are all lovely gestures. But they often lack a deep, personal connection to the couple’s unique story. After fifty years, the most valuable things they own are their memories.

    The perfect gift, therefore, isn’t something new you can buy. It’s a lifetime of old memories, made new again.

    The Ultimate Sentimental Gift: Their Life Story, Reborn

    Imagine this.

    On their anniversary, your parents or grandparents unwrap their gift. It’s a beautiful digital photo album playing on the TV. But these aren’t just old, faded photos.

    The first image appears: their wedding photo from fifty years ago. But it’s not the cracked, black and white version they have in a dusty album. It’s perfectly restored, vibrant, and in full, realistic color.

    And then, something incredible happens.

    He subtly smiles. She gently blinks. For a fleeting second, the photograph comes to life.

    The slideshow continues, showing restored and animated photos from their honeymoon, the day they brought their first child home, family vacations, and holidays through the years. You’re not just showing them photos; you’re giving them back moments. You’re giving them a time machine.

    This is the power of a restored and animated photo album. It is, without a doubt, one of the most powerful and unique 50th anniversary gift ideas you can create.

    What is a Restored & Animated Photo Album?

    This isn’t a typical slideshow. It’s a curated collection of a couple’s most precious photo memories that have been digitally enhanced for maximum emotional impact.

    It involves three key steps:

    1. Restoration: Taking old, damaged photos (scratched, torn, faded) and using AI technology to repair them, making them look as crisp and clear as the day they were taken.
    2. Colorization: Transforming their black and white photos into vibrant and realistic color, revealing details and life that were hidden in shades of gray.
    3. Animation: Applying subtle, lifelike motion to their restored portraits. A gentle smile, a soft blink—these small movements create a breathtaking “living photo” effect that has to be seen to be believed.

    How to Create This Unforgettable Gift (Step-by-Step)

    Creating this golden anniversary present is surprisingly simple. You don’t need to be a tech wizard. You just need a little time and the right tool.

    We recommend using an all-in-one AI platform like BringBack.pro because it handles all three steps—restoration, colorization, and animation—in one simple, fast, and affordable process.

    Step 1: Become a Photo Detective

    Your first job is to gather the photos. This is a fun part of the gift.

    • Look Through Old Albums: Start with their own photo collection.
    • Contact Family & Friends: Reach out to relatives and close friends who might have hidden gems from the early years.
    • Curate a Timeline: Don’t just grab random photos. Select pictures that tell a story, from their wedding day to the present. Pick the moments that mattered.

    Step 2: Digitize the Memories

    You need good digital copies of the photos.

    • Use a Scanner: For the best quality, scan the photos at 300-600 DPI.
    • Use a Scanning App: Apps like Google’s PhotoScan are perfect for quickly capturing photos from albums using your smartphone.

    Step 3: Restore, Colorize, and Animate

    a visual showing how bringback ai works
    Bringback AI restoration process

    This is where the magic happens.

    1. Upload a Photo: Go to BringBack.pro and upload your first scanned image.
    2. Let the AI Work: In about 30-60 seconds, the tool will automatically restore any damage, colorize it if it’s black and white, and prepare it for animation.
    3. Animate the Portrait: With a single click, you can add the subtle, lifelike animations to key portraits (like their wedding photo).
    4. Download the Finished File: Save the new, enhanced photo or short video clip to a dedicated folder on your computer.

    Repeat this process for your curated collection of 20-30 key photos. At a cost of just a few dollars per photo, you can build an entire album for less than the price of a fancy dinner.

    Step 4: Assemble the Final Album

    Once you have your collection of restored and animated photos, you need to present them beautifully.

    • Create a Video Slideshow: Use a free, simple video editor (like iMovie, CapCut, or Windows Video Editor) to arrange the photos in chronological order. Add their favorite song or a meaningful piece of music in the background.
    • Get a Digital Photo Frame: A fantastic companion gift is a digital photo frame. You can pre-load it with all the restored images, so they can enjoy the memories on a loop every day.

    Why This is the Perfect 50th Anniversary Gift

    This isn’t just another gift. It’s a profound experience that shows a deep level of thought, effort, and love.

    • It’s Deeply Personal: This gift is 100% about them and their unique journey. It’s a celebration of the life they built together.
    • It’s an Experience, Not Just an Object: The moment they see their memories come to life is an emotional and unforgettable experience they can share with the whole family.
    • It’s a New Family Heirloom: The digital video album you create becomes a new, modern heirloom that can be passed down and cherished for generations to come.
    • It Honors the Past, Beautifully: It acknowledges the depth of their fifty-year journey and presents their history with the vibrancy and clarity it deserves.
    a happy couple with watching their restored photo on tablet

    If you are searching for 50th anniversary gift ideas that go beyond the ordinary, stop looking for something new to buy. Instead, look to their past. Find their most cherished memories, bring them back to life, and give them the one thing that truly matters: their story, beautifully retold.

  • Preparing Photos for Your Family Reunion: Digital Restoration Guide

    Preparing Photos for Your Family Reunion: Digital Restoration Guide

    You’re planning the family reunion. You’ve handled the venue, the food, and the guest list.

    Now you need the one thing that truly brings everyone together: the memories.

    Old family photos are the heart of any reunion. A slideshow of grandpa as a boy, a display of your parents’ wedding—these are the moments that spark joy and connection.

    But there’s a problem. Many of your best family photos are probably torn, faded, covered in scratches, or stained. Displaying them as-is feels like showing a dimmed, broken memory.

    This guide will show you how to fix that—easily and instantly.

    We’ll show you how to prepare your photos for the big event. First, we’ll cover the best way to digitize photos, and then, how to restore them instantly, turning them into the highlight of your reunion.

    Why You MUST Use Restored Photos for Your Reunion

    Before we get into the “how,” let’s be clear: this is about creating an experience. This is the “wow” factor.

    • It Sparks Conversation: A clear, restored photo of a shared ancestor will have cousins and aunts pointing and sharing stories you’ve never heard.
    • It Honors Your Elders: Displaying a beautifully restored portrait of the family patriarch or matriarch is a powerful tribute.
    • It Engages the Kids: Young members of the family are captivated by seeing their parents or grandparents as children, especially when the photos are clear and colorful.
    • It Creates a Lasting Gift: Restored photos can be printed and given as take-home favors, a far more meaningful gift than a customized keychain.

    The bottom line: Restored photos transform a simple get-together into an unforgettable event.

    The Old Way is Too Slow for Event Planning

    Traditionally, if you wanted to restore a box of old family photos, you had two choices:

    1. Professional Restoration: This gives great results but is incredibly slow and expensive. You could pay 50−50-50− 200 for a single photo and wait weeks. That’s not practical when you’re on a reunion budget and timeline.
    2. DIY with Complex Software: Using a tool like Photoshop requires skill and a lot of time. As an event organizer, you have a million other things to do.

    Neither of these options works well for preparing a large batch of photos for an event.

    The New Way: AI Restoration in Seconds

    This is where AI changes the game for family reunion planners. A tool like BringBack AI is built for this exact task.

    It’s an online platform that uses artificial intelligence to automatically fix your old photos. You don’t need any technical skills.

    Here’s why it’s the perfect tool for the job:

    • Instant Results: Upload a photo, and it’s restored in under 30 seconds. You can prepare dozens of photos in the time it takes to watch a TV show.
    • Extremely Affordable: Restore 5 photos for just $2.49. This lets you build a huge, beautiful collection for your reunion without draining your budget.
    • Automatic and Effortless: The AI handles everything. It removes scratches, fixes tears, corrects faded colors, and sharpens focus with one click.
    • Completely Private: Your family photos are personal. BringBack.pro deletes uploaded files within 30 minutes, ensuring your memories remain yours alone.

    Step-by-Step: How to Digitize Old Photos from Your Family Collection

    Let’s get tactical. Here is your complete workflow for preparing photos for the big day.

    Step 1: Gather and Curate Your Photos

    Before you restore, you need to collect.

    • Reach Out to Family: Ask key family members (especially older ones) to look for their best old photos. Give them a deadline!
    • Choose a Theme: Don’t just grab random pictures. Create categories that will tell a story at your reunion.
      • Weddings Through the Generations
      • “Guess the Baby” Photos
      • Family Vacations Over the Years
      • Generational Portraits (Grandmother, Mother, Daughter)

    Step 2: Scanning the photos for restoration

    Before you can restore anything, you need a good digital copy. This process is often called digitising photographs, and it’s the most crucial step. Getting a clean digital image is essential.

    Here are the two best methods to convert photographs to digital.

    Option A: Using a Scanner to Digitize Photos

    This method generally gives you the highest quality and is the best way to digitize photos if you have access to a scanner.

    • What You Need: A flatbed scanner is ideal. These are often part of an all-in-one home printer.
    • Clean the Scanner Bed: Wipe the glass with a lint-free cloth to avoid dust spots on your scan.
    • Choose Your Settings: You’ll see an option for resolution, measured in DPI (dots per inch).
      • For standard-size photos (4×6, 5×7), use 300 DPI.
      • For very small photos (like old passport-sized portraits), use 600 DPI.
    • Save as a JPEG or PNG: This will create a high-quality file on your computer, ready for the next step.

    This process to scan photos to digital is straightforward and ensures you capture as much detail as possible from the original print.

    Option B: Using Your Phone to Digitize Photos Instantly

    Don’t have a scanner? No problem. Your smartphone is an incredibly powerful tool to digitize photos quickly, especially when you’re gathering pictures from multiple relatives.

    • What You Need: Your smartphone and a good photo scanning app.
      • We recommend Google’s PhotoScan. It’s free and uses a special process to capture glare-free, high-resolution images.
    • Find Good, Even Lighting: Place the photo on a flat surface near a window, but out of direct, harsh sunlight. Avoid using your phone’s flash, as it creates a terrible glare.
    • Follow the App’s Instructions: PhotoScan will guide you to move your phone over the photo to capture it from multiple angles. This is how it removes glare and distortion.

    This is the easiest way to digitize old photos when you’re at a relative’s house and want to quickly capture a treasure from their photo album.

    For an in-depth guide about how to scan photos with mobile you can go through this article written at Wired.com

    Step 3: Restore with BringBack.pro (The Magic Step)

    Now that you have your digital files, it’s time for the fun part.

    Forget spending weeks waiting for a professional or hours struggling with complicated software. We’re going to use an AI tool called BringBack AI because it’s perfect for this exact task.

    Here’s why it’s the best choice for a busy reunion planner:

    • It’s Instant: The entire restoration process takes under 30 seconds per photo. You can prepare an entire slideshow in one afternoon.
    • It’s Affordable: You can restore 5 high-quality photos for just $2.49. This is a tiny investment for a massive impact on your event.
    • It’s Automatic: The AI does all the work. It removes scratches, repairs tears, brightens faded colors, and sharpens blurry faces with a single click.
    • It’s Private and Secure: Your personal family photos are safe. Uploaded files are deleted from their servers within 30 minutes.

    This is the fast and easy part.

    1. Go to the BringBack.pro website.
    2. Upload the scanned photo you want to fix.
    3. Let the AI automatically repair the damage.
    4. In less than 30 seconds, your restored photo is ready.
    5. Download the high-quality, vibrant “After” image.
    Before and after showcase of old damaged and restored photograph of a family
    Before and after showcase of old damaged and restored photograph of a family

    Look at the difference. A faded, scratched photo becomes a clear, engaging portrait ready for display.

    Step 4: How to Display Your Restored Photos at the Reunion

    Now that you have a folder full of beautifully restored images, how will you show them off? Think beyond just taping them to a wall.

    Digital Display Ideas:

    • Create a Rolling Slideshow: This is the easiest and most dynamic option. Use a TV or a projector to have the restored photos cycle throughout the event. You can add names and dates to each photo.
    • Make a Short “Family History” Video: Use a simple video editor to combine the restored photos with music. You can even ask an older relative to narrate a short story to go with it.

    Physical Display Ideas:

    • A “Memory Lane” Clothesline: A very popular and charming idea. String twine between two points and use clothespins to hang the printed restored photos. You can even find LED photo clips for a magical touch.
    • Themed Photo Boards: Get large foam boards and create collages based on your themes (e.g., “The Family Through the Decades”).
    • “Who Am I?” Game Board: Print the restored baby photos, number them, and have family members write down their guesses. It’s a perfect icebreaker.
    • A Photo Gallery Wall: Use frames of the same color or style to create a sophisticated, gallery-style display on a feature wall.

    Take It to the Next Level: Animated Photos

    Want to create a moment at the reunion that no one will ever forget?

    BringBack AI has a feature that adds subtle, lifelike animation to still photos. Imagine your family gathered around the slideshow. A beautiful, restored photo of your great-grandfather appears on screen. And then, he softly blinks and a gentle smile forms on his face.

    It’s a breathtaking way to connect with the past and is guaranteed to be the talk of the reunion. Go and animate old photos now.

    Your Quick Action Plan for Amazing Reunion Photos

    Planning a family reunion is a huge undertaking. Don’t let damaged photos keep you from creating a truly memorable event.

    1. Start Gathering Photos Now: Don’t wait until the last minute.
    2. Digitize Everything: Scan or use a scanning app.
    3. Restore with BringBack.pro: Turn your entire collection of old, damaged photos into a vibrant archive in one afternoon.
    4. Choose Your Display Method: Decide between a slideshow, video, or a creative physical display.

    By investing a tiny amount of time and money, you can create a powerful, emotional centerpiece for your reunion that will have your family talking for years to come.

  • 10 Creative Ways to Use and Preserve Old Family Photographs

    10 Creative Ways to Use and Preserve Old Family Photographs

    You have a box. We all do.

    It’s sitting in a closet or an attic, smelling faintly of dust and time. The faces of people you love, some you’ve never even met, are staring back at you from cracked, faded paper. You feel a deep connection to them, a responsibility to them, but you’re overwhelmed. What do you do with a box of inherited old photos?

    So you close the lid. The memories stay trapped. The stories stay untold.

    You tell yourself that you’ll deal with it “one day.” But you know the truth. You’re in a race against time. Every year, the photos fade a little more, the stains get a little deeper, and the memories get a little harder to reach.

    This article is your roadmap. It’s your plan to stop being a “keeper of the box” and start being a “teller of the stories.” We’re going to show you how to unlock those trapped memories and turn them into active, living parts of your family’s life, starting with one essential step.

    The Essential First Step: Digitizing and Restoring Your Family Archive

    Before you can create a beautiful gift or a stunning gallery wall, you need clean, high-quality digital copies of your photos. This is the foundation for everything. Digitizing your family photo albums is the single best way to preserve your old family photographs, protecting them forever from fire, floods, and the simple decay of time.

    This used to be a massive hurdle. You’d find a precious photo, but it was ripped, faded, or covered in scratches. The memory was there, but it was damaged.

    This is where AI changes the game.

    Modern AI tools are the bridge from your physical past to your digital future. They can repair damage and restore life to these fragile images with stunning accuracy.

    If your photos have physical damage, our guide on How AI Can Fix Tears, Scratches, and Water Damage is the perfect place to start.

    Once you have your clean, restored digital files from a tool like BringBack.pro, the real fun begins. You’re no longer just saving your photos; you’re ready to live them.

    Creative Gift Ideas for Family History Lovers

    A restored photo is a powerful starting point. But when you combine it with modern tools, you can create truly unforgettable gifts that will be cherished for generations. Here are four practical, high-impact ideas, complete with the tools you need to make them happen.

    1. The “Then and Now” Diptych

    The Idea: Create a framed piece that places a restored photo of an ancestor next to a modern photo of a family member recreating the exact same pose. It’s a powerful visual that collapses time.

    A brown-framed diptych displaying the 'Then and Now' concept. The left panel is a vintage sepia photo of a man in 1952 leaning on an old car. The right panel is a modern color photo of a younger man in 2025 in the same pose leaning on a modern car
    A brown-framed diptych displaying the ‘Then and Now’ concept
    • What You’ll Need:
      1. Your restored photo from BringBack.pro.
      2. A smartphone camera.
      3. A free design tool like Canva.
    • How to Do It (The Workflow):
      1. Analyze the Pose: Study your restored photo. Is your grandfather leaning against a classic car? Is your mother reading in a specific chair? Pay attention to the posture, the lighting, and the background.
      2. Recreate the Shot: Get your son, niece, or even yourself to recreate the pose as closely as possible. The contrast between the vintage setting and the modern one is what makes it magical.
      3. Combine in Canva: Use Canva’s free “Grid” or “Frame” feature. Create a two-panel layout. Drop your restored vintage photo in one side and your new photo in the other. Add a simple text caption below with the names and years, like “John Miller, 1952” and “Leo Miller, 2024.”
      4. Print & Frame: Download the final image as a high-quality PDF and get it printed. This becomes a stunning piece of art that tells an instant story.

    2. The Animated Family Story Video

    The Idea: Go beyond static images. Use the animation feature on your restored photos to create a short, deeply emotional video for a family reunion, anniversary, or milestone birthday.

    • What You’ll Need:
      1. Several restored and animated photos from BringBack.pro.
      2. A simple video editing tool like CapCut (mobile) or Clipchamp (web/Windows), which are both free.
    • How to Do It (The Workflow):
      1. Generate the Clips: In BringBack.pro, use the animation feature on 5-10 of your best-restored portraits. Download each short video clip.
      2. Arrange the Story: Import the clips into CapCut or Clipchamp. Arrange them in chronological order to tell a story of your family’s journey.
      3. Add Music & Text: Add a gentle, royalty-free instrumental track in the background. Use the text tool to add simple captions identifying each person and the year.
      4. Share Emotionally: This video will be the highlight of any family gathering. It’s not just a slideshow; it’s a living tribute.

    3. The “Ancestor Story” Photo Book

    The Idea: Create a professional-quality, hardcover photo book that combines your restored photos with the stories that give them meaning. This is the ultimate family heirloom.

    professionally printed Ancestor Story Photo Book that pairs beautifully restored photos
    • What You’ll Need:
      1. Your collection of restored photos from BringBack AI.
      2. A print-on-demand photo book service like Mixbook or Shutterfly.
    • How to Do It (The Workflow):
      1. Gather the Stories: This is the most important part. For each photo, write a short paragraph. It could be a famous family story, a key life date, or a simple quote. Ask relatives for help—this process of gathering stories is a gift in itself.
      2. Choose a Simple Template: On Mixbook or your chosen service, pick a clean, minimalist template. You want the photos and stories to be the heroes, not a busy design.
      3. Design Each Page: Typically, you’ll place a large, beautifully restored photo on one page and the corresponding text on the facing page. It’s a classic, elegant layout.
      4. Proofread and Print: Double-check all names and dates. Then, order the book. When you hold it in your hands, you’ll realize you didn’t just make a book; you created a physical archive of your family’s legacy.

    4. The Interactive Ancestor Calendar

    The Idea: A family calendar where each month features a restored ancestor, but with a modern tech twist that links to more information.

    modern wall calendar for July 2025, featuring a restored colorized vintage photo of 'Eleanor Vance, b. 1898'. A hand holds a smartphone scanning a QR code on the calendar, which displays a digital folder of ancestor information
    close-up of a wall calendar page featuring a restored ancestor’s photo and a QR code
    • What You’ll Need:
      1. 12 restored and colorized photos from BringBack.pro.
      2. A calendar design tool (Canva is perfect for this).
      3. A free QR code generator (like Canva’s built-in one).
    • How to Do It (The Workflow):
      1. Assign Each Month: Choose an ancestor for each month, ideally one with a birthday or anniversary in that month.
      2. Create a Digital Hub: For each of the 12 ancestors, create a simple shared folder in Google Drive or a page in Notion. Add more photos, stories, and key facts about that person. This is your “digital deep dive.”
      3. Design the Calendar: In Canva, use a calendar template. For each month, feature the large, restored photo. Mark important family birthdays and anniversaries.
      4. Add the Interactive Link: For each month’s page, generate a QR code that links to that ancestor’s specific Google Drive folder or Notion page. Place it subtly in the corner of the calendar page. Now, your calendar is not just a schedule; it’s a gateway to 12 different family stories.

    Telling Family Stories Through Pictures: Displaying Your Restored Photos

    Your memories don’t deserve to live on a hard drive. Here’s how to bring them into your daily life.

    5. The “Ancestor Wall”

    Dedicate a wall in your home to your family’s history. Get high-quality prints of your best-restored photos—especially the newly colorized black and white ones—and create a stunning gallery wall. It’s a bold statement that you are proud of where you come from.

    6. The Digital Photo Frame Slideshow

    A digital photo frame is the modern equivalent of a family album. Load it with hundreds of your restored photos. It’s a beautiful, passive way to surround yourself with your family’s journey, turning a corner of your home into a living, ever-changing museum.

    7. The Blog or Social Media Series

    Start a personal project by posting one restored photo a week with the hashtag #AncestorStory. Sharing the image and a small piece of their story is a fantastic way of telling family stories through pictures with a wider audience, connecting with cousins you may have never met.

    Passing It On: Archiving Your Digital Legacy

    You’ve done the work. Now, make sure it’s never lost again.

    8. The Cloud Archive

    Create a shared family cloud folder on a service like Google Drive or Dropbox. Invite all your relatives to view, download, and contribute their own photos. This becomes the central, protected hub for your family’s entire visual history.

    9. The Physical Backup (The “Legacy Drive”)

    Don’t rely on the cloud alone. Purchase a dedicated USB drive, load it with all the high-resolution restored photos, and give it as a physical gift to your siblings or children. This ensures your archive has multiple copies in multiple households.

    10. The QR Code Link

    This is a brilliant final touch. On the back of any new framed prints you create, add a small sticker with a QR code. When a family member scans it, it links them directly to the shared cloud folder with more photos and stories about that person. It turns every picture frame into a gateway to your entire family history.

    A restored photo isn’t the end of the process; it’s the beginning of a new story. You’re not just a keeper of old things; you are a family historian, a storyteller, and the crucial link between your past and your future.

    Your family’s story is waiting to be told. Start by bringing one photo back to life with BringBack.pro, and see where the journey takes you.